
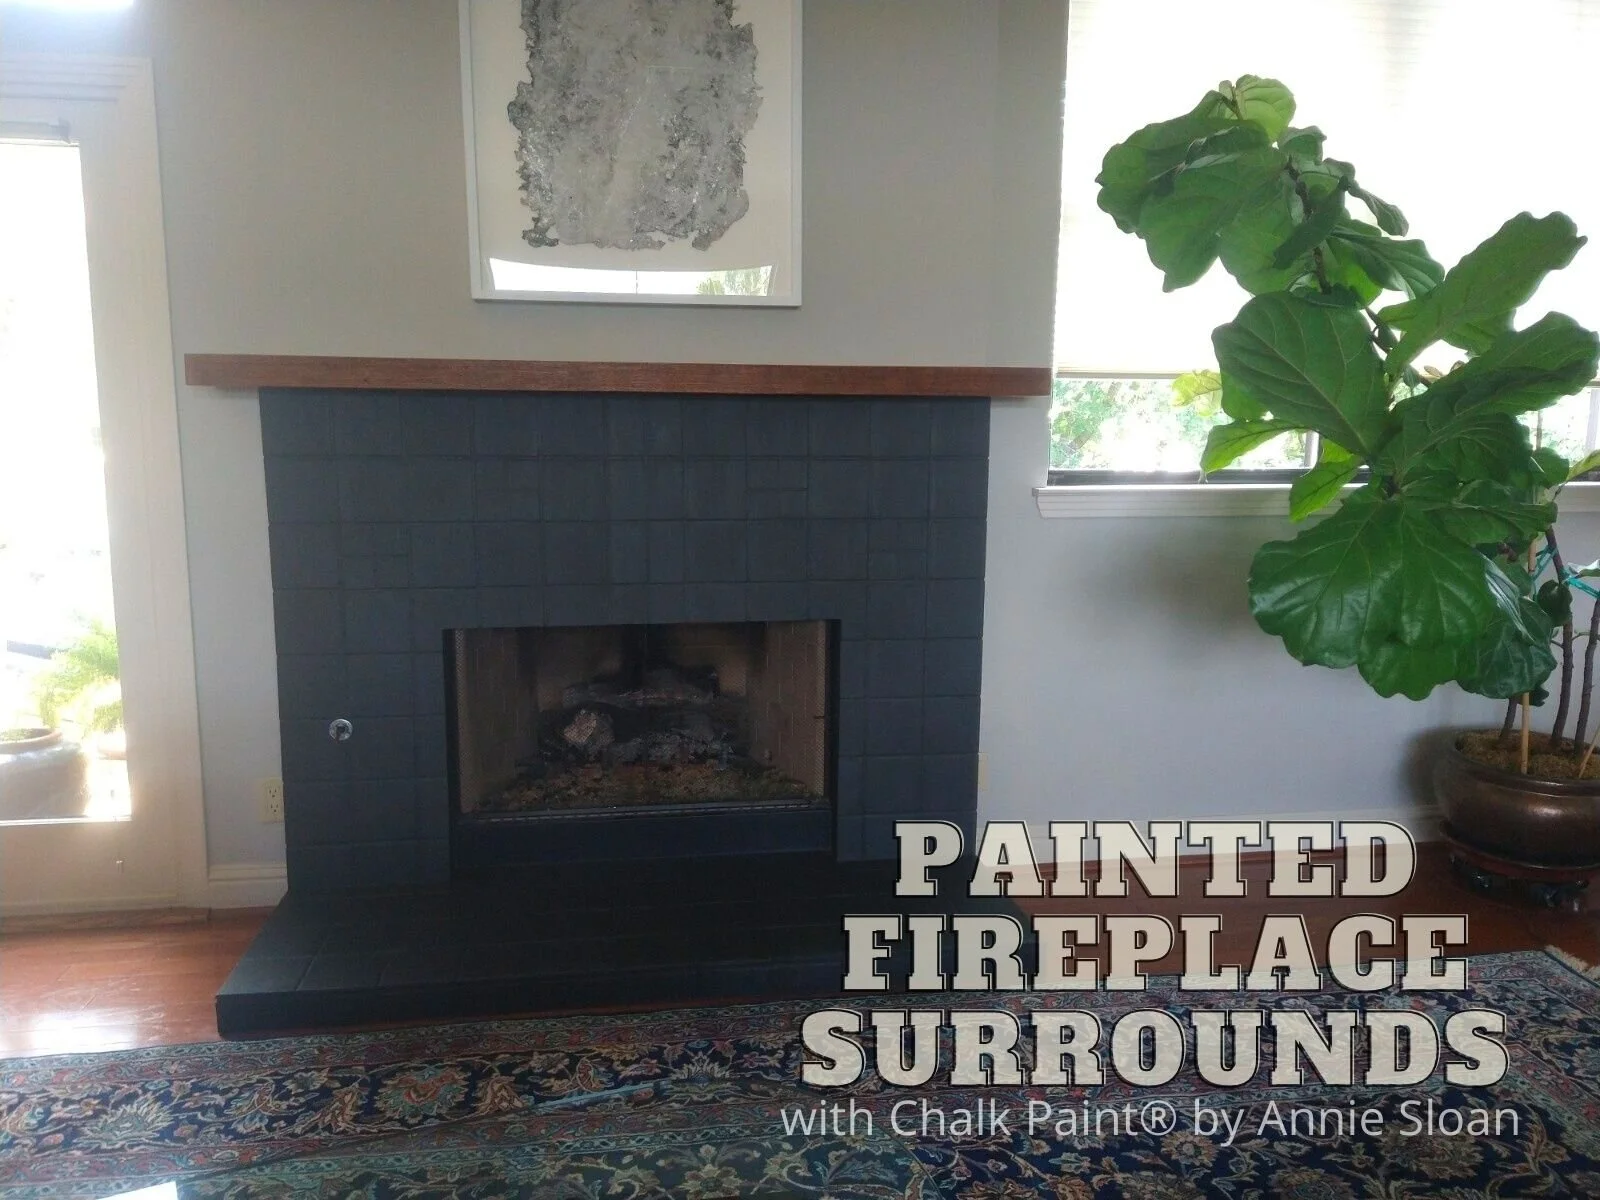
Home Improvement Project Idea: Painted Fireplace Surrounds with Chalk Paint® by Annie Sloan
Stuck at home like all of us? Painted fireplace surrounds can immensely change a room’s look and be knocked out in a weekend or less…
Hey there, 2020 sure has been a wild ride, and we’re here with our first blog post of the year. Good gosh. Like many of you, we have been spending increasing amounts of time at home and assessing every nook and cranny for ‘improvements’ to pass time and stay in our own space. Sometimes these improvements are purely based off changing style preferences, and sometimes are crucial to the overall state of certain rooms and structures.
One such project is changing up fireplace surrounds and mantles! Whether wood, tiled, or stone, they can be painted to varying degrees and styles. That’s great news because here in Texas, some of our stone fireplace surrounds are looking seriously dated. Instead of ripping out the old tile or stone, painting them up can be done in a weekend (or even shorter)! Here are two easy-to-knock-out painted fireplace surround ideas:
Complete Overpaint (Solid/Opaque Coverage, Over Tile and Possibly Even the Grout; Works Well on All Surfaces)- Chalk Paint® will cover both porous and slick-glazed tile, and certainly the grout as well (if it’s the wrong color, if it’s dirty, if you want complete-coverage and a knocked-back look). To paint, clean the tile first with a gentle eco-friendly degreaser (like Krud Kutter), nothing sudsy, rinse, and let dry; for porous tile, you may want to add 5-10% water to the paint to make it soak in very well, and for slick-glazed tile you may want to wait an extra long drying period between paint coats to prevent ‘double processing’ the paint (instead of a couple hours, wait several hours or even overnight between coats to allow an extra great bond to the tile). Apply as many paint coats as you’d like for desired coverage. You can certainly seal the paint, and Soft Wax often works best, just make sure that the surround doesn’t get too hot if a fire is lit!
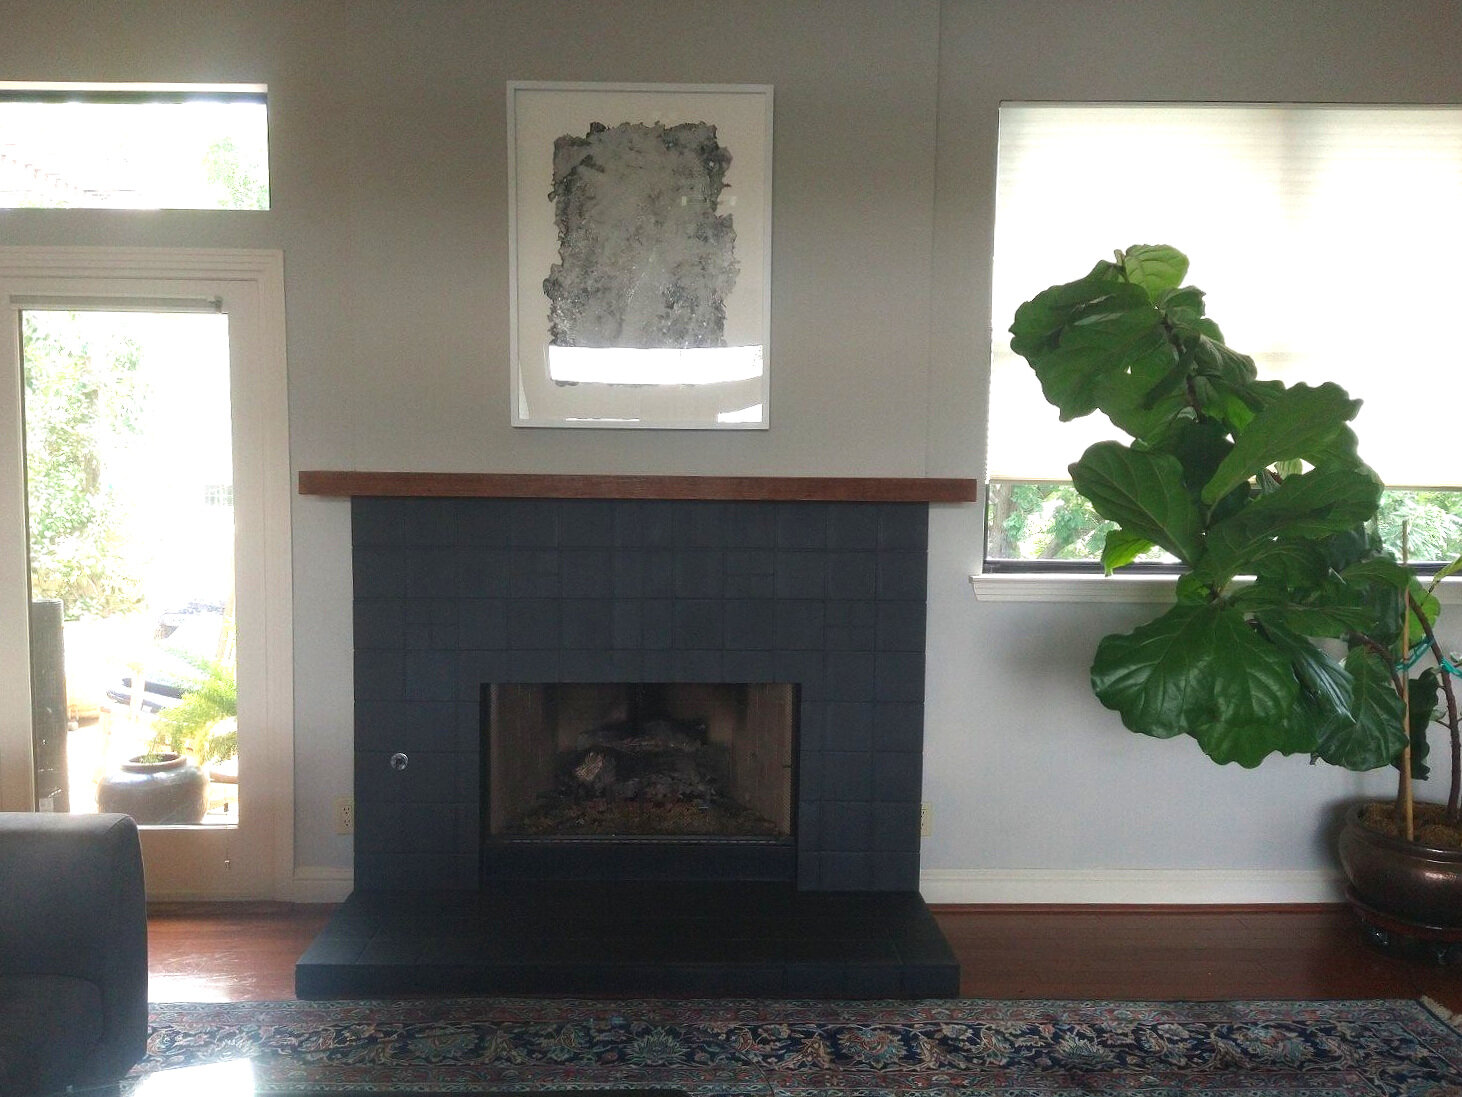
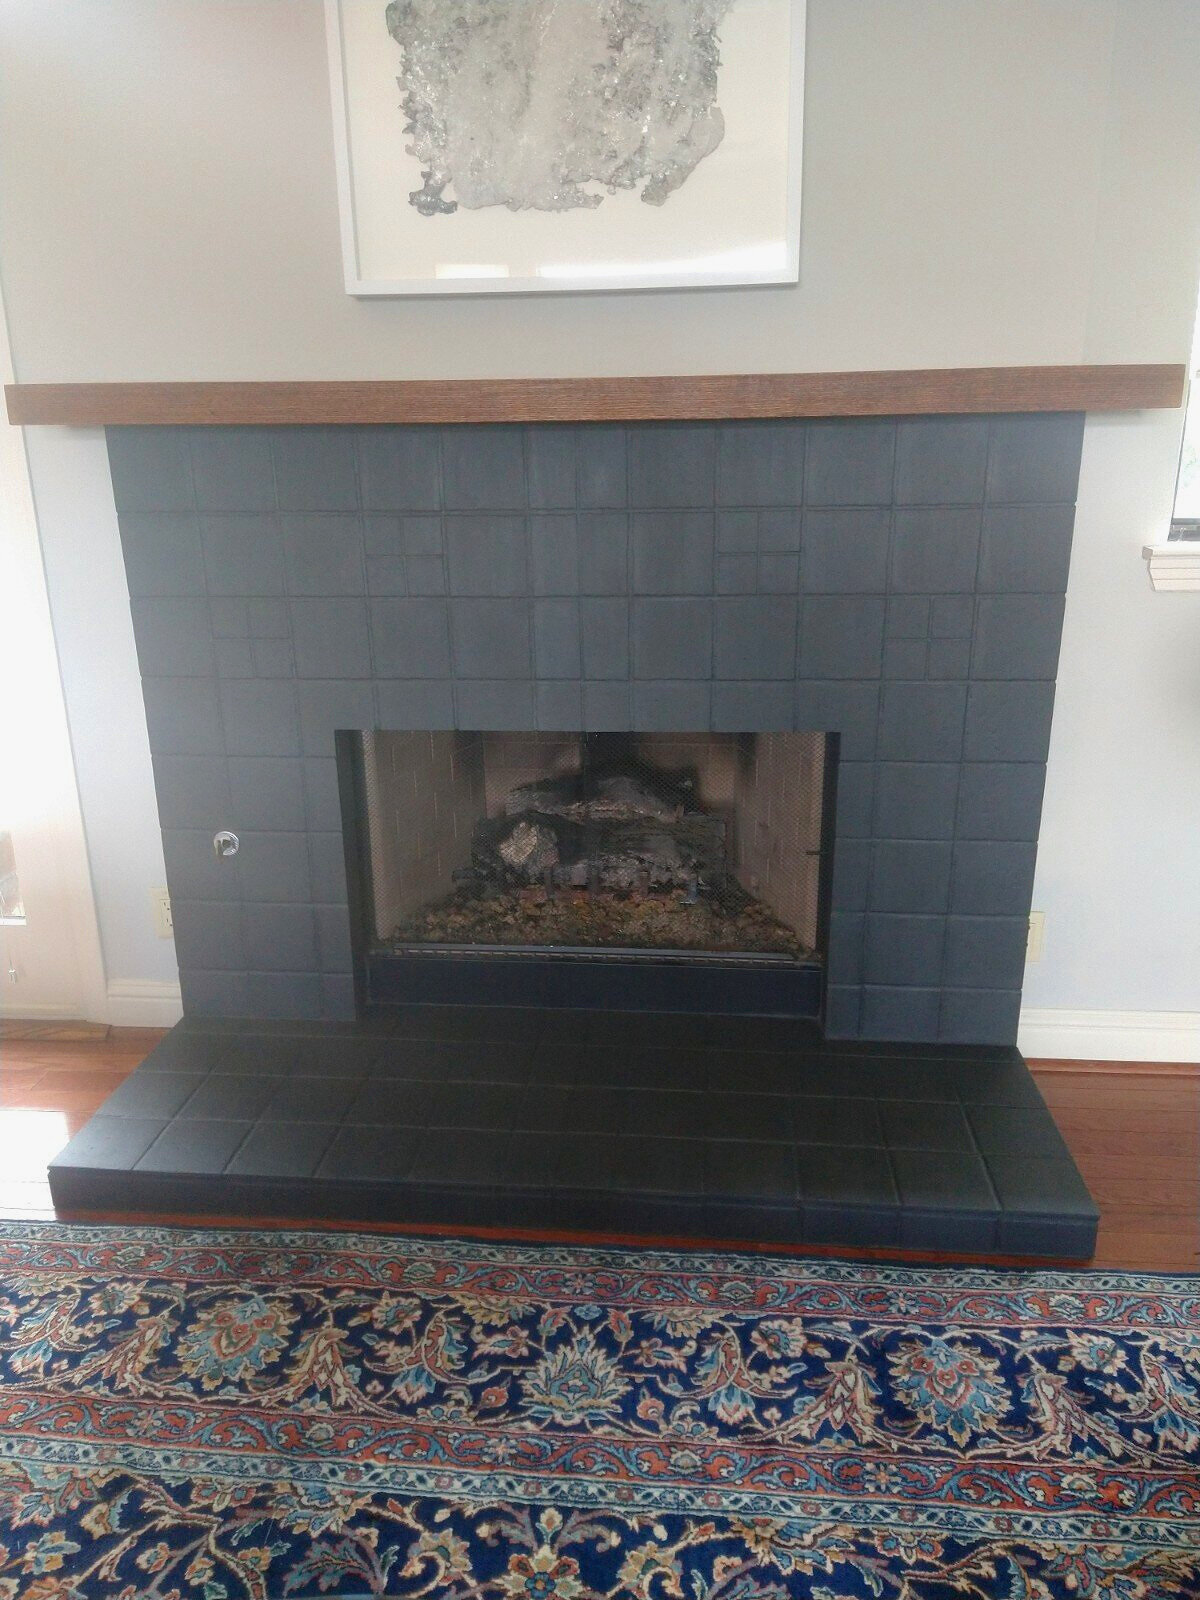
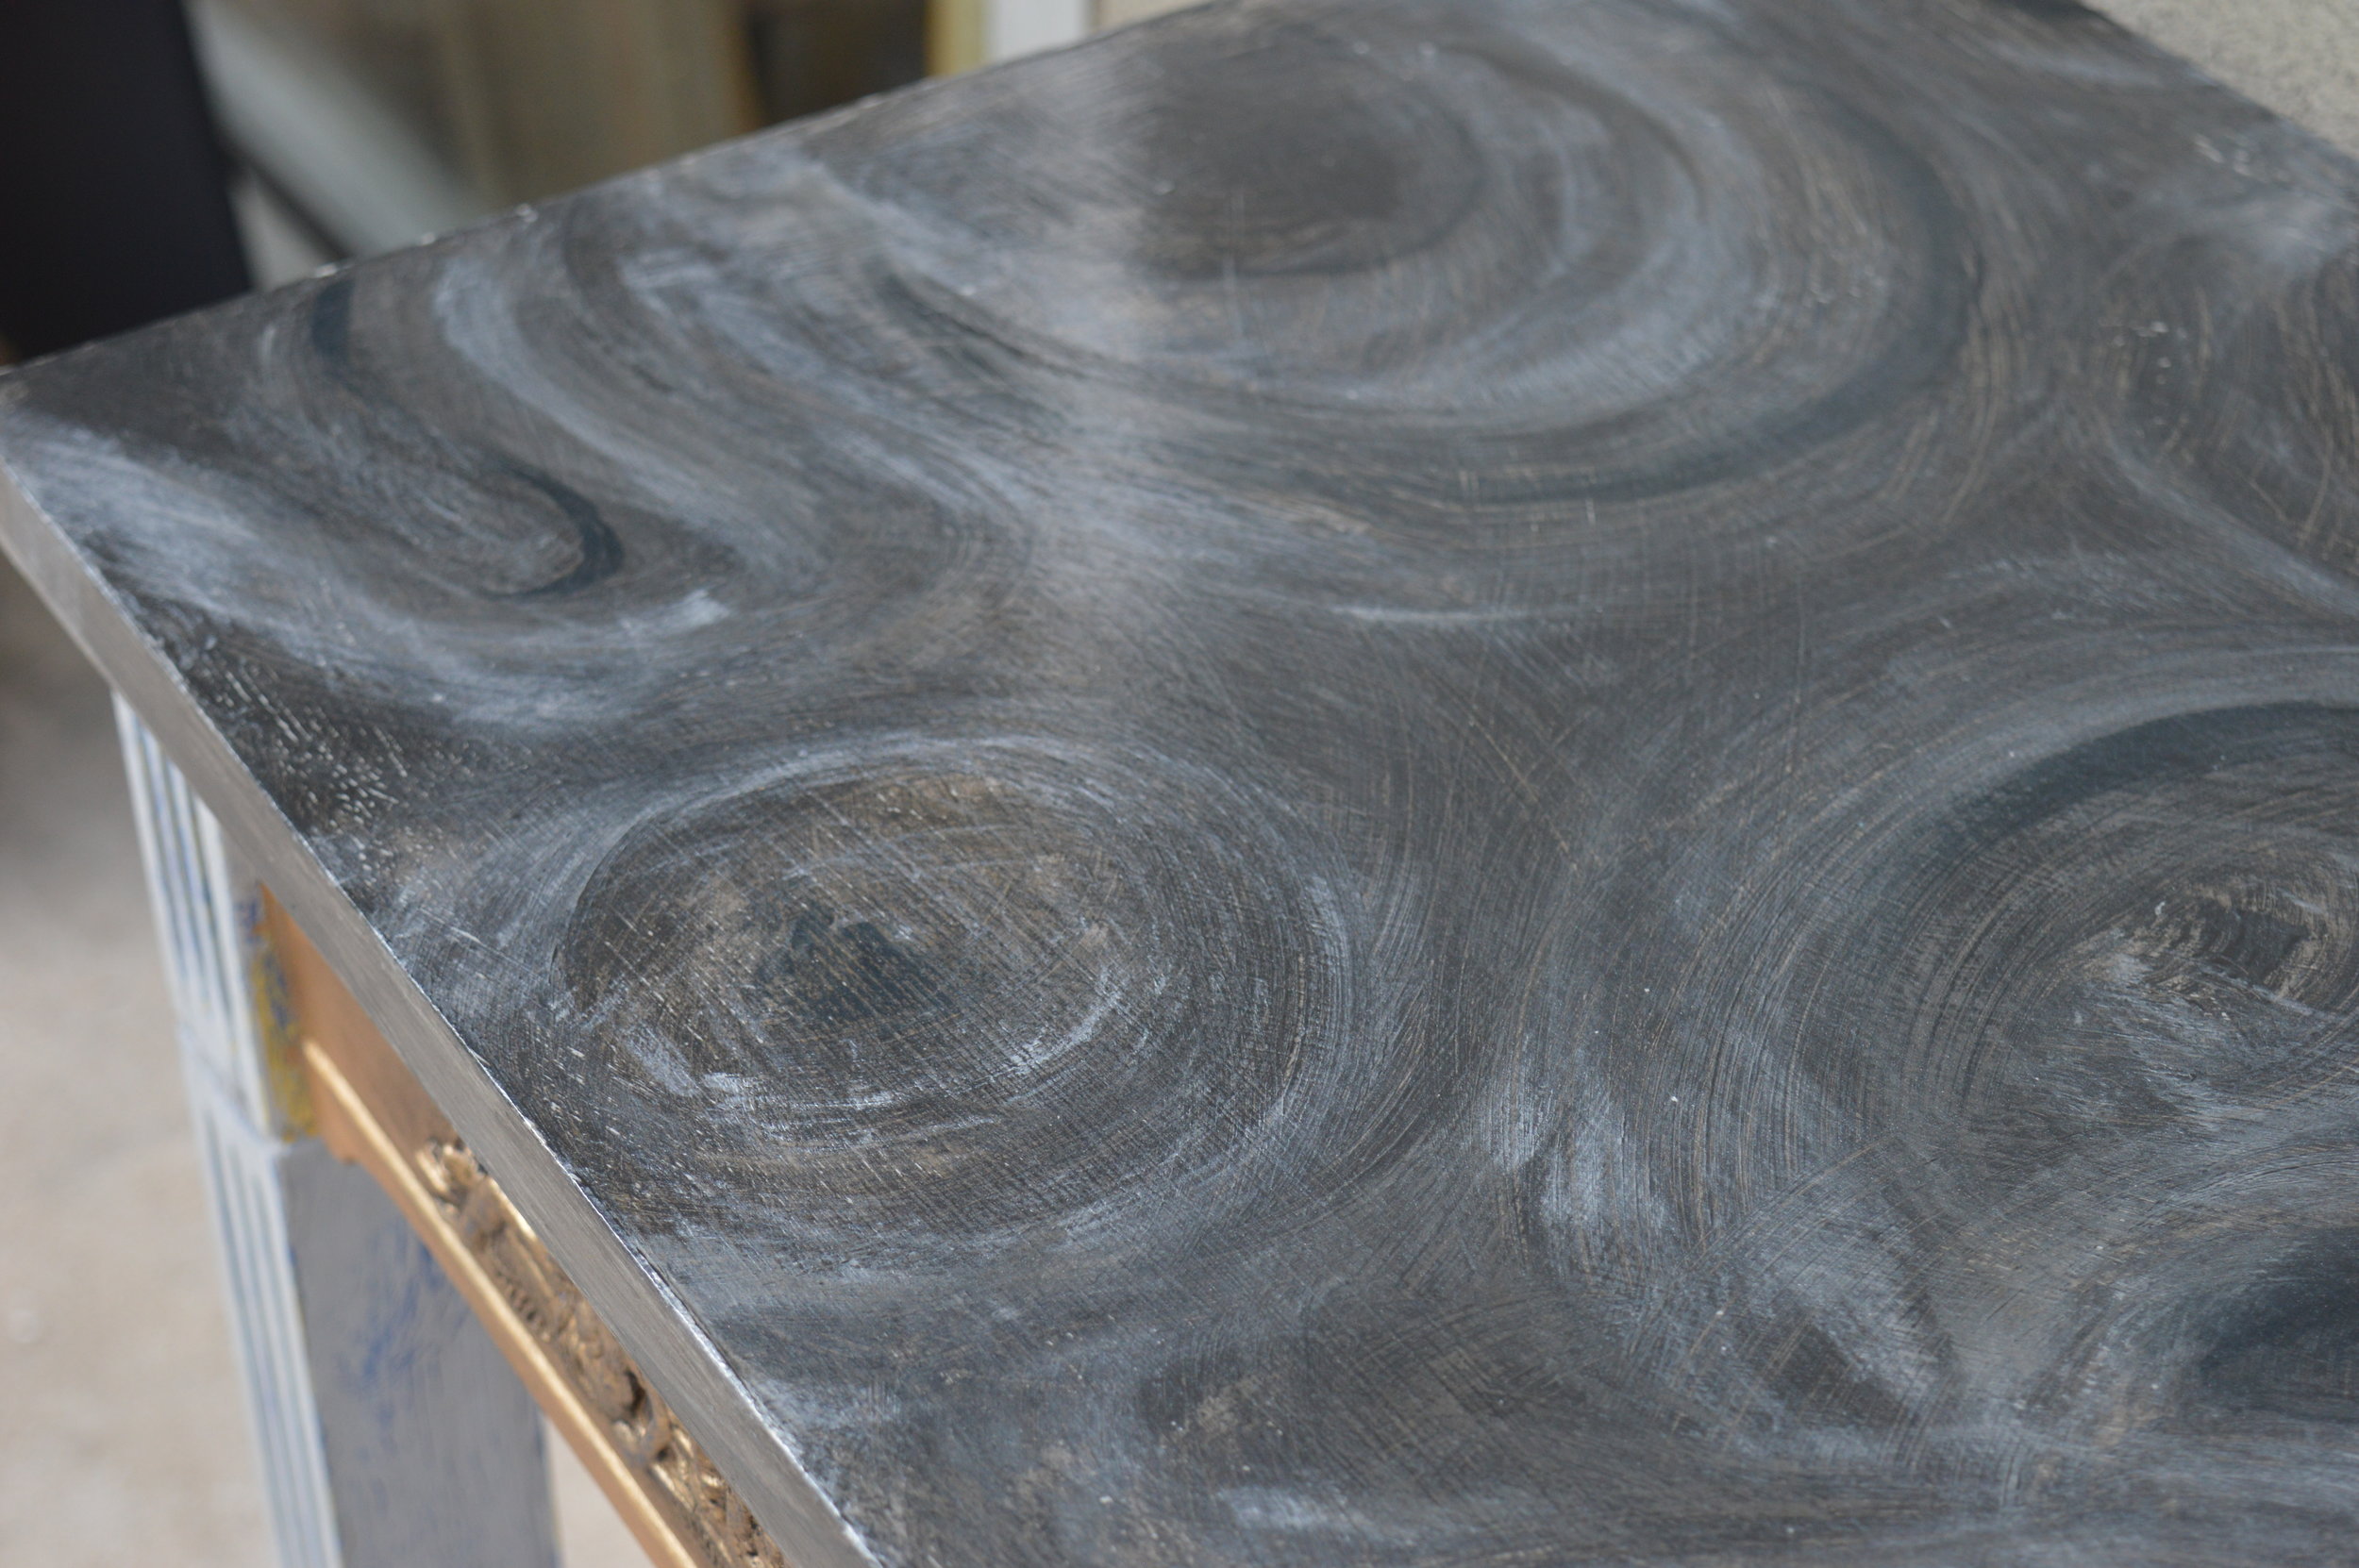
Project featured from a Silk and Sage custom-work client, done with Chalk Paint® in Graphite with solid coverage, followed by Clear Wax
Washed Effect (Transparent Paint Coverage/ Showing Some of the Base Material and Color Through the Paint; Works Best on Porous Materials Like Unsealed Tile and Stone, and Dry/Raw/Worn Woods)- To create this effect, choose your Chalk Paint® color (white and grey washes are extremely popular these days due to being so neutral BUT you can do color washes too!) and dilute the paint with water between 50%-80% water (depending on how transparent you want the paint layer to be), and mix paint and water up together very well. Make sure your surface is either degreased or at least make sure none of the stone or tile is crumbling or degrading, brushing off dust and soot. Apply your paint wash with a good natural brush, working in sections. If you want to remove some paint from certain areas and reveal some of the underlying texture and colors, wipe some paint wash away with a lint-free cloth. If wiping away, a great tip is to keep a spray water bottle handy nearby and spritz the washed areas before wiping them, especially if the wash is absorbing and drying into the surface quickly. Add more layers once dried if you like! And again, you may certainly seal the surface when done.

Project shared with Silk and Sage courtesy of customer, J.M., done with Chalk Paint® in French Linen as a more solid base coat followed by a wash with Old White
We love these looks and hope you do too! We are constantly asked about such projects year-round, and always receive lovely status updates on how everything has turned out and lasted over the years. Another way to incorporate this look into other spaces of your home would be on tiled or stone backsplashes too (not inside a shower or constant wet spaces however). If you try this type of project then drop us a line and let us know how it’s turned out! Continue to shop with us using our no to low-contact options to maintain our health during these times.
Happy painting, stay safe and well, xoxo

How to Apply Efex Flexible Mouldings to Furniture (To Be Painted Over)
How to apply Efex Flexible Moldings to Furniture, title says it all!

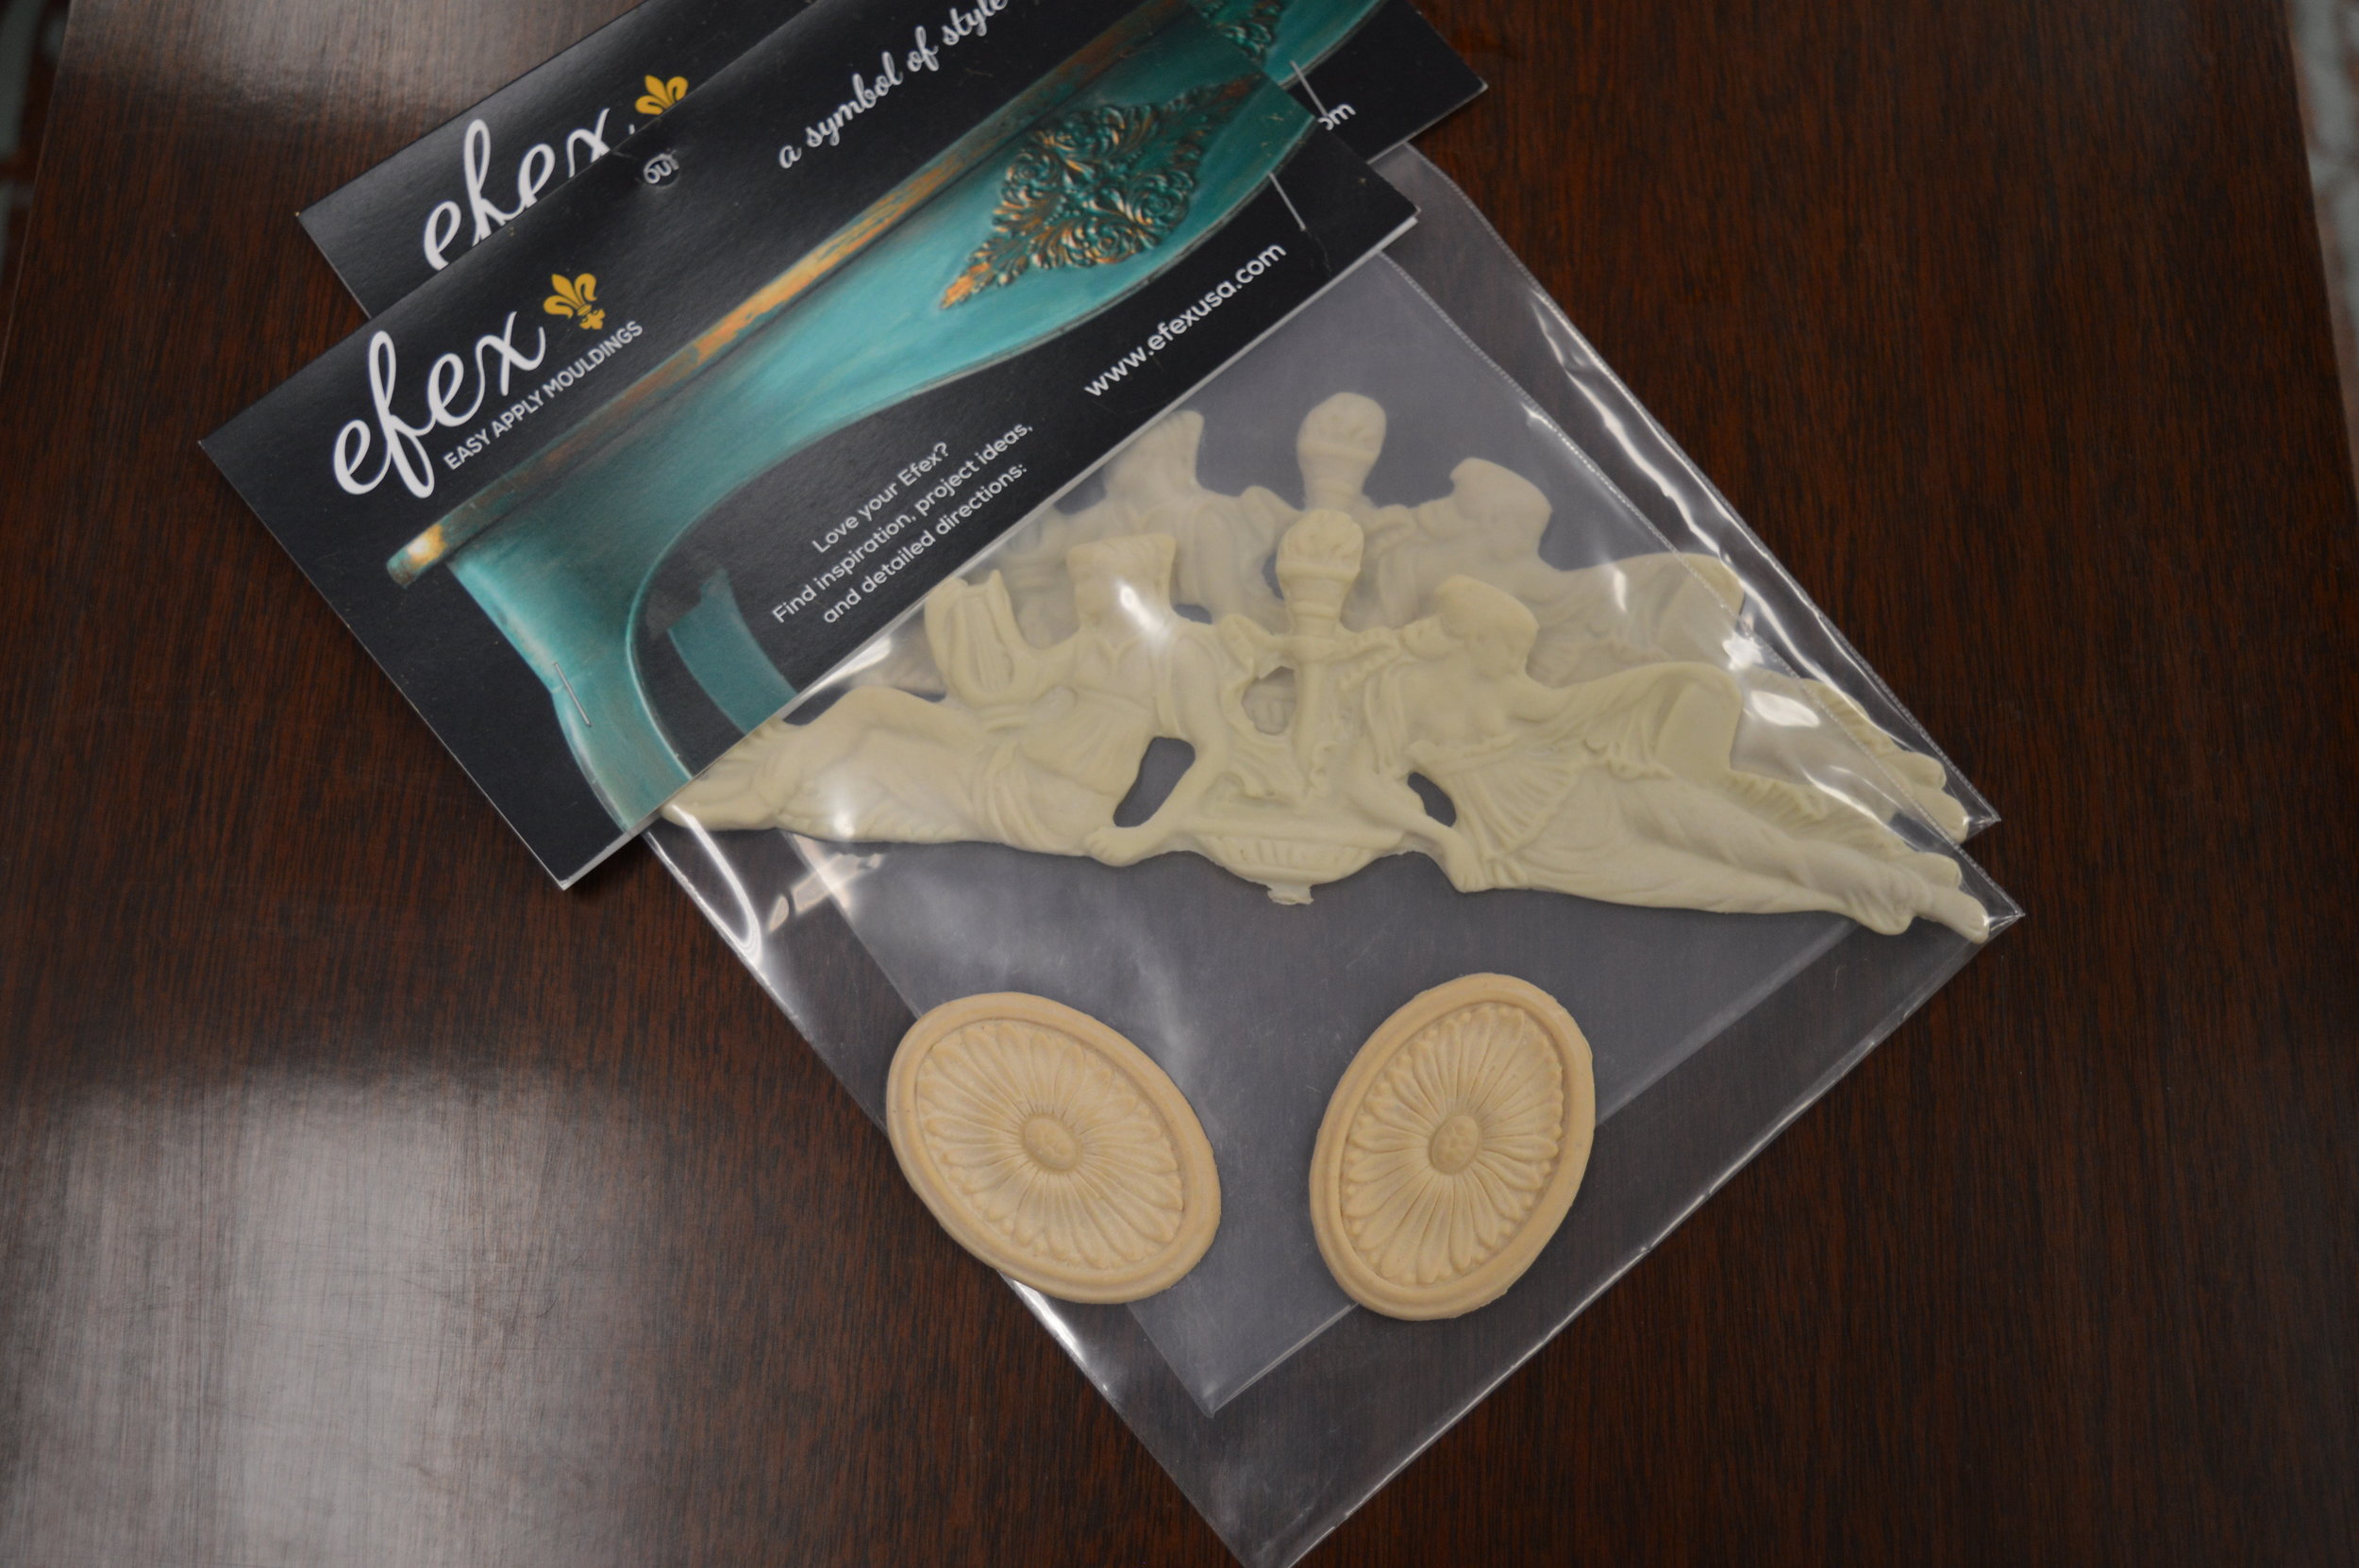
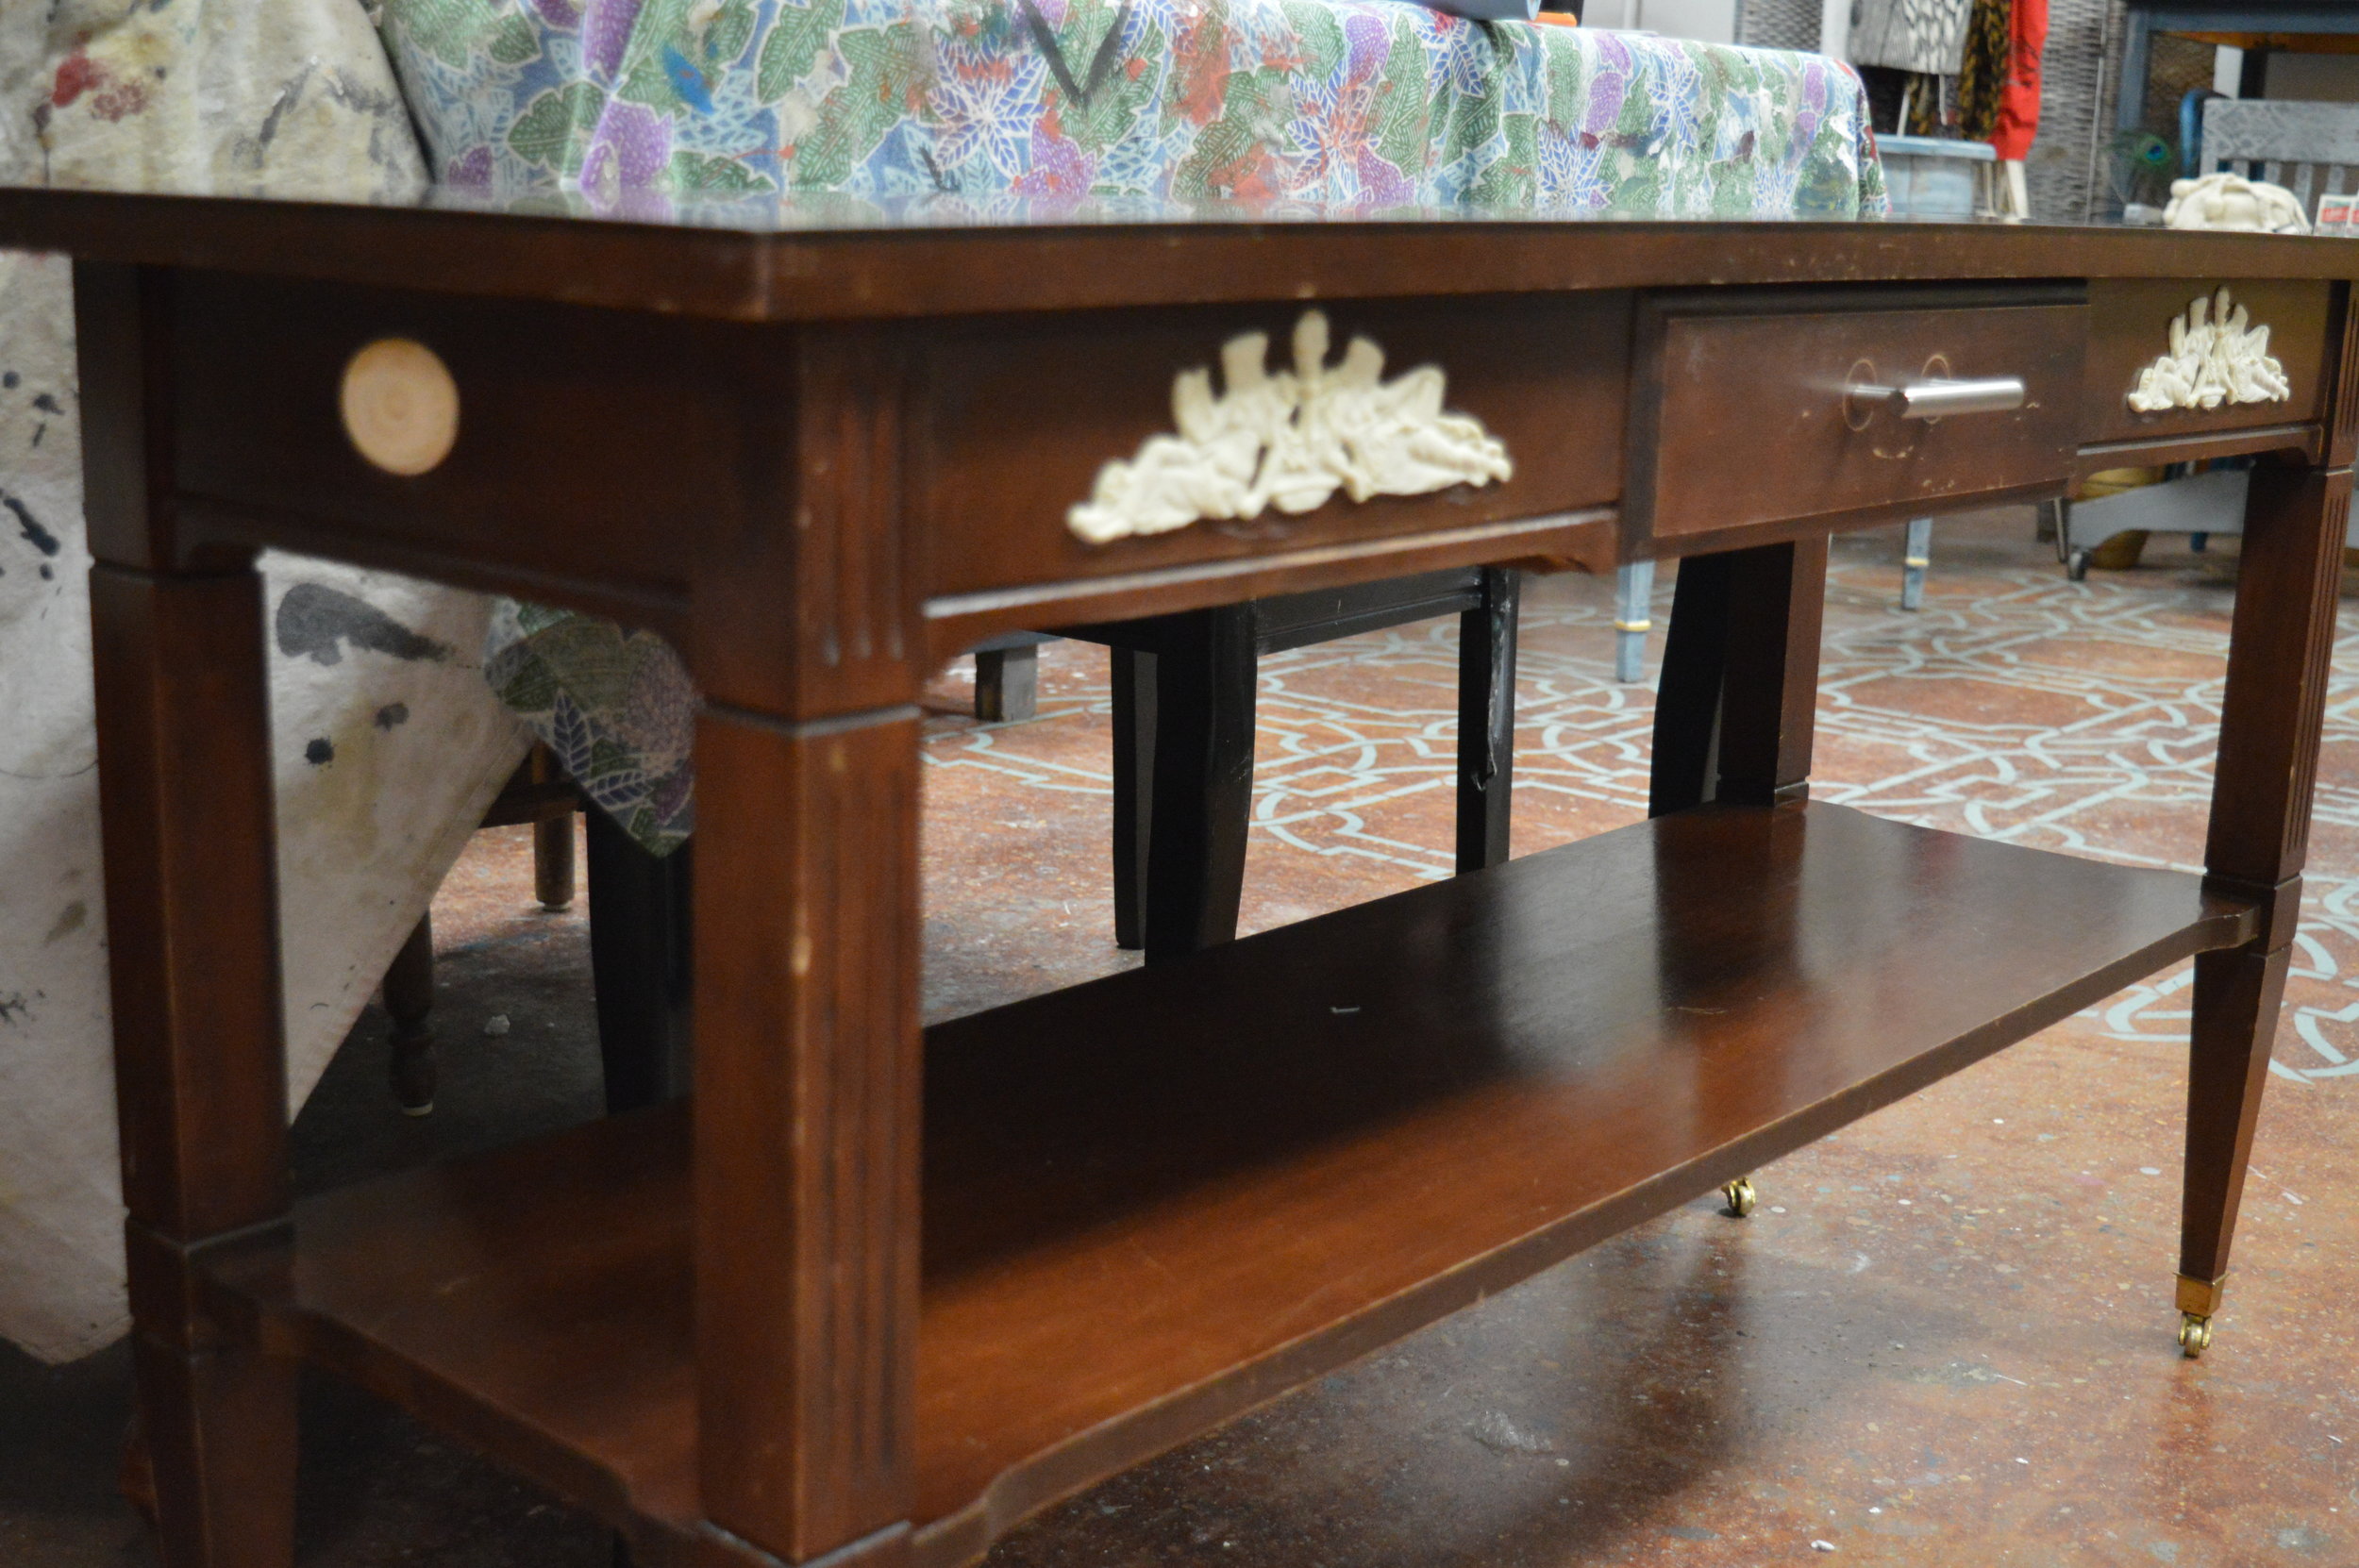
In the last couple of months you might know that we started to carry Efex Flexible Mouldings, which are downright ahh-mazing. They’re flexible, lightweight silicone mouldings that can be applied to furniture, decor, walls and architectural accents, and much more I’m sure. There aren’t many tutorials that we could find out there, so here we are, with great tips composed with a complete transformation of a furniture piece alongside!
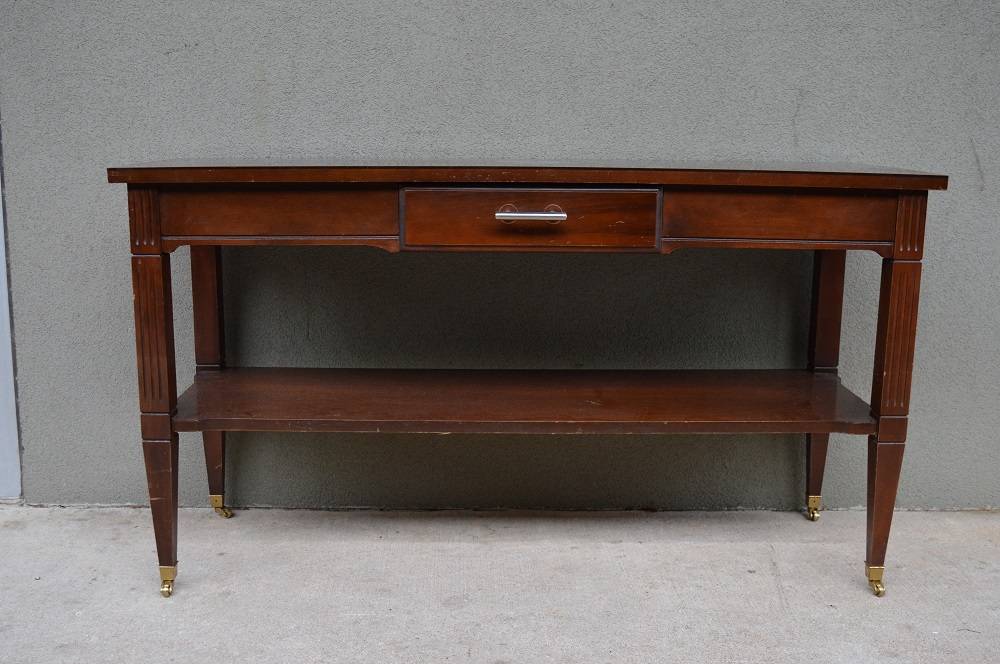
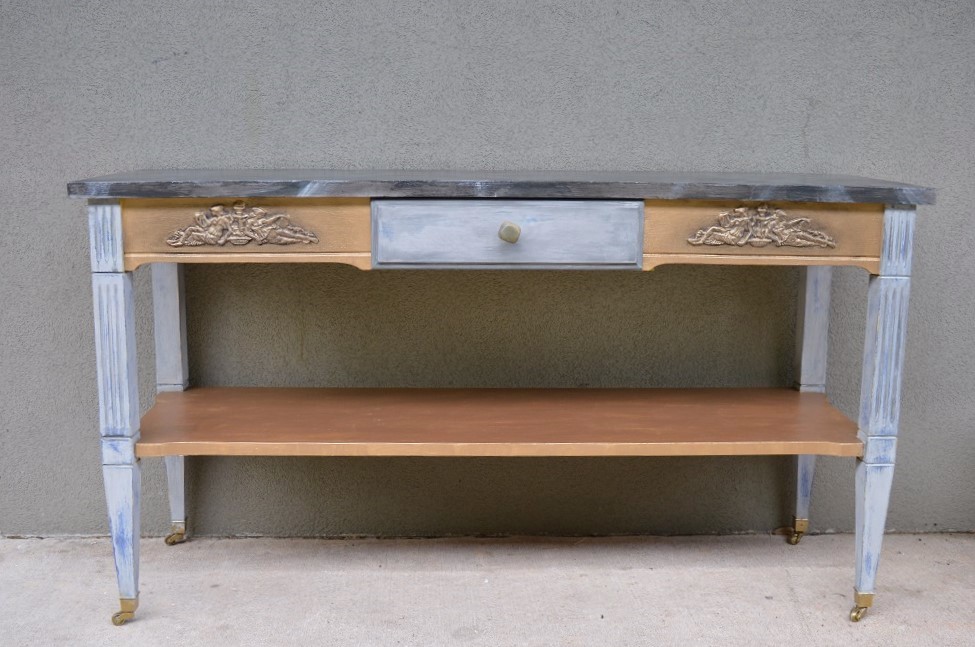
We started off with a quite traditional, rather boring piece:

Our idea was to play off the existing design and go in a more neoclassical direction. Now, here are the steps we took to apply Efex:
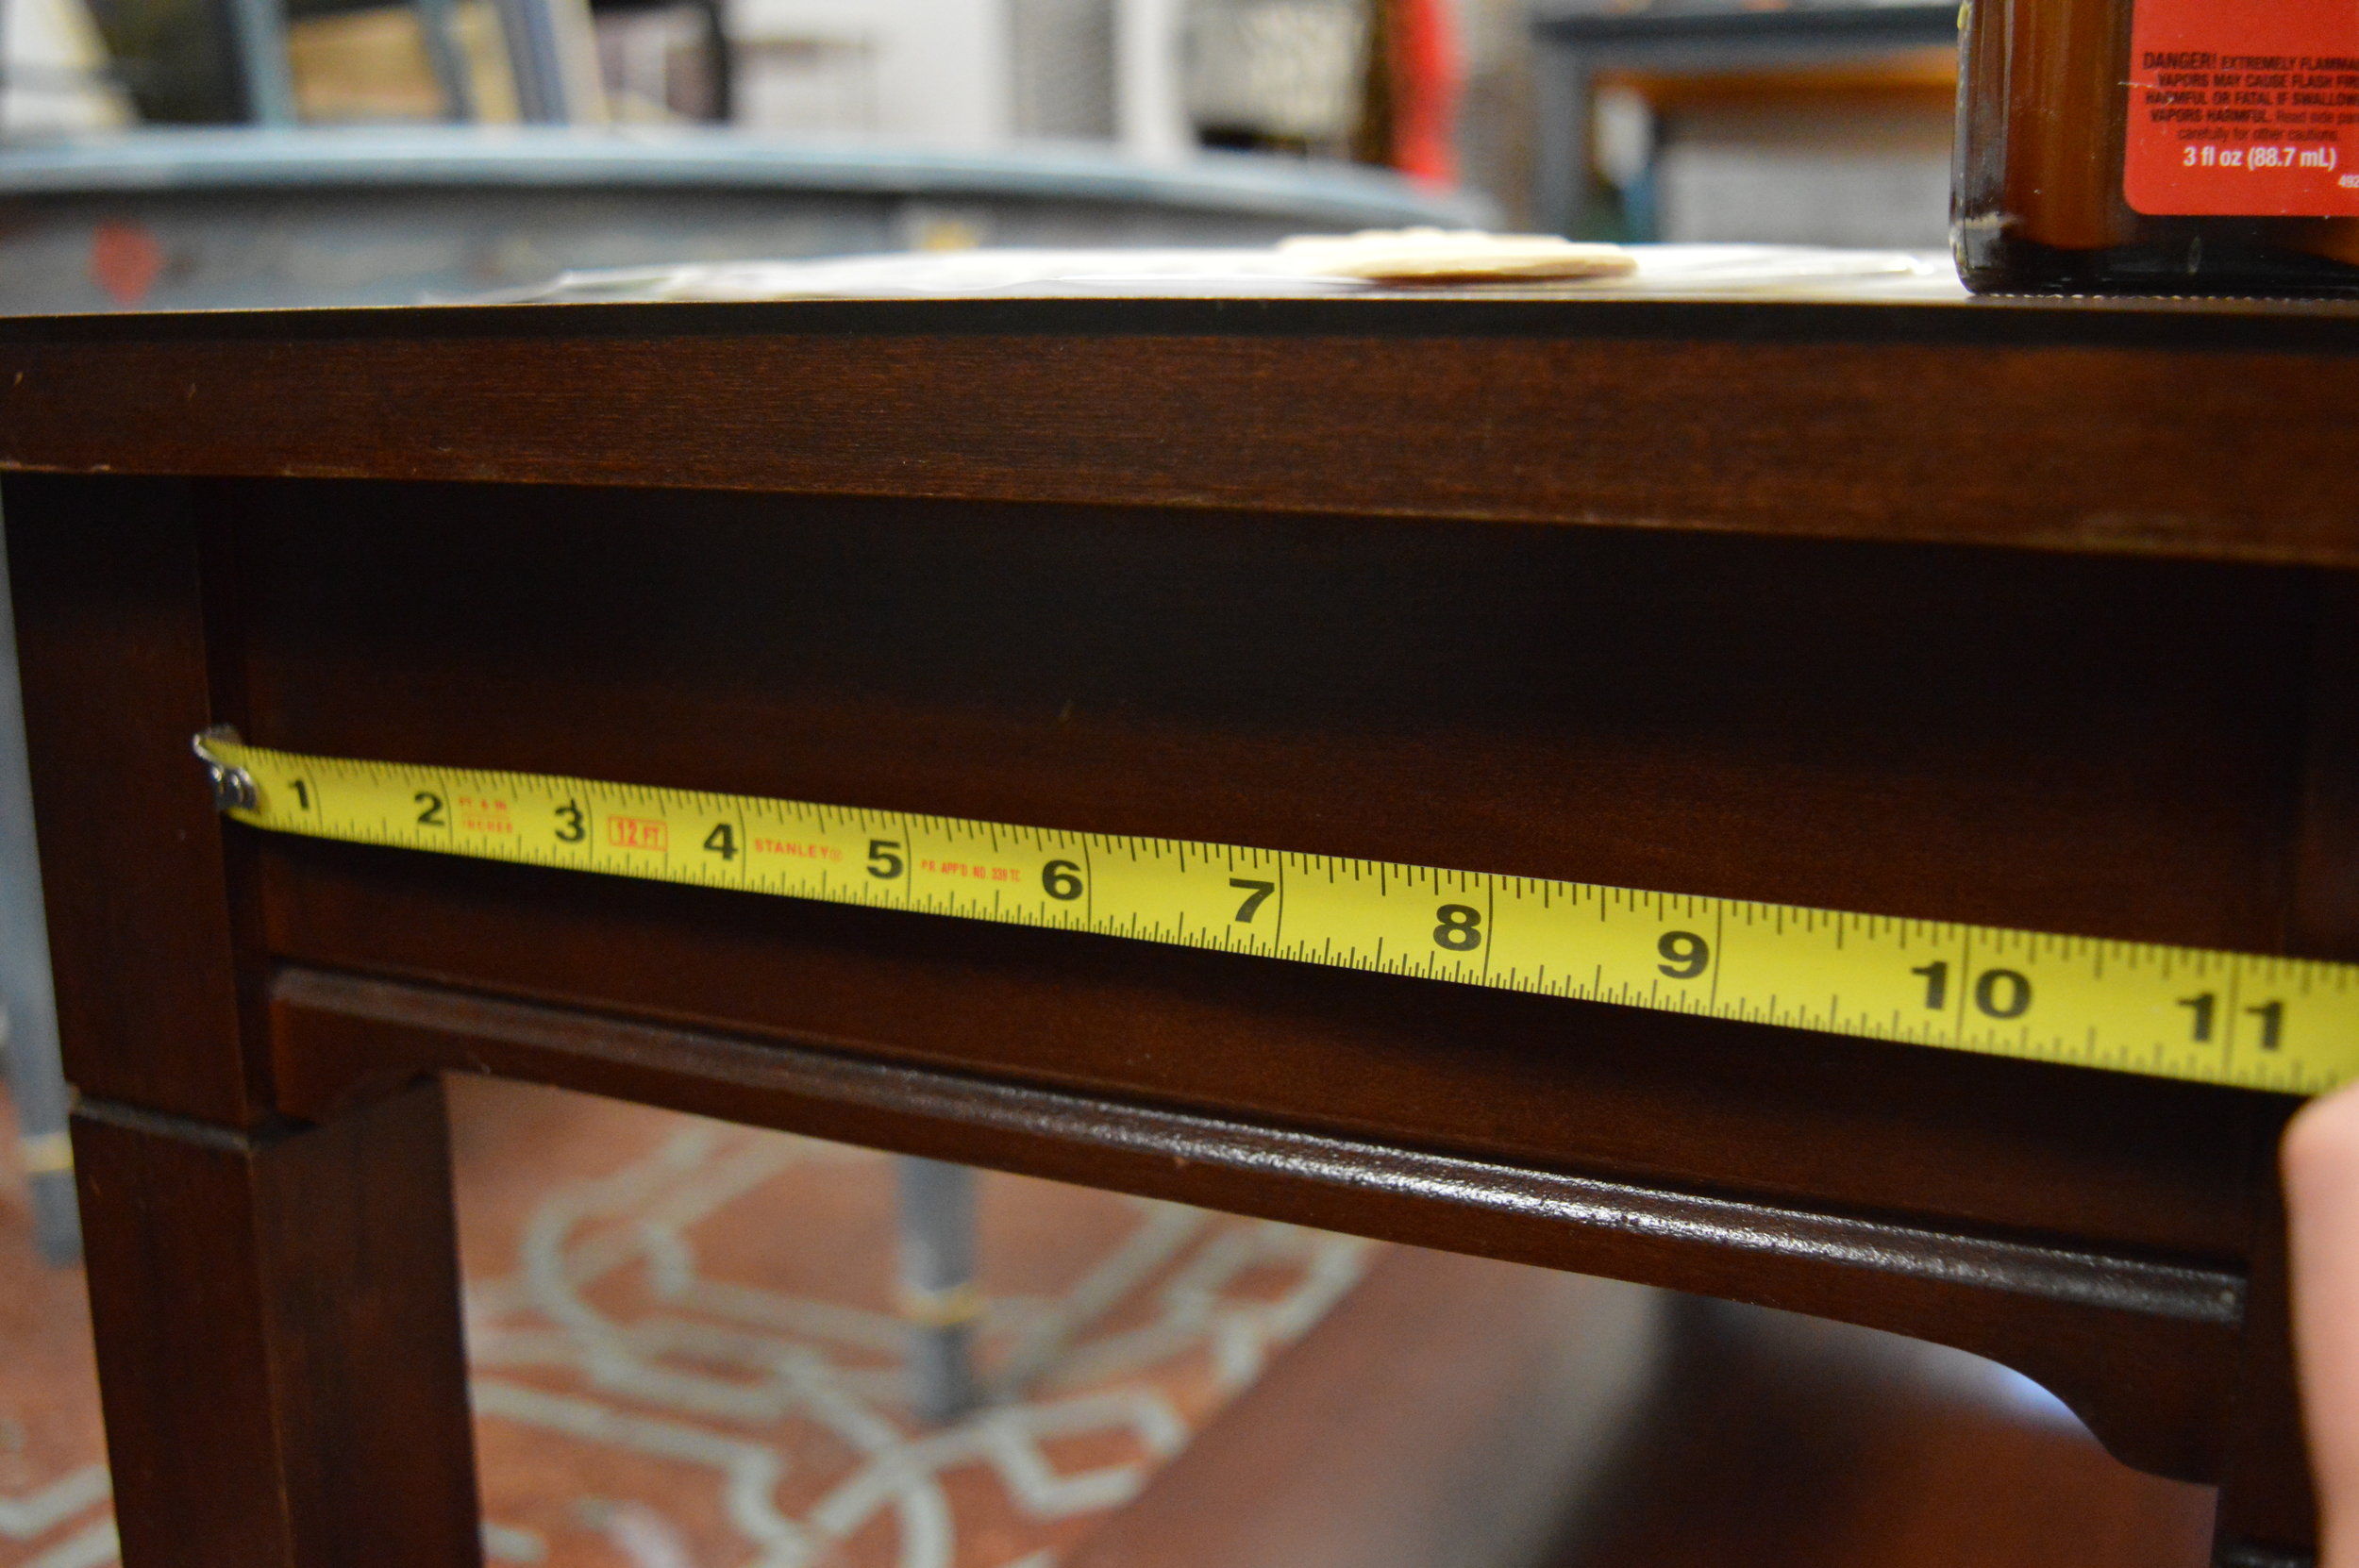
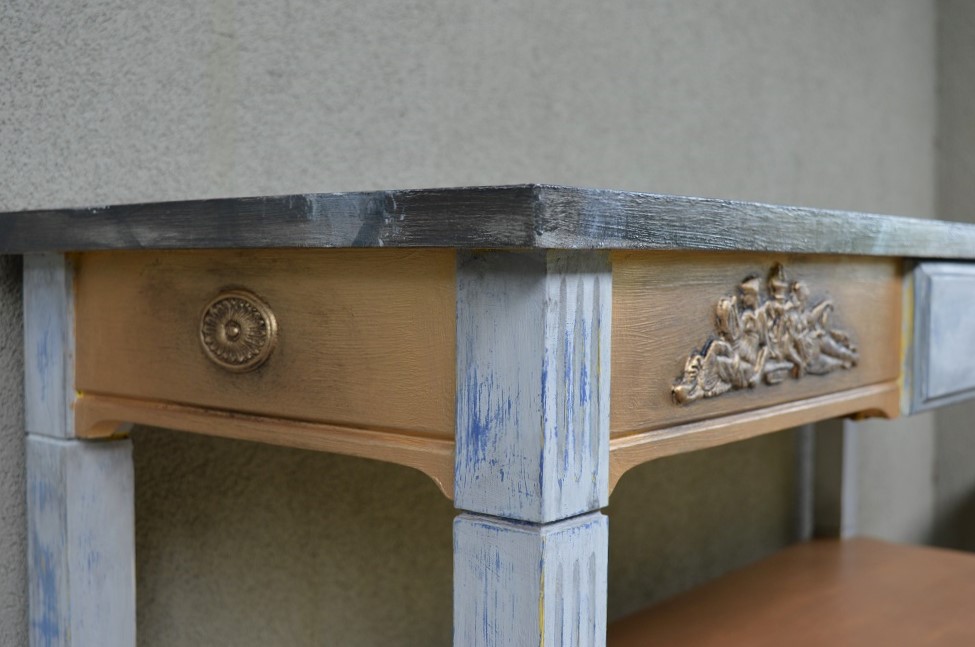
1. We cleaned our piece, then selected our Efex designs and measured the spaces on the furniture to plot out the layout.
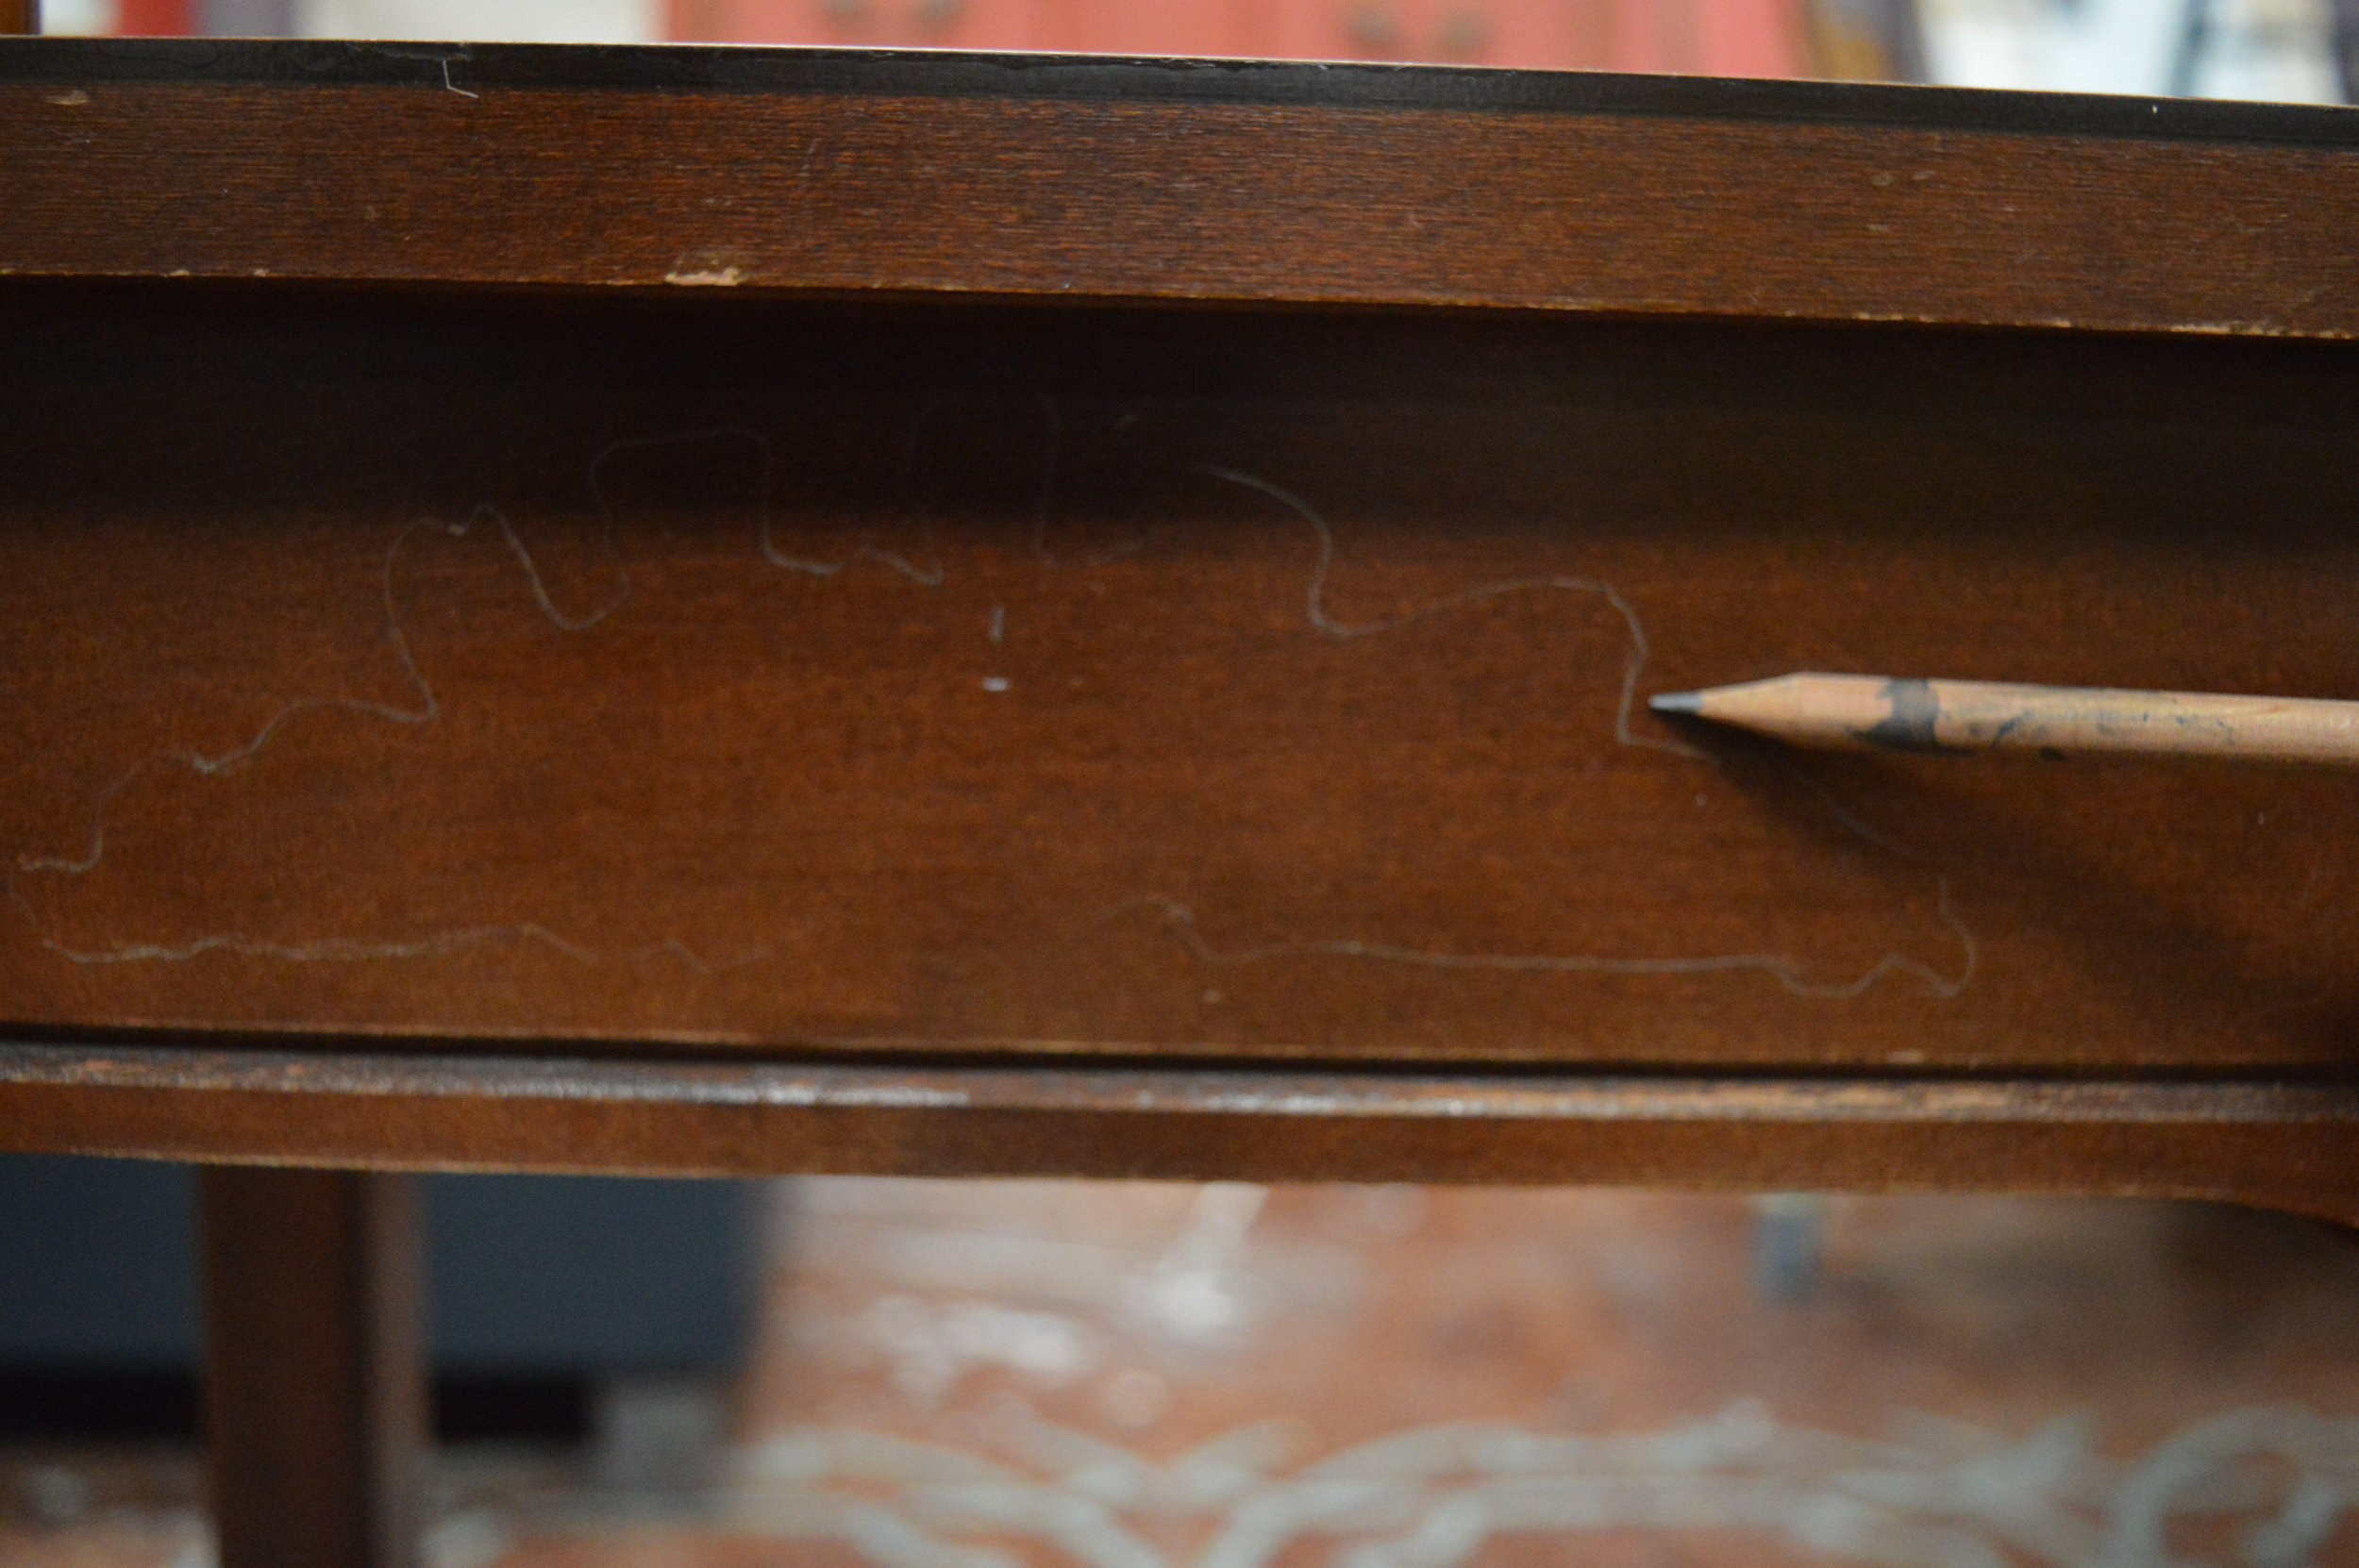
2. We traced the silhouettes of the Efex shapes to make sure they could stay aligned during the glueing part of the process. Tracing is very important if you want your Efex shapes to look even and aligned!
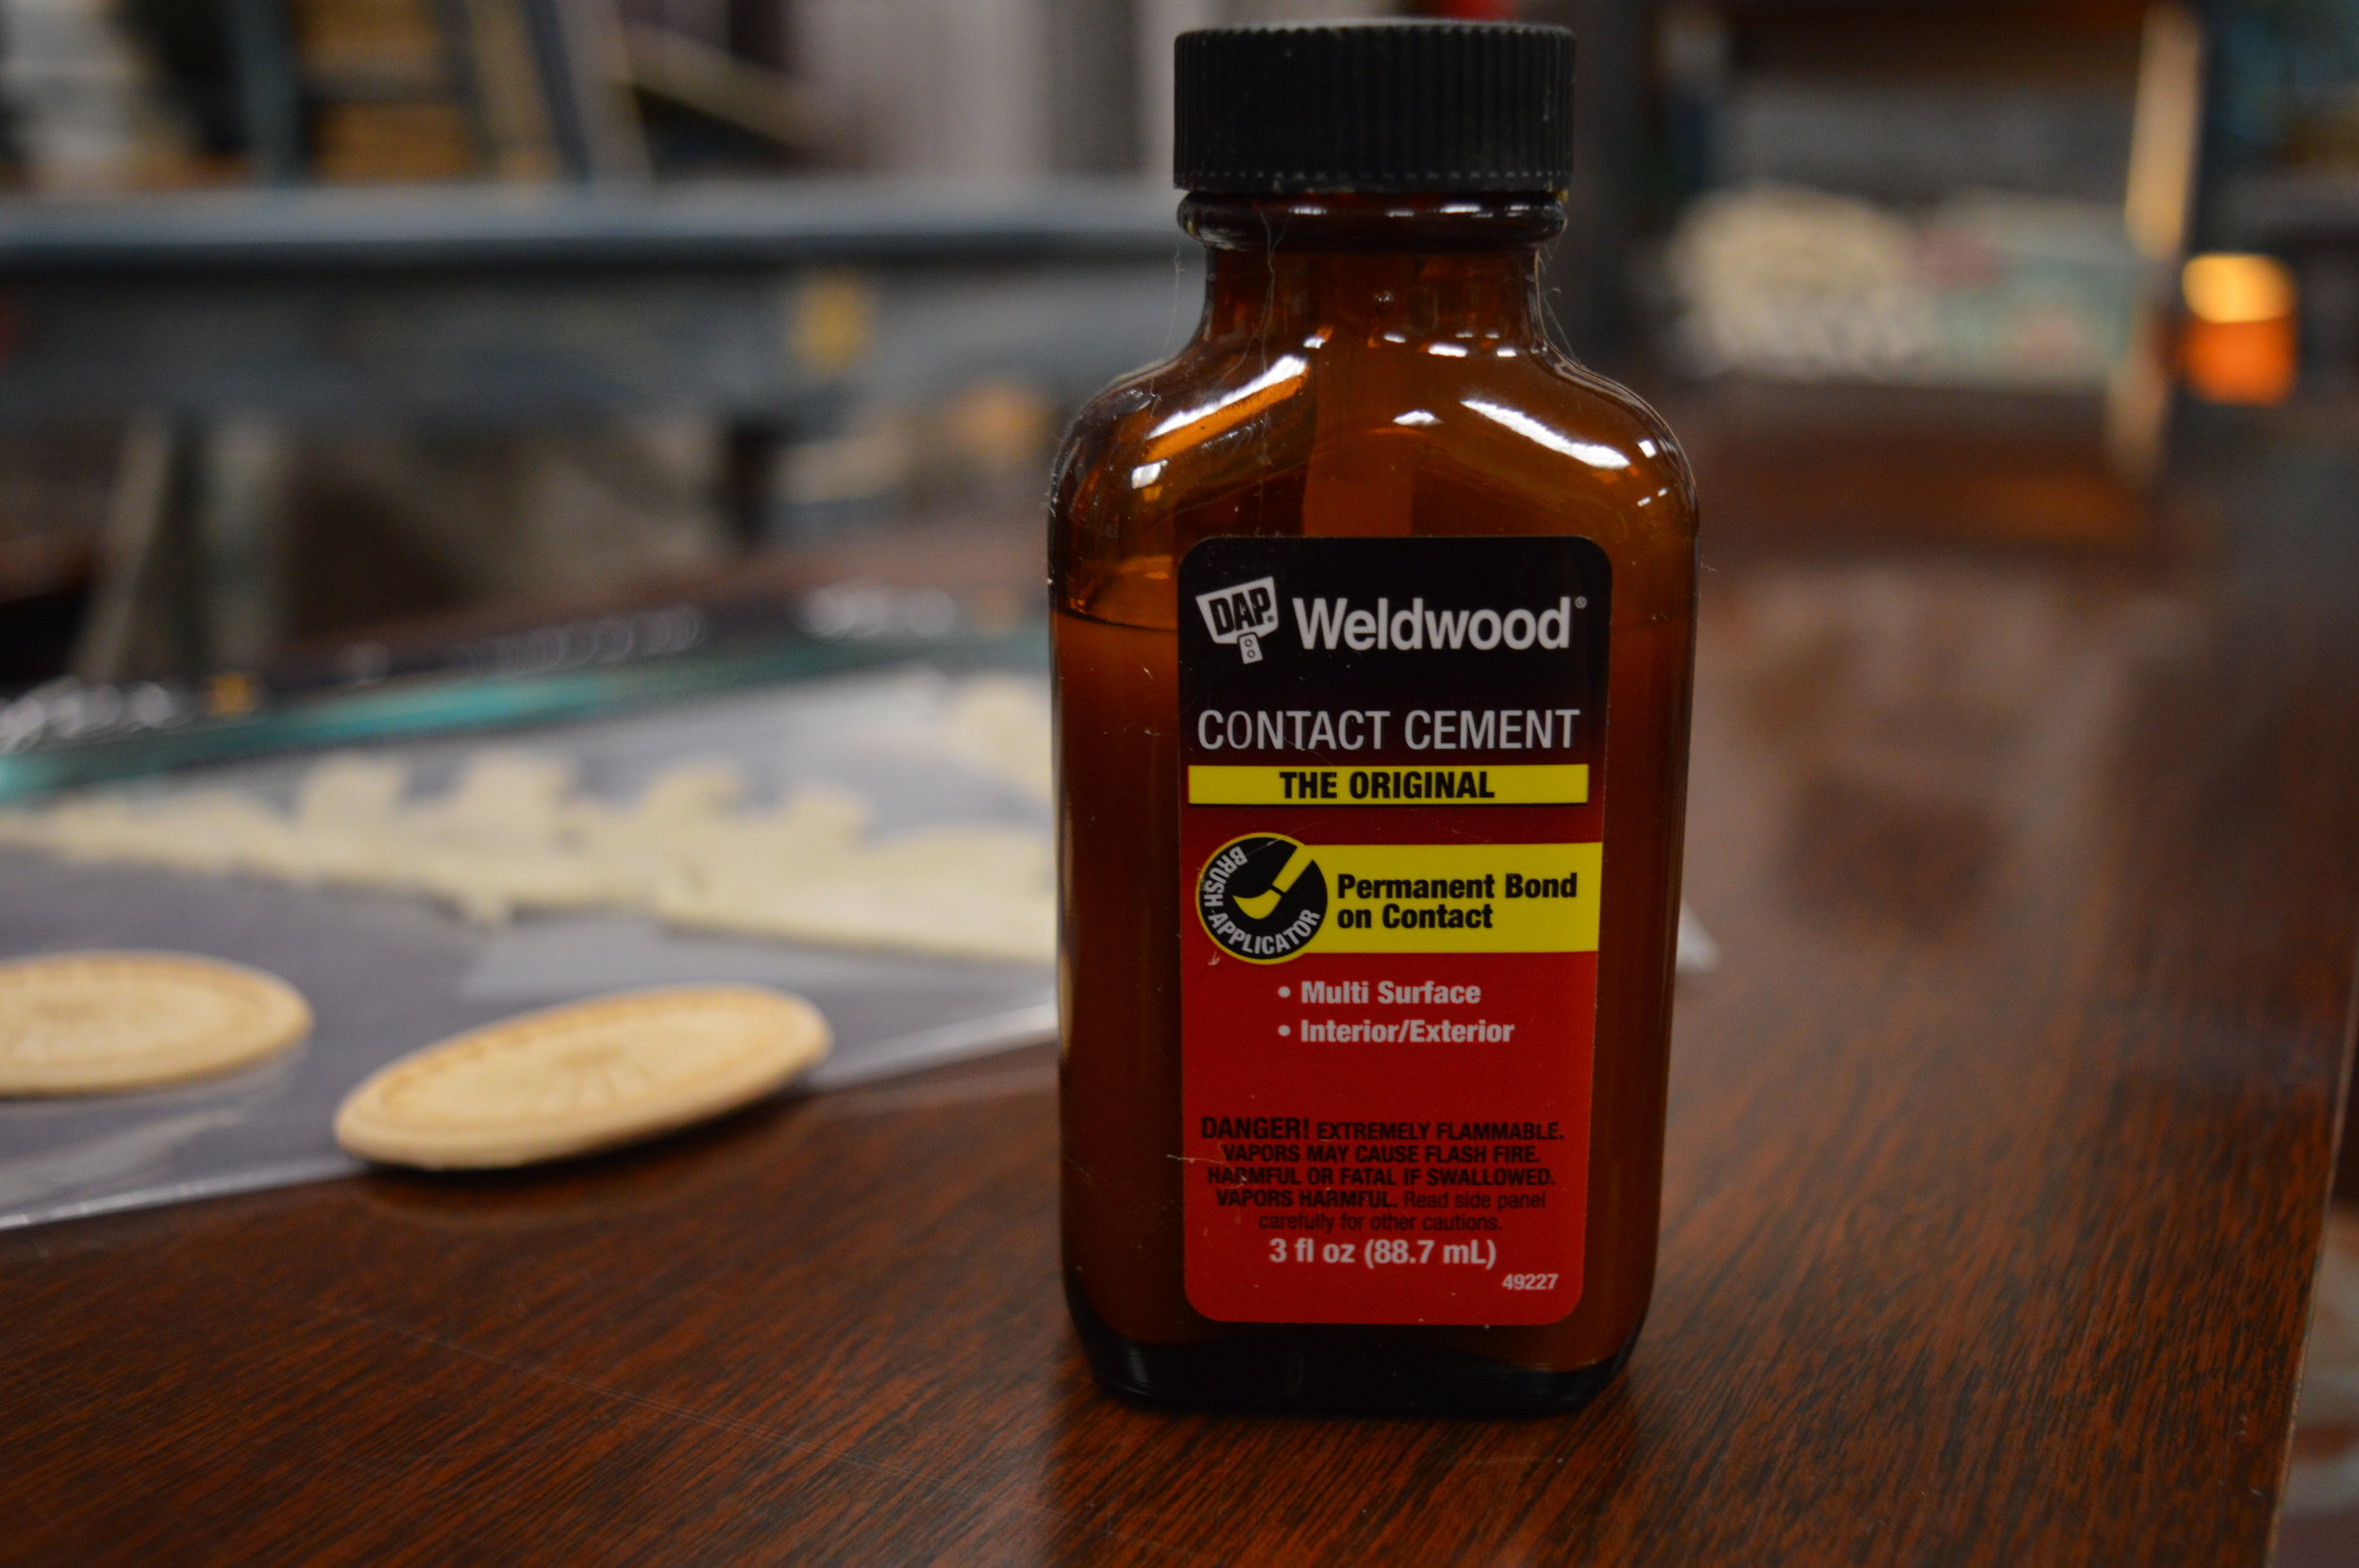
3. We applied contact cement to BOTH the backs of each shape, as well as within the traced shape on the surface of the furniture. These Efex shapes cannot merely be glued on with regular Elmer’s or wood glue— they work together with the contact cement. Basically, the cement dries for 15 minutes on each side, and then when you place the shape down, both cemented sides bond to one another. That way they are on there firmly and won’t budge!
We recommend cementing outside the lines of the traced shape as well, just a little bit, because when you press the silicone Efex down they may flatten and widen out a tiny bit. This ensures that you don’t end up with gaps and loose edges. Make sure you don’t skip areas on the backs of the actual mouldings either. We carry the DAP Weldwood at our Shop & Studio alongside Efex, and we love the small bottles because they have a brush attached to the inside of the cap (like a nail polish bottle) to make life easier.
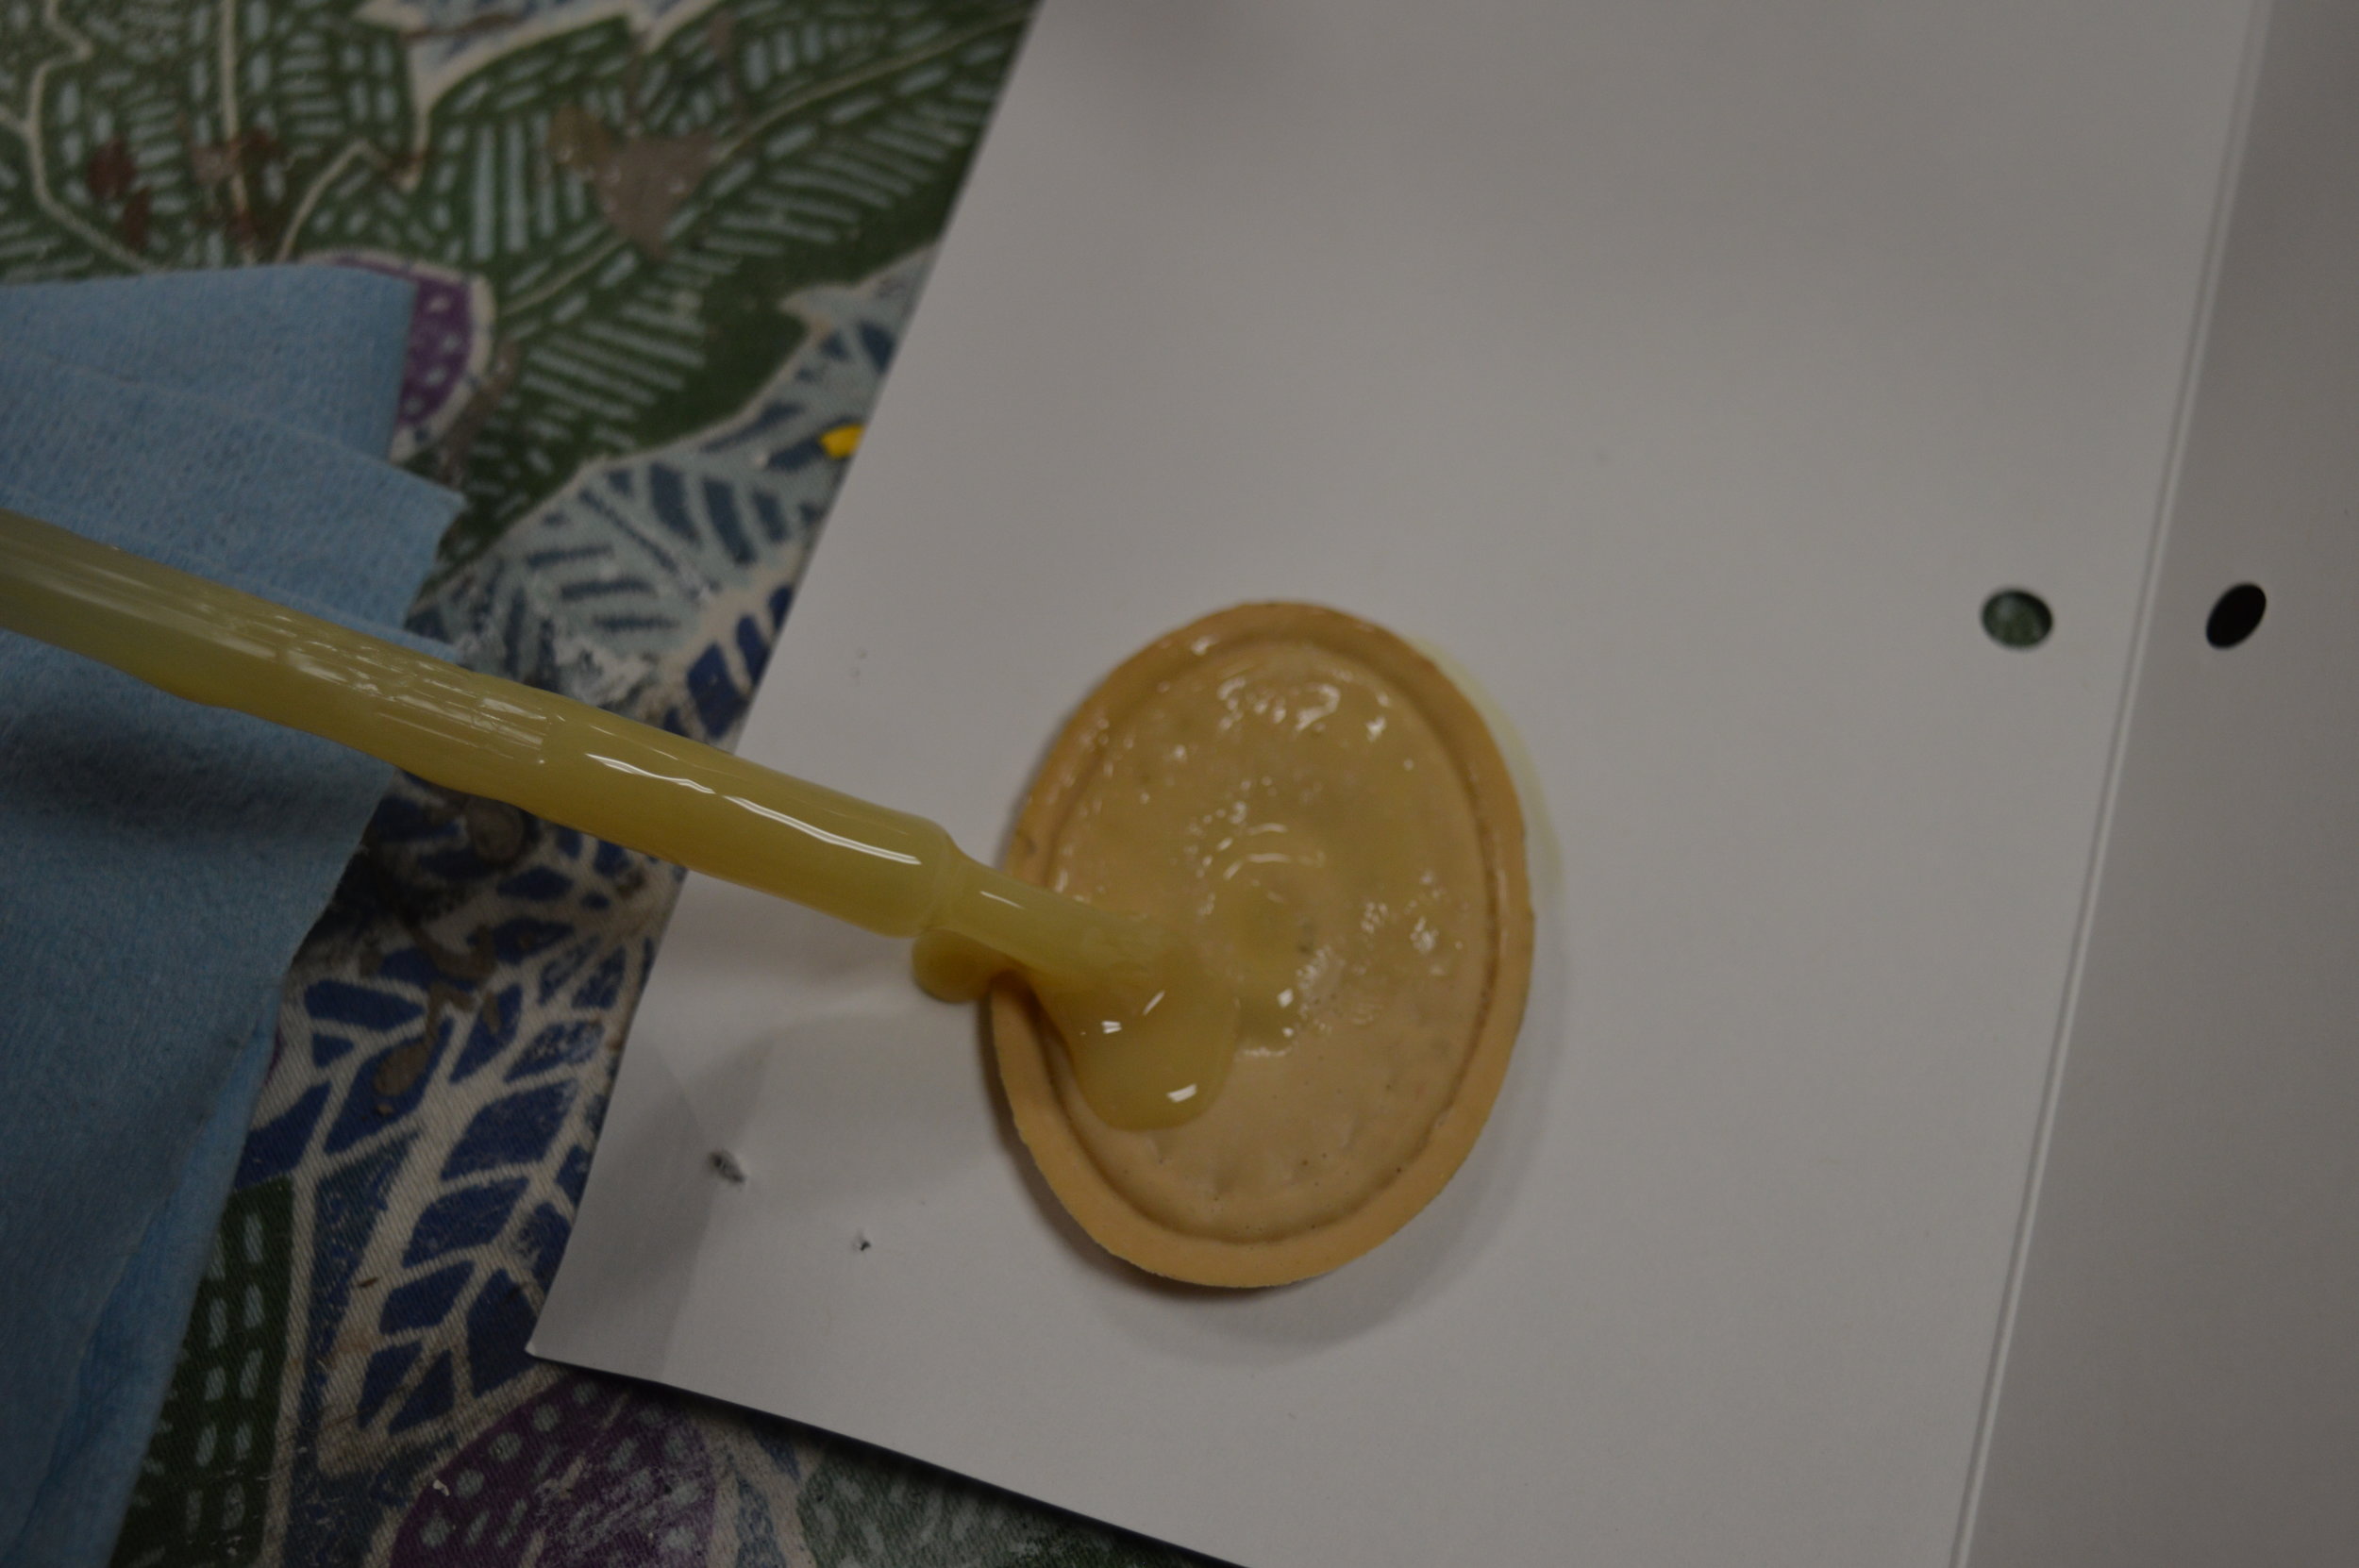

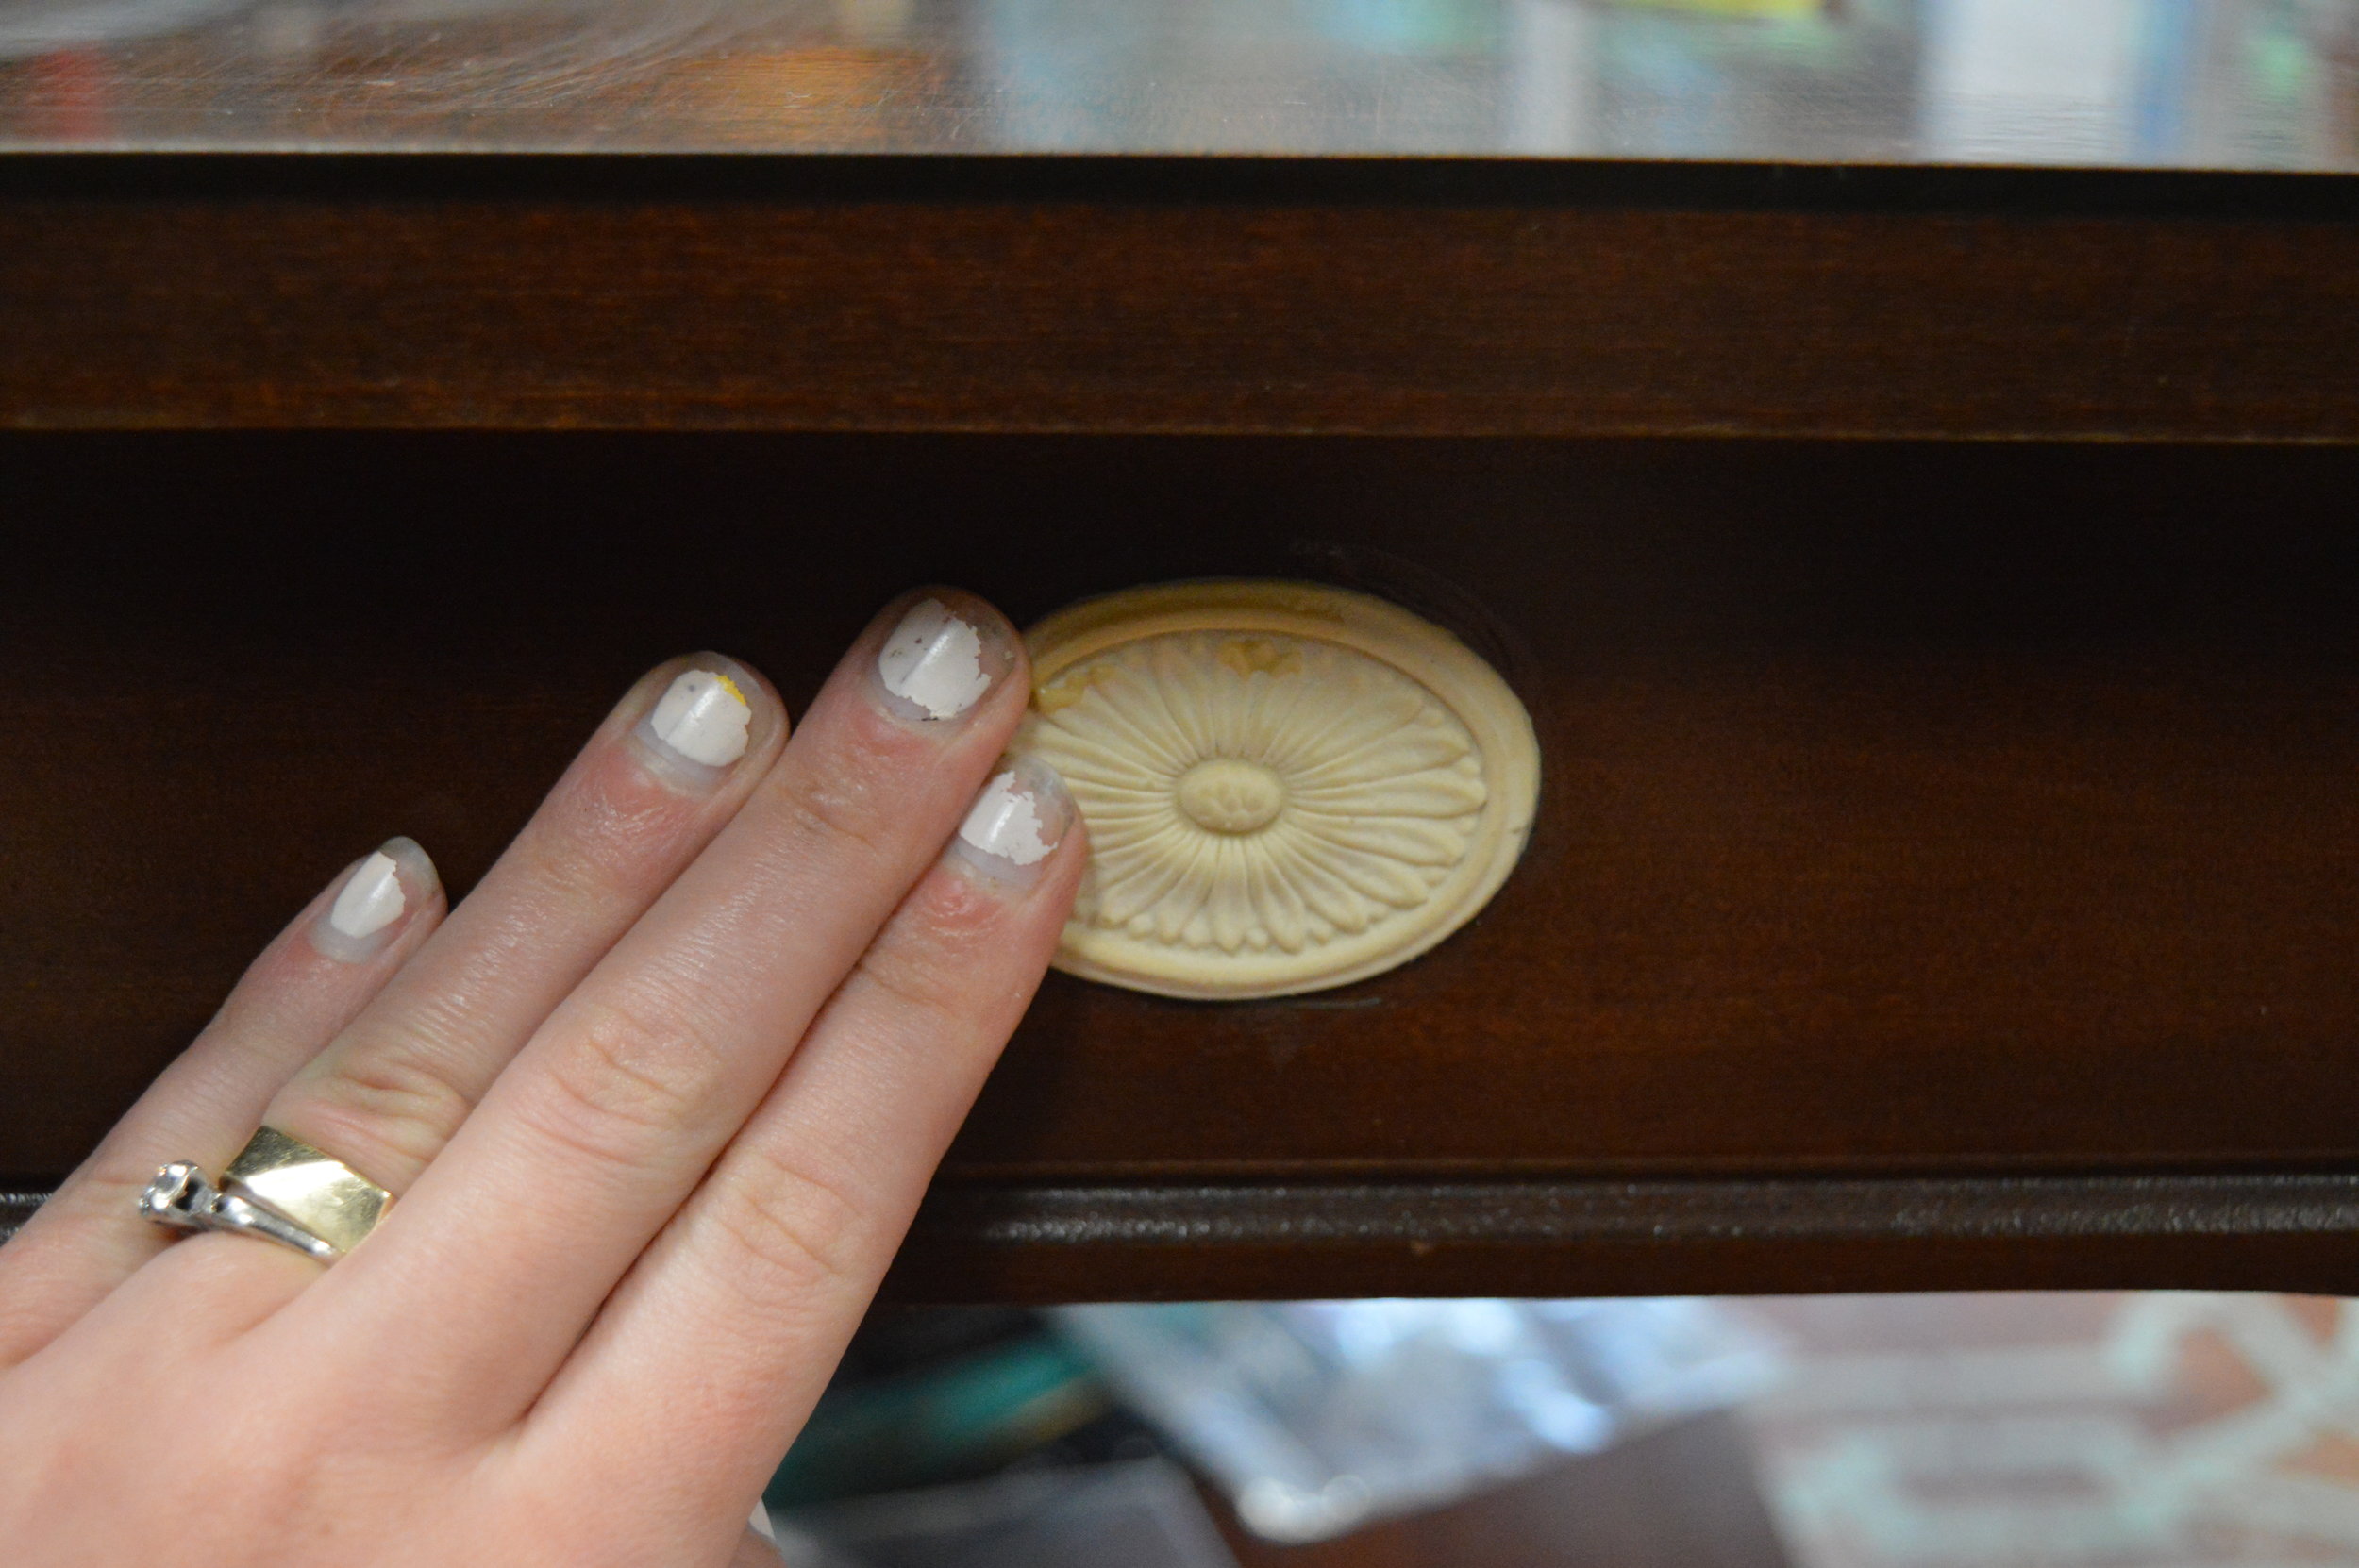
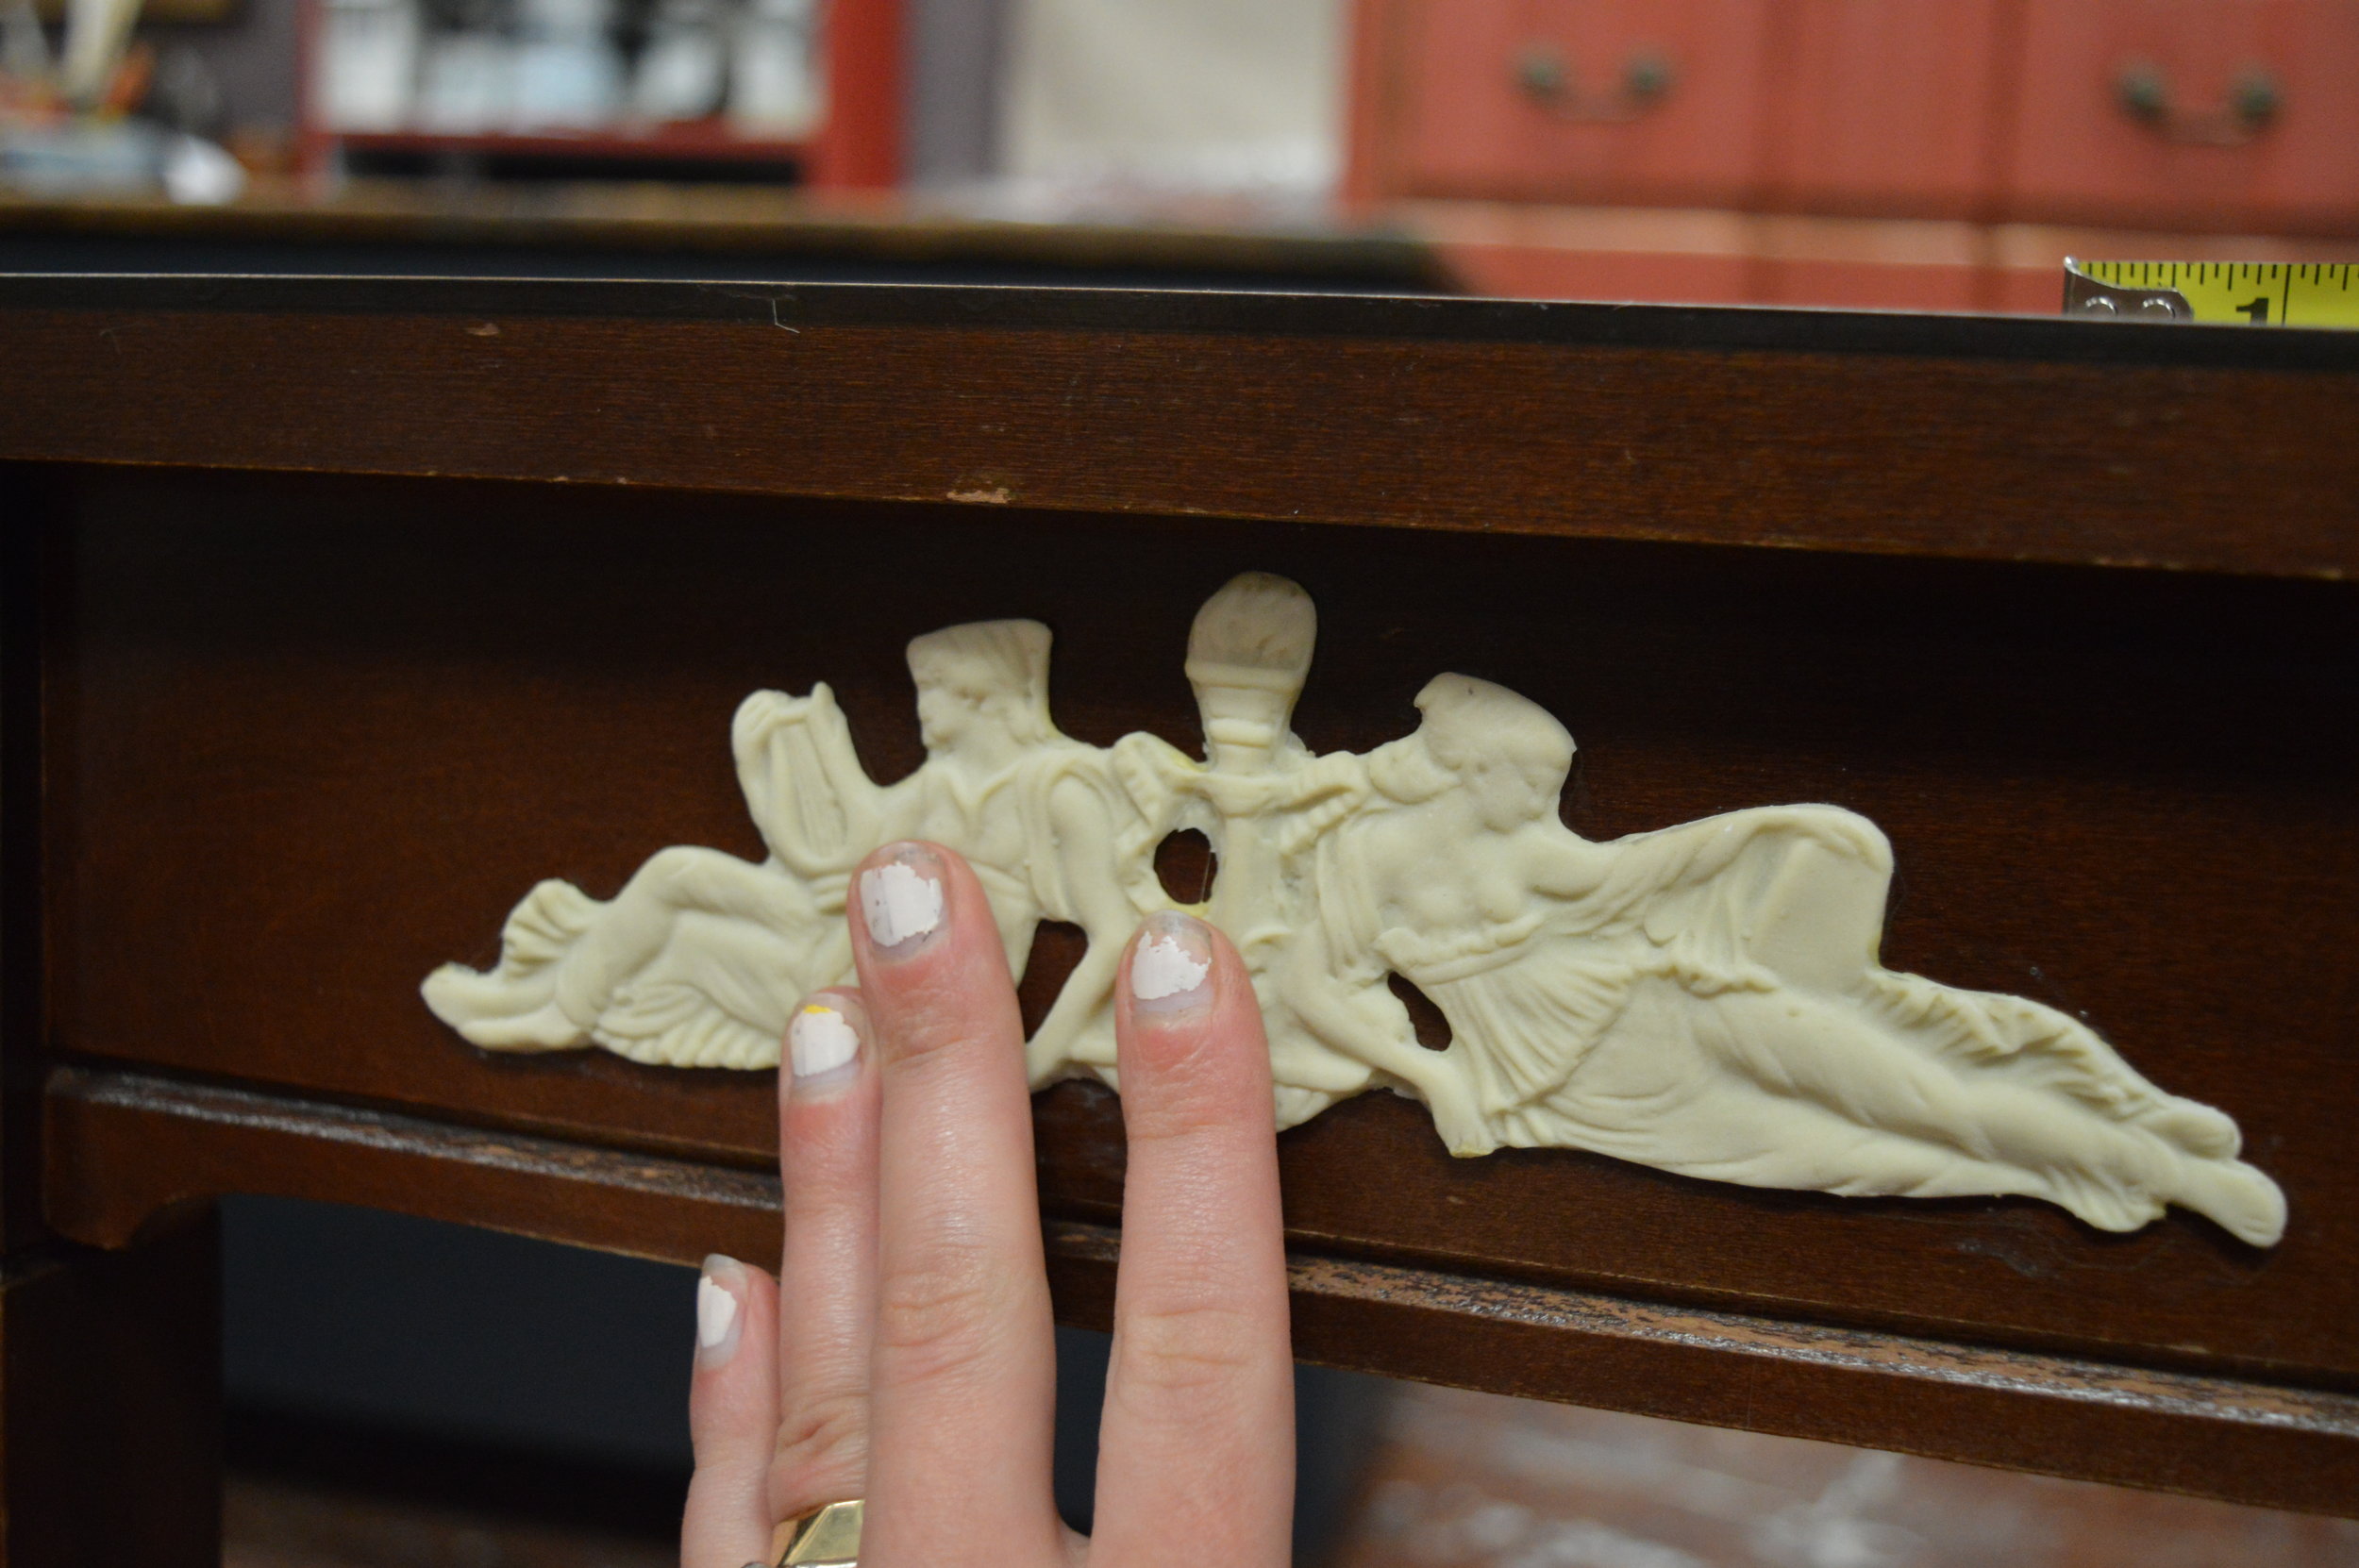
4. We pressed down each shape, aligning it as best as possible to the traced area and contact cement. A great suggestion is to press just the middle of the shape down first and work outward, because once the cement sides are bonded to one another then it’s very difficult to lift the shape back up. Starting from the middle allows you some wiggle-room (pun intended!) to shift the shape a bit if needed where it hasn’t yet bonded. That being said, it really was not difficult at all to make sure they got on there correctly. Our students and customers agree so far on that as well!
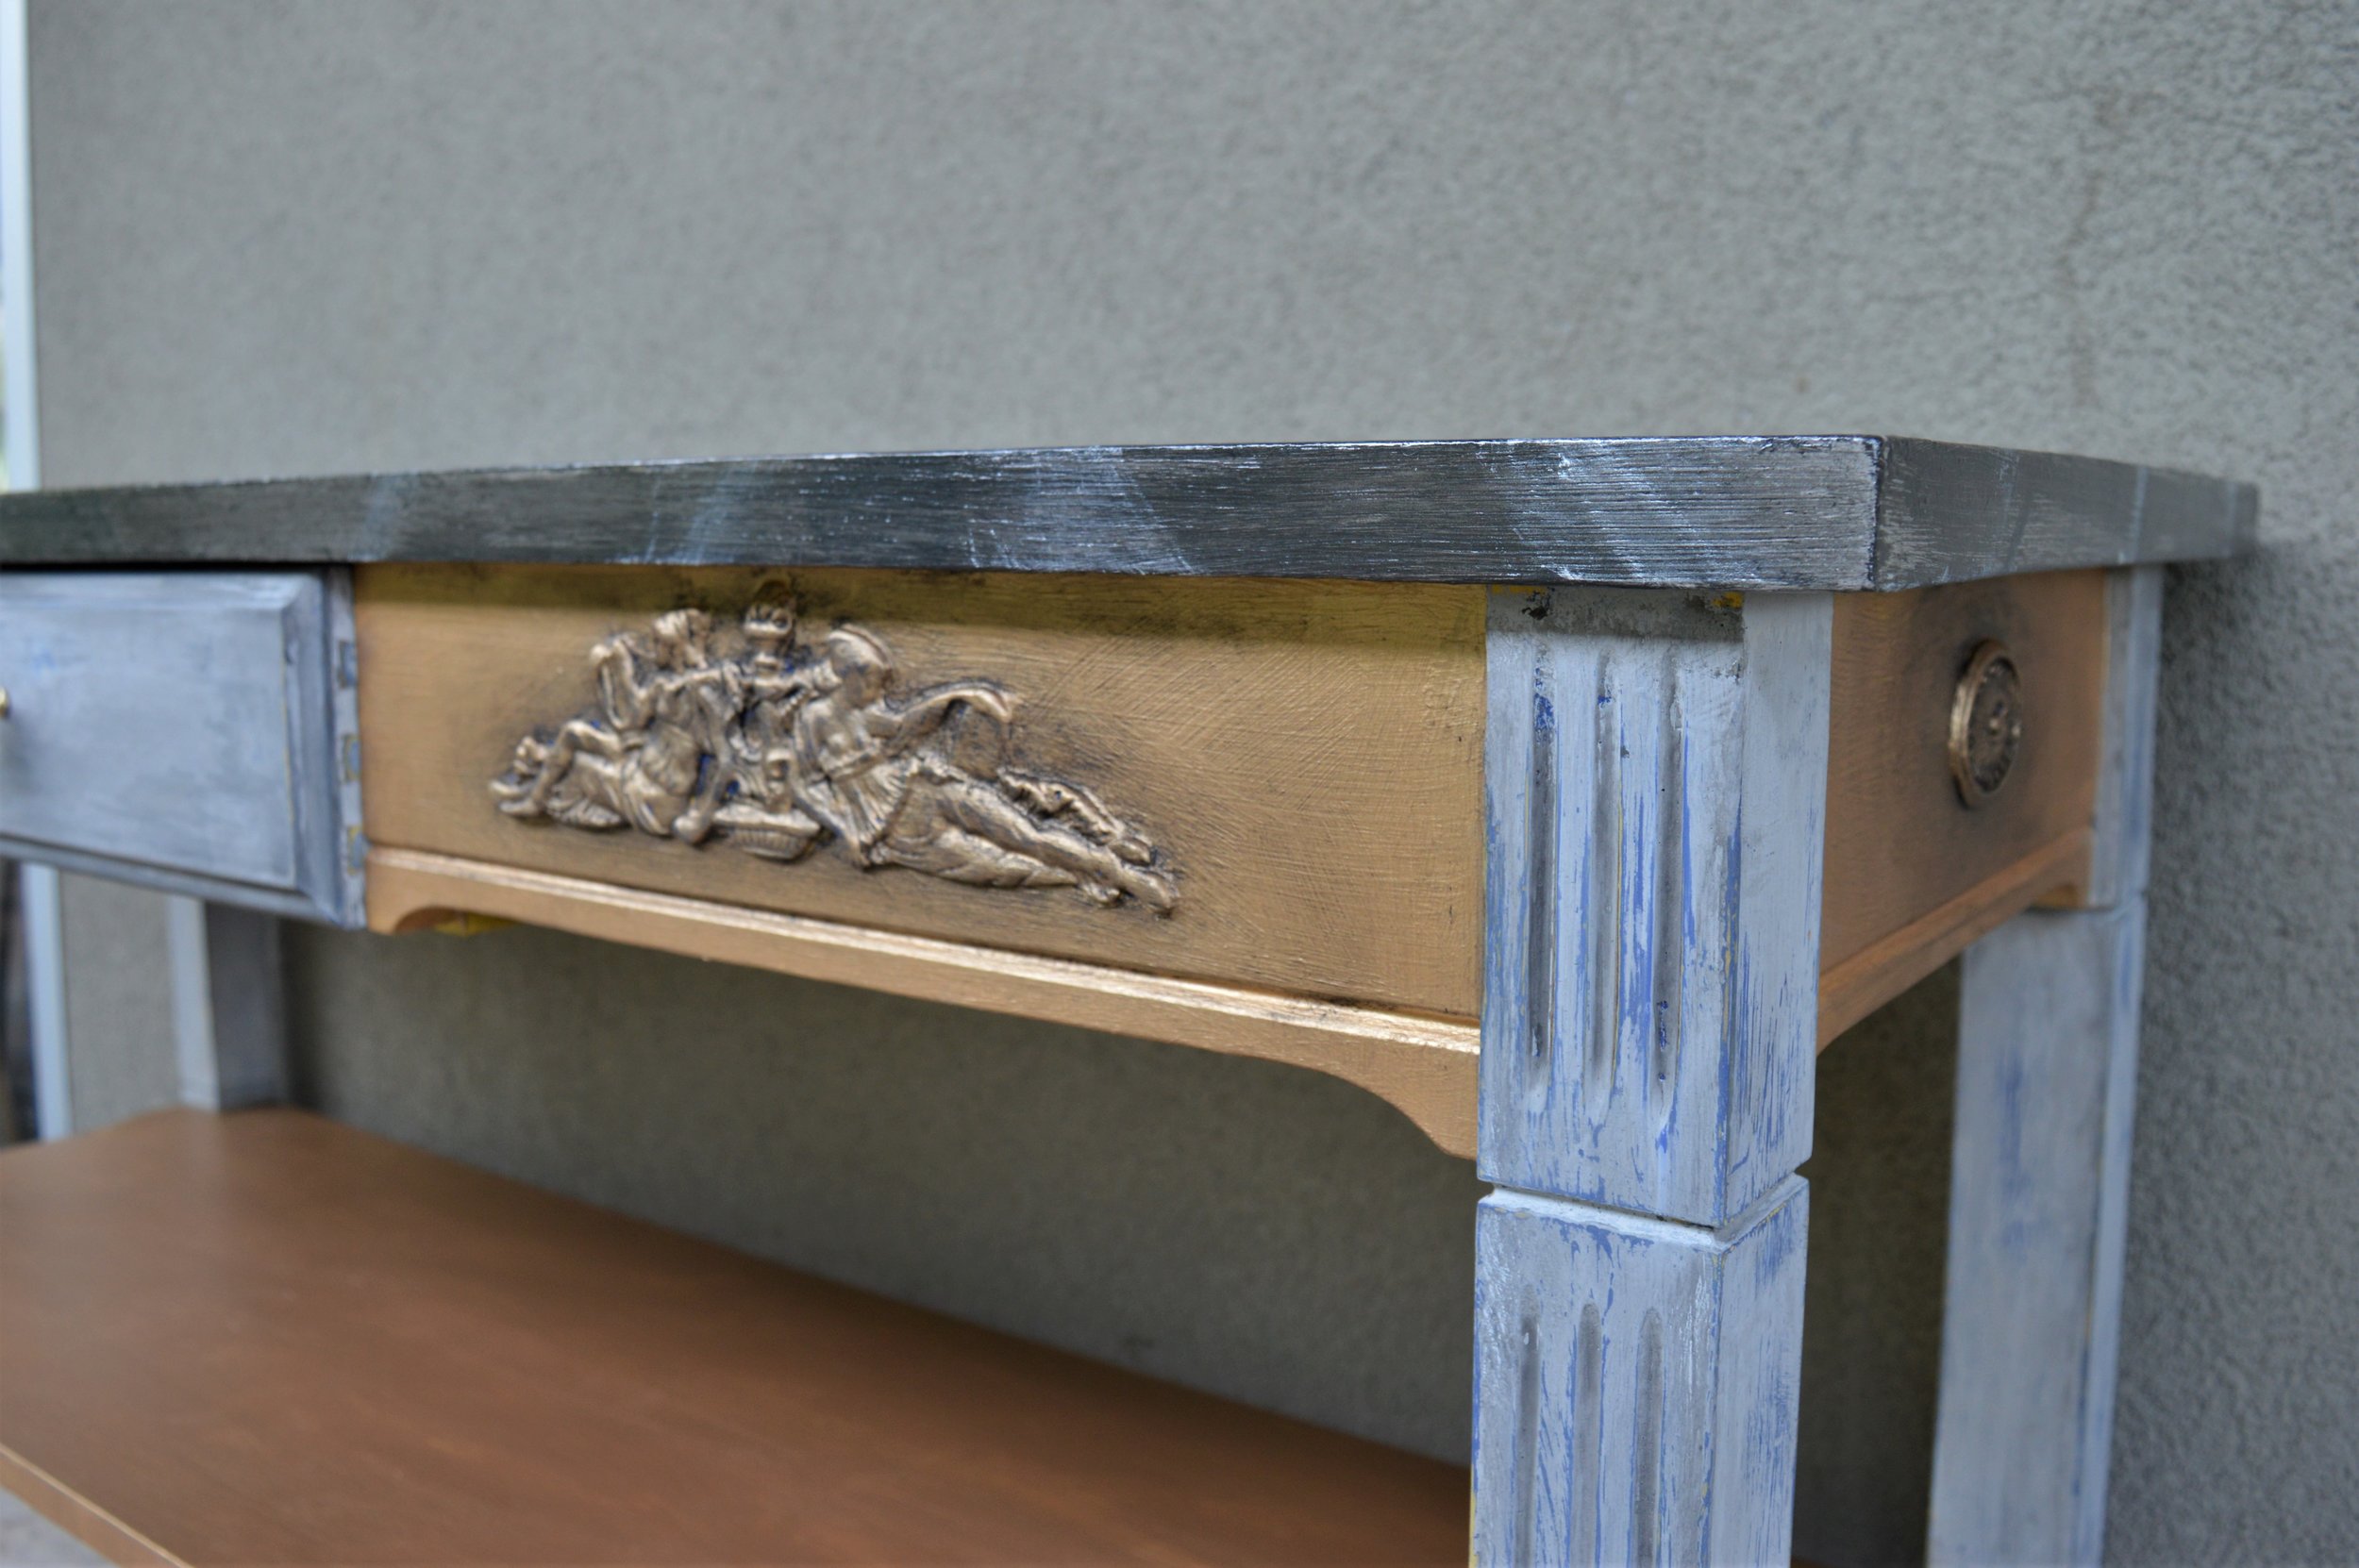
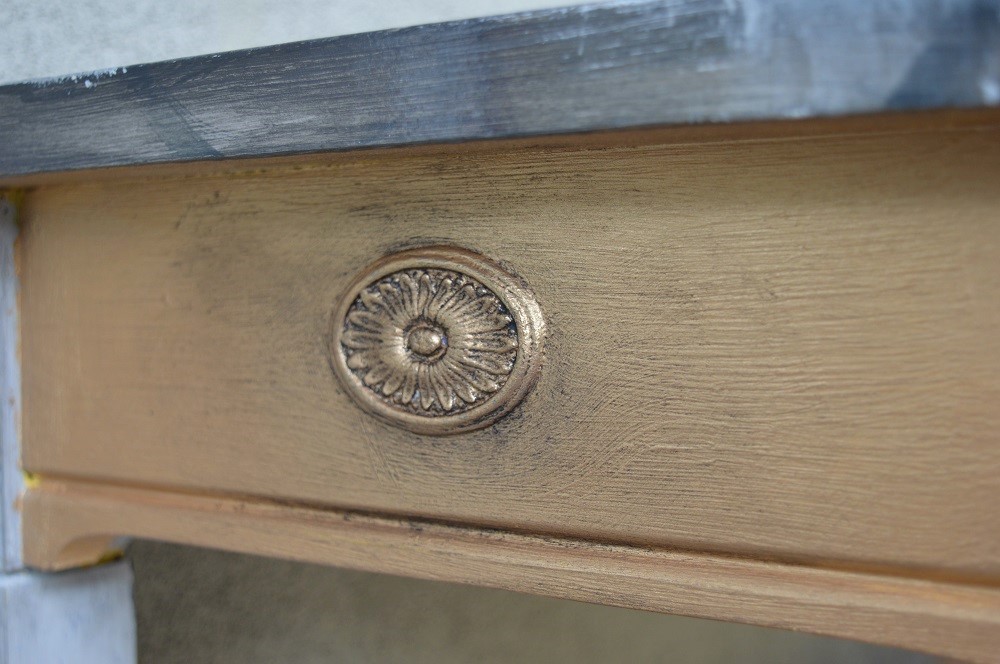
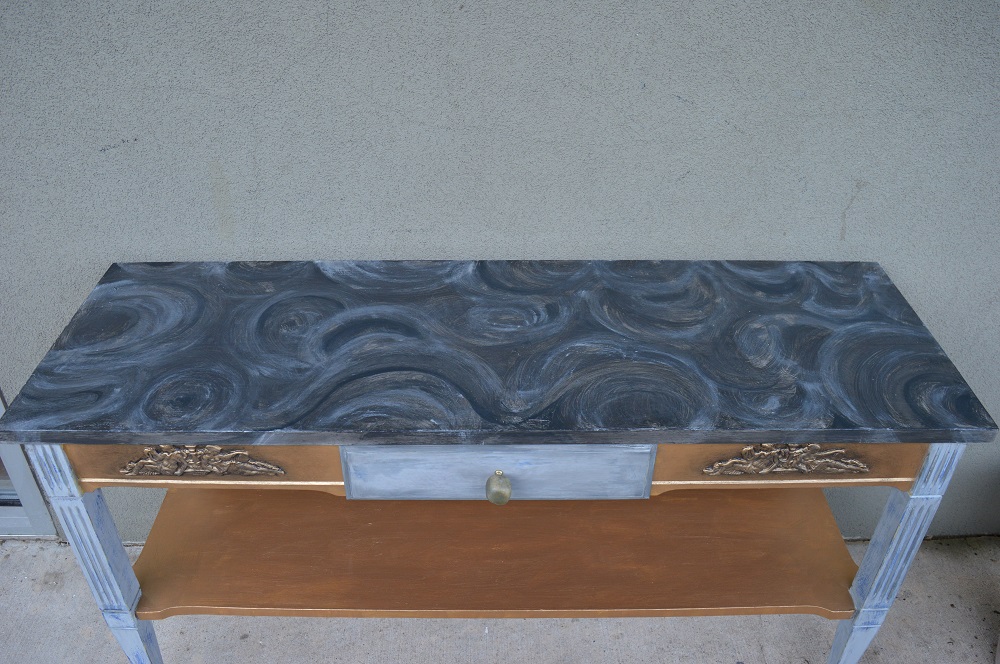
5. We went about finishing our painting technique up right over top! We used layers of Chalk Paint® global Paris Grey, Graphite, Tilton, and Napoleonic Blue. We also used some Modern Masters® Pale Gold on certain areas. We also did a specialty faux stone effect on the top— now THAT DIY tutorial will be for another day!
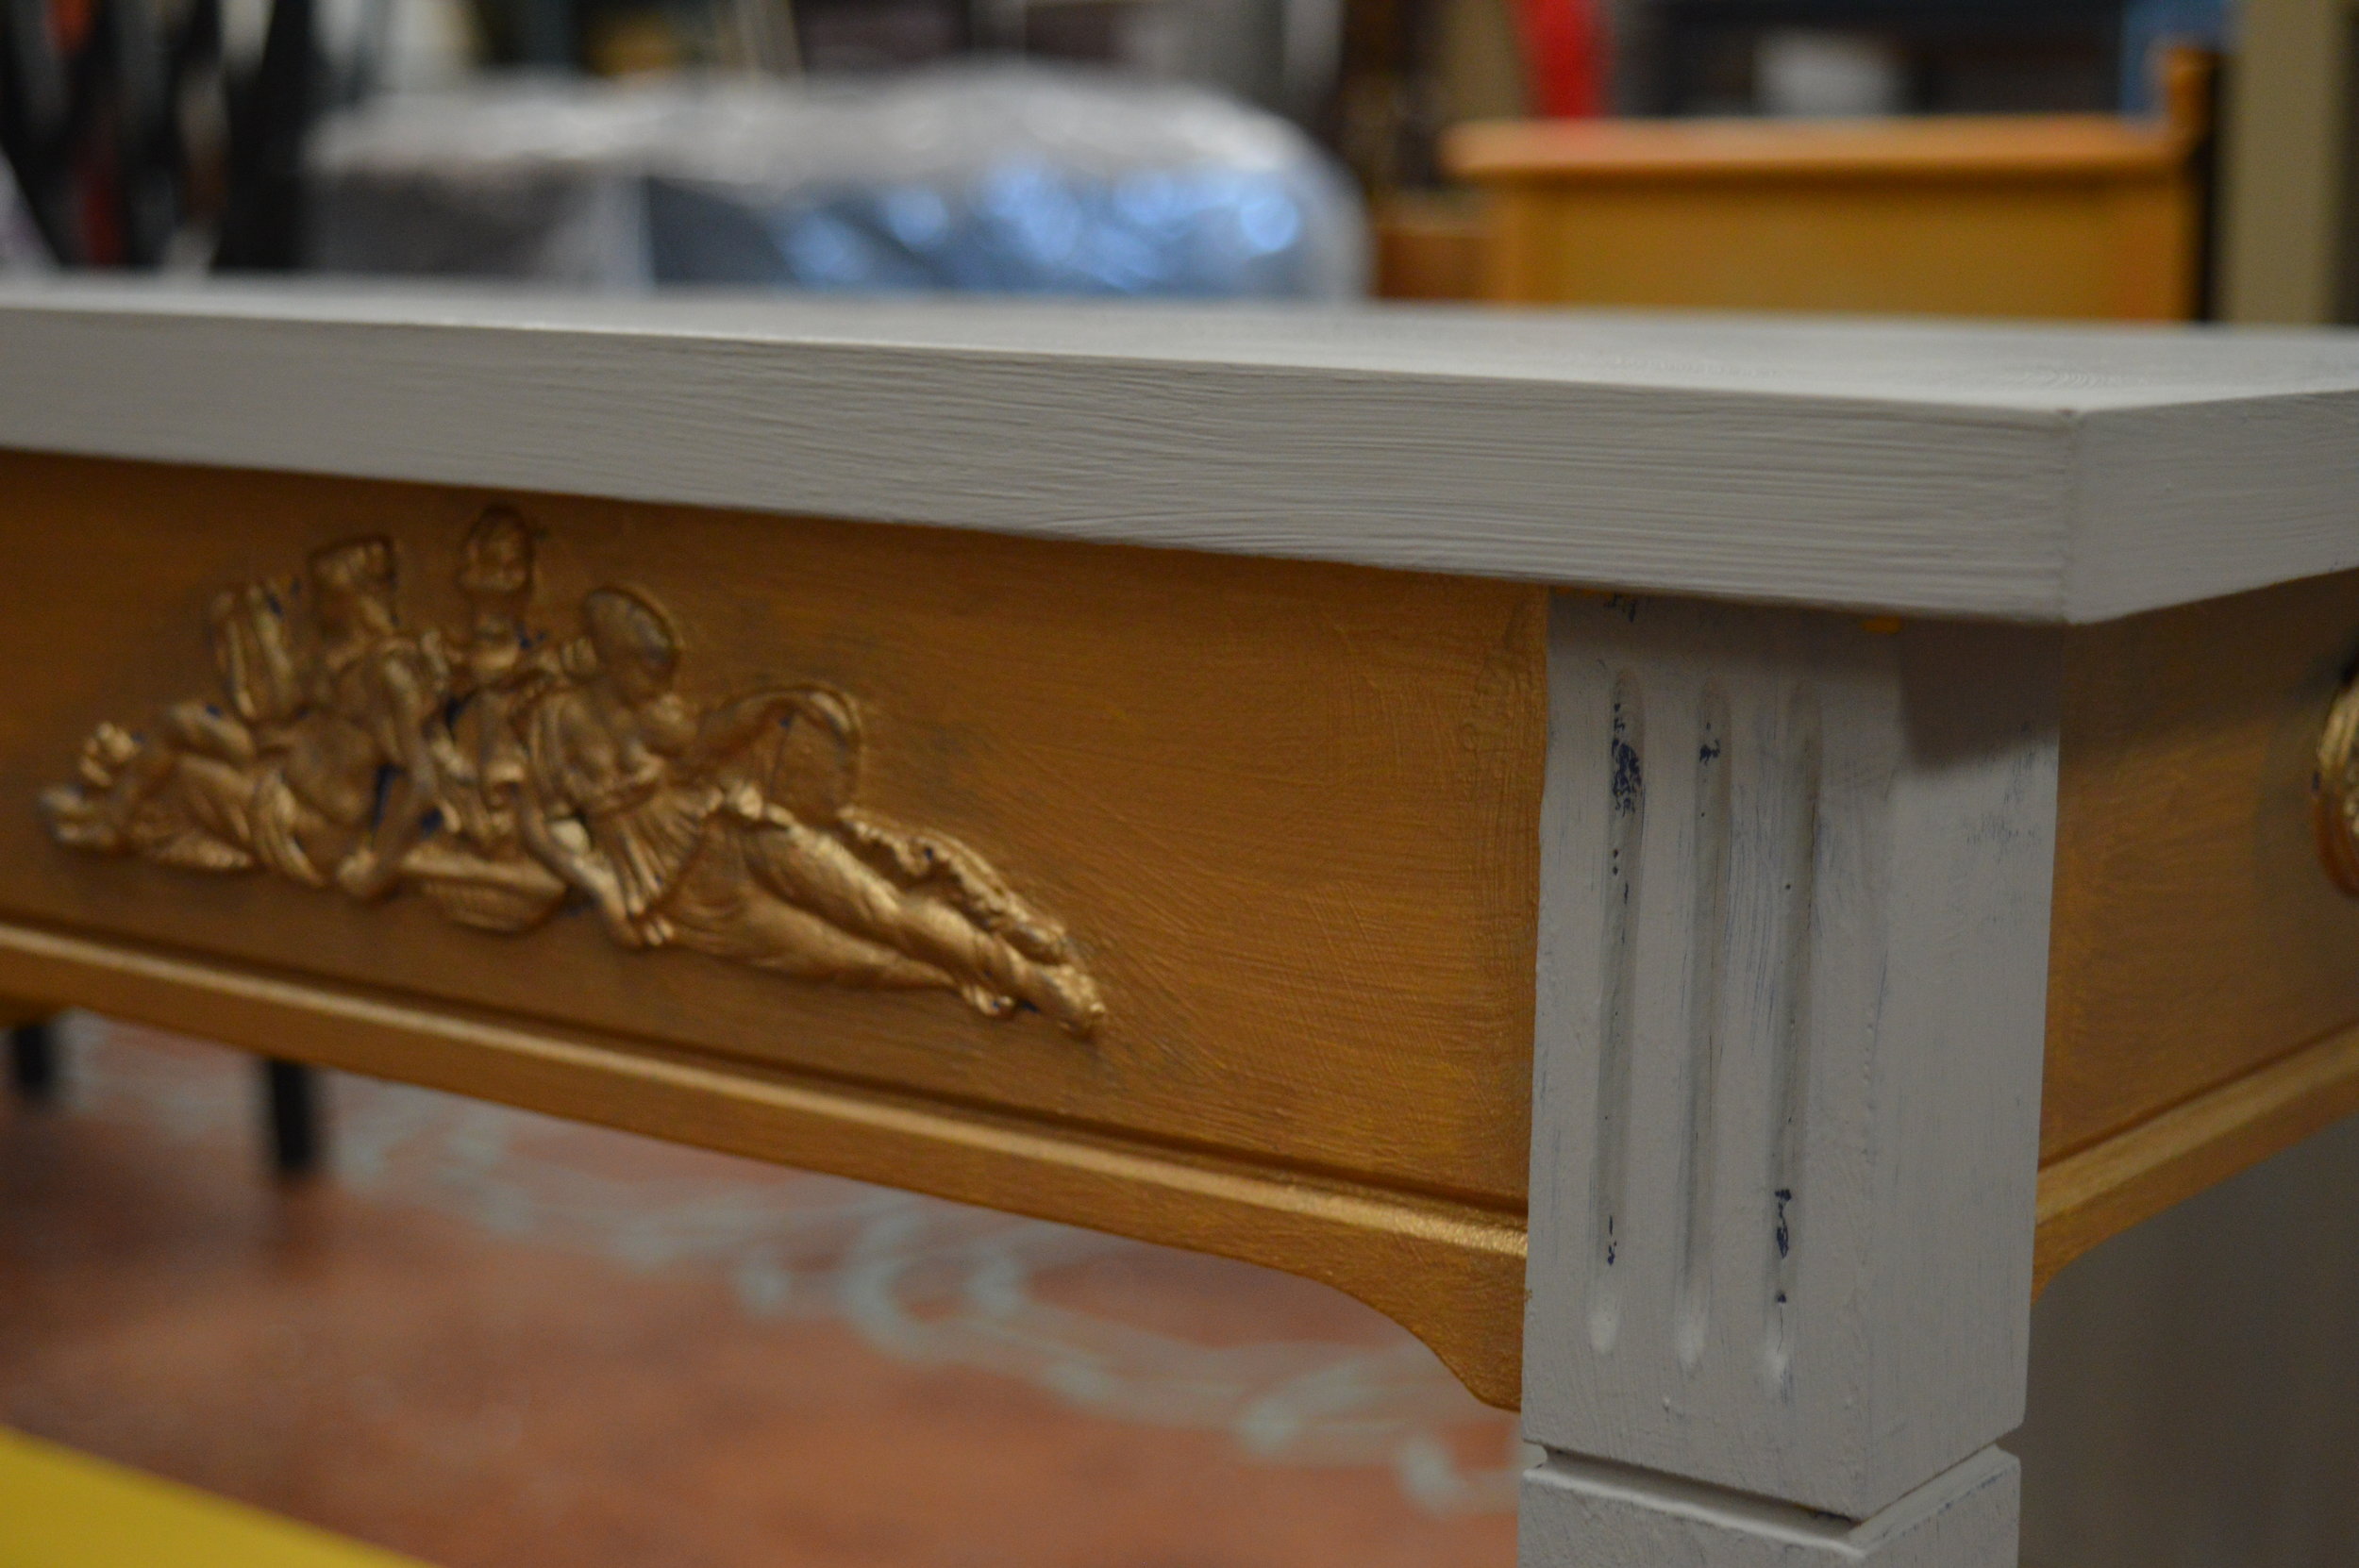

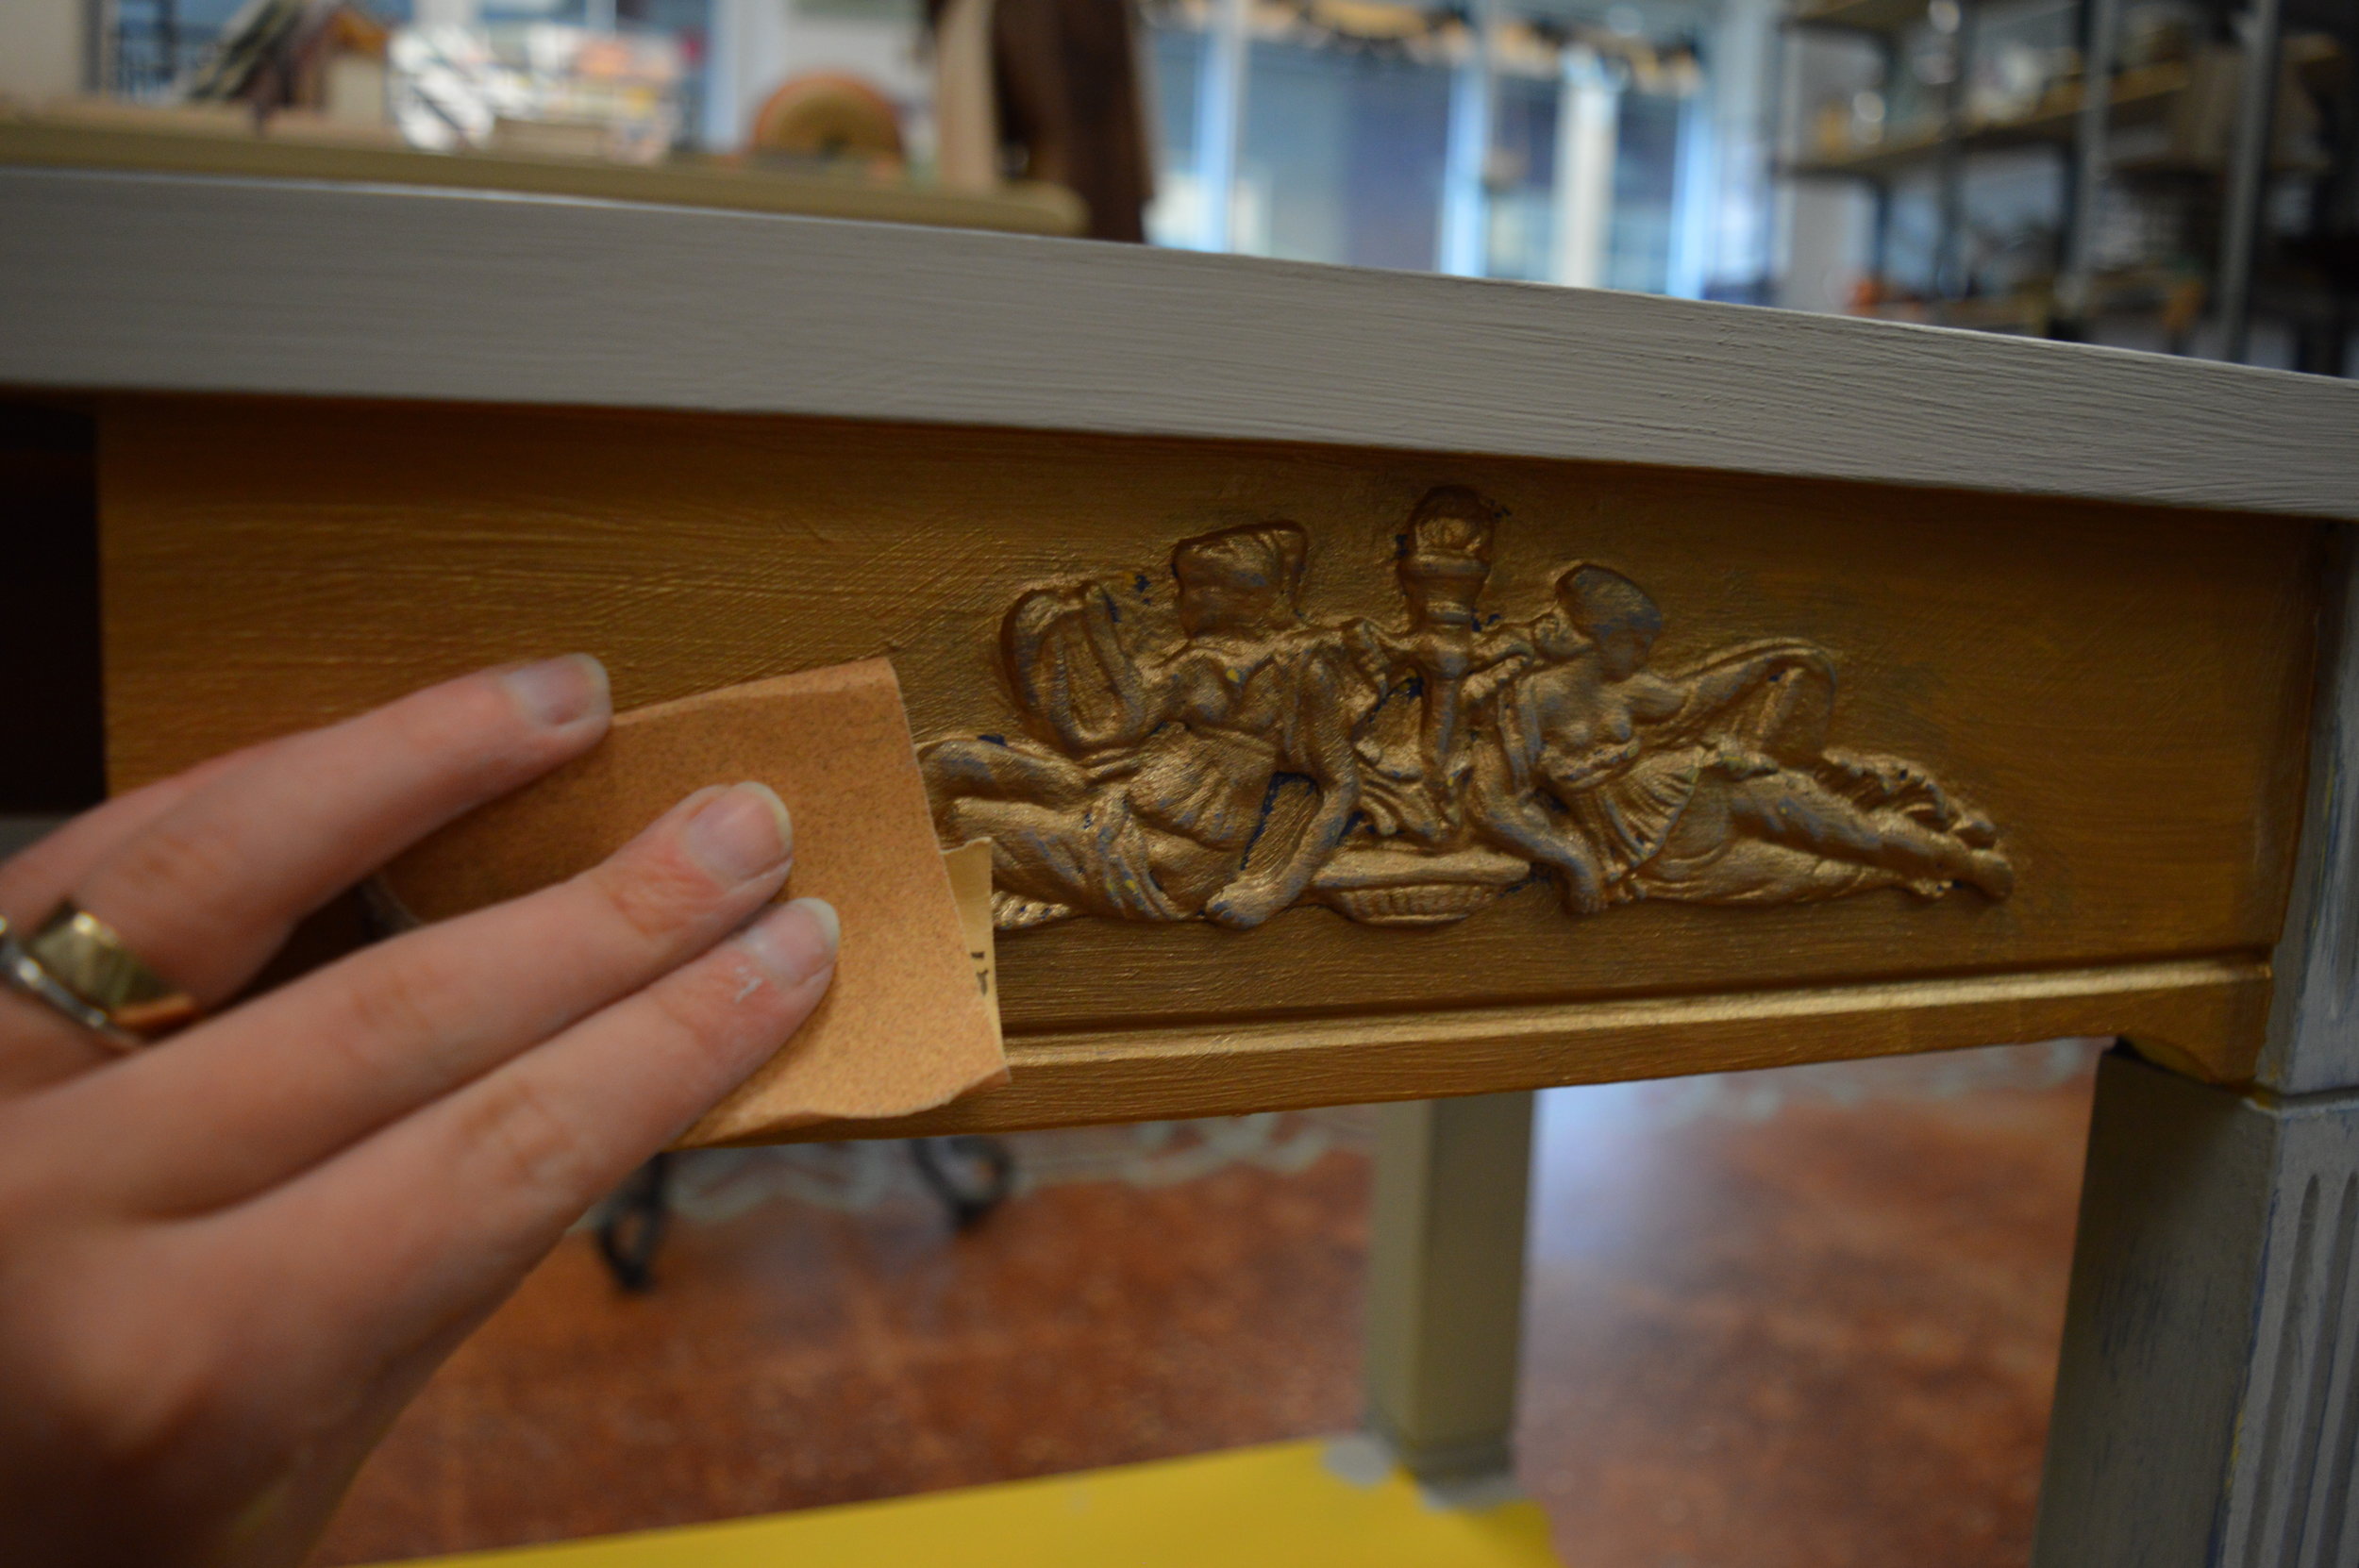
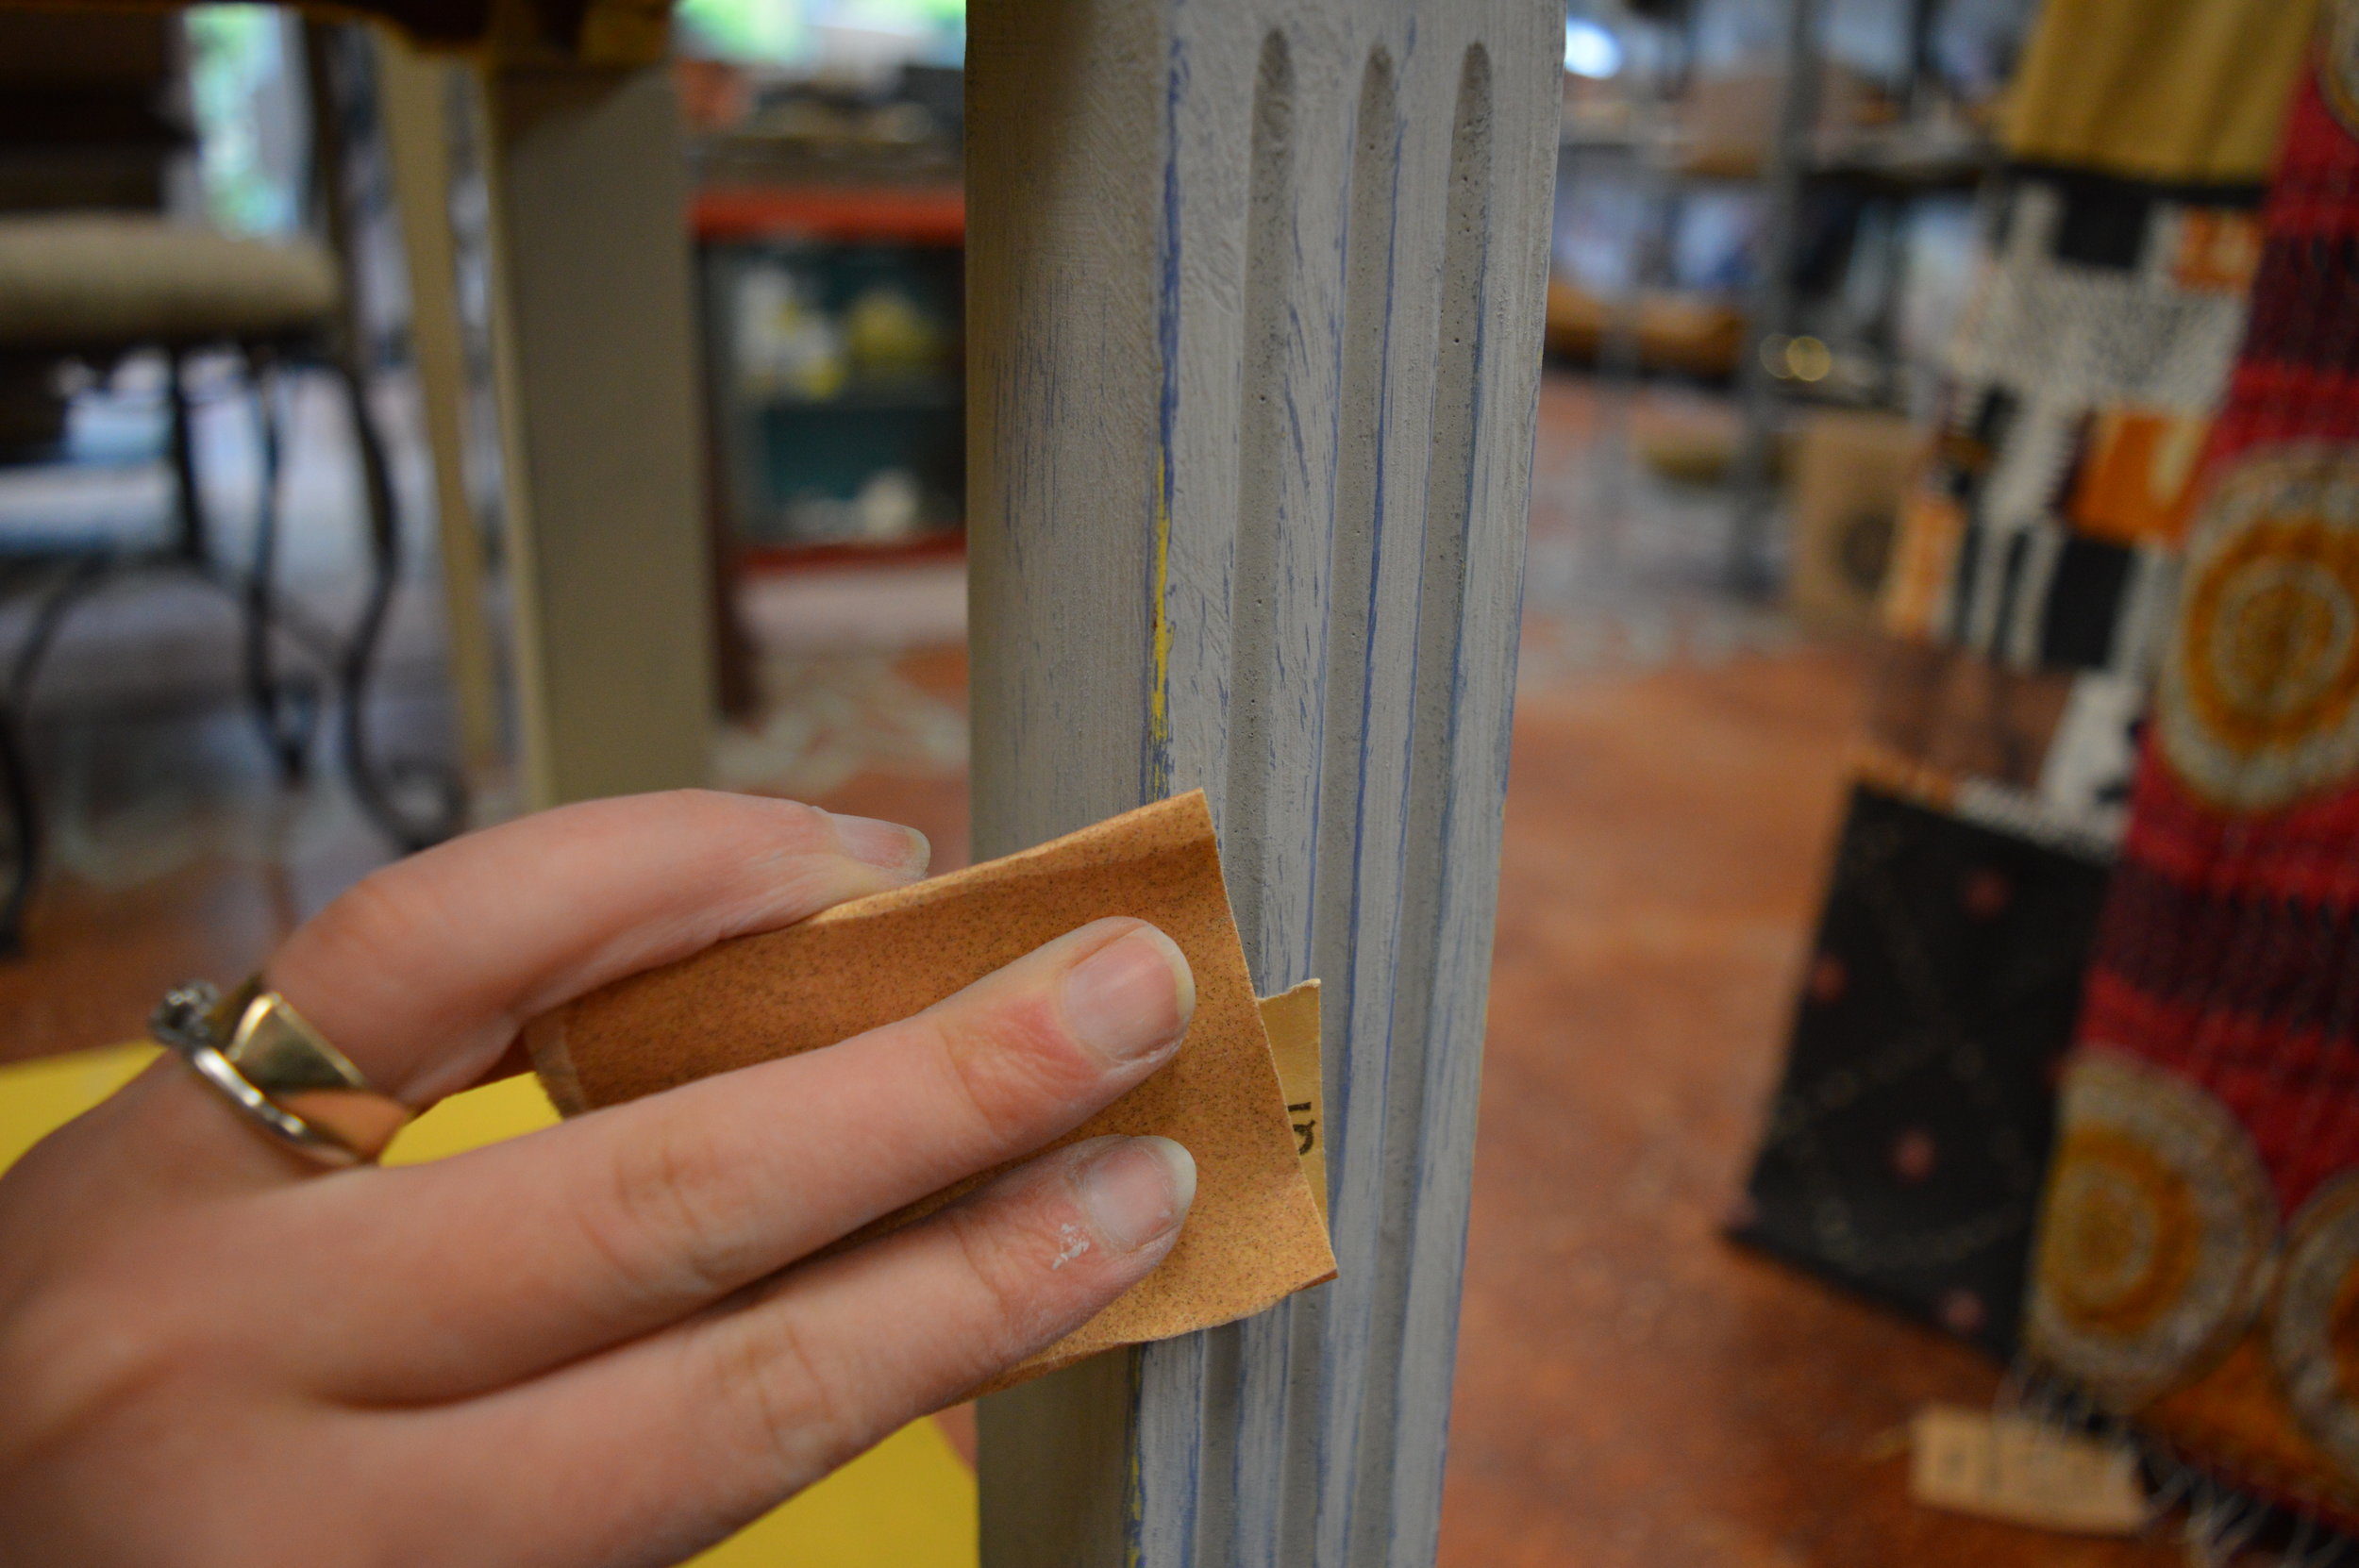
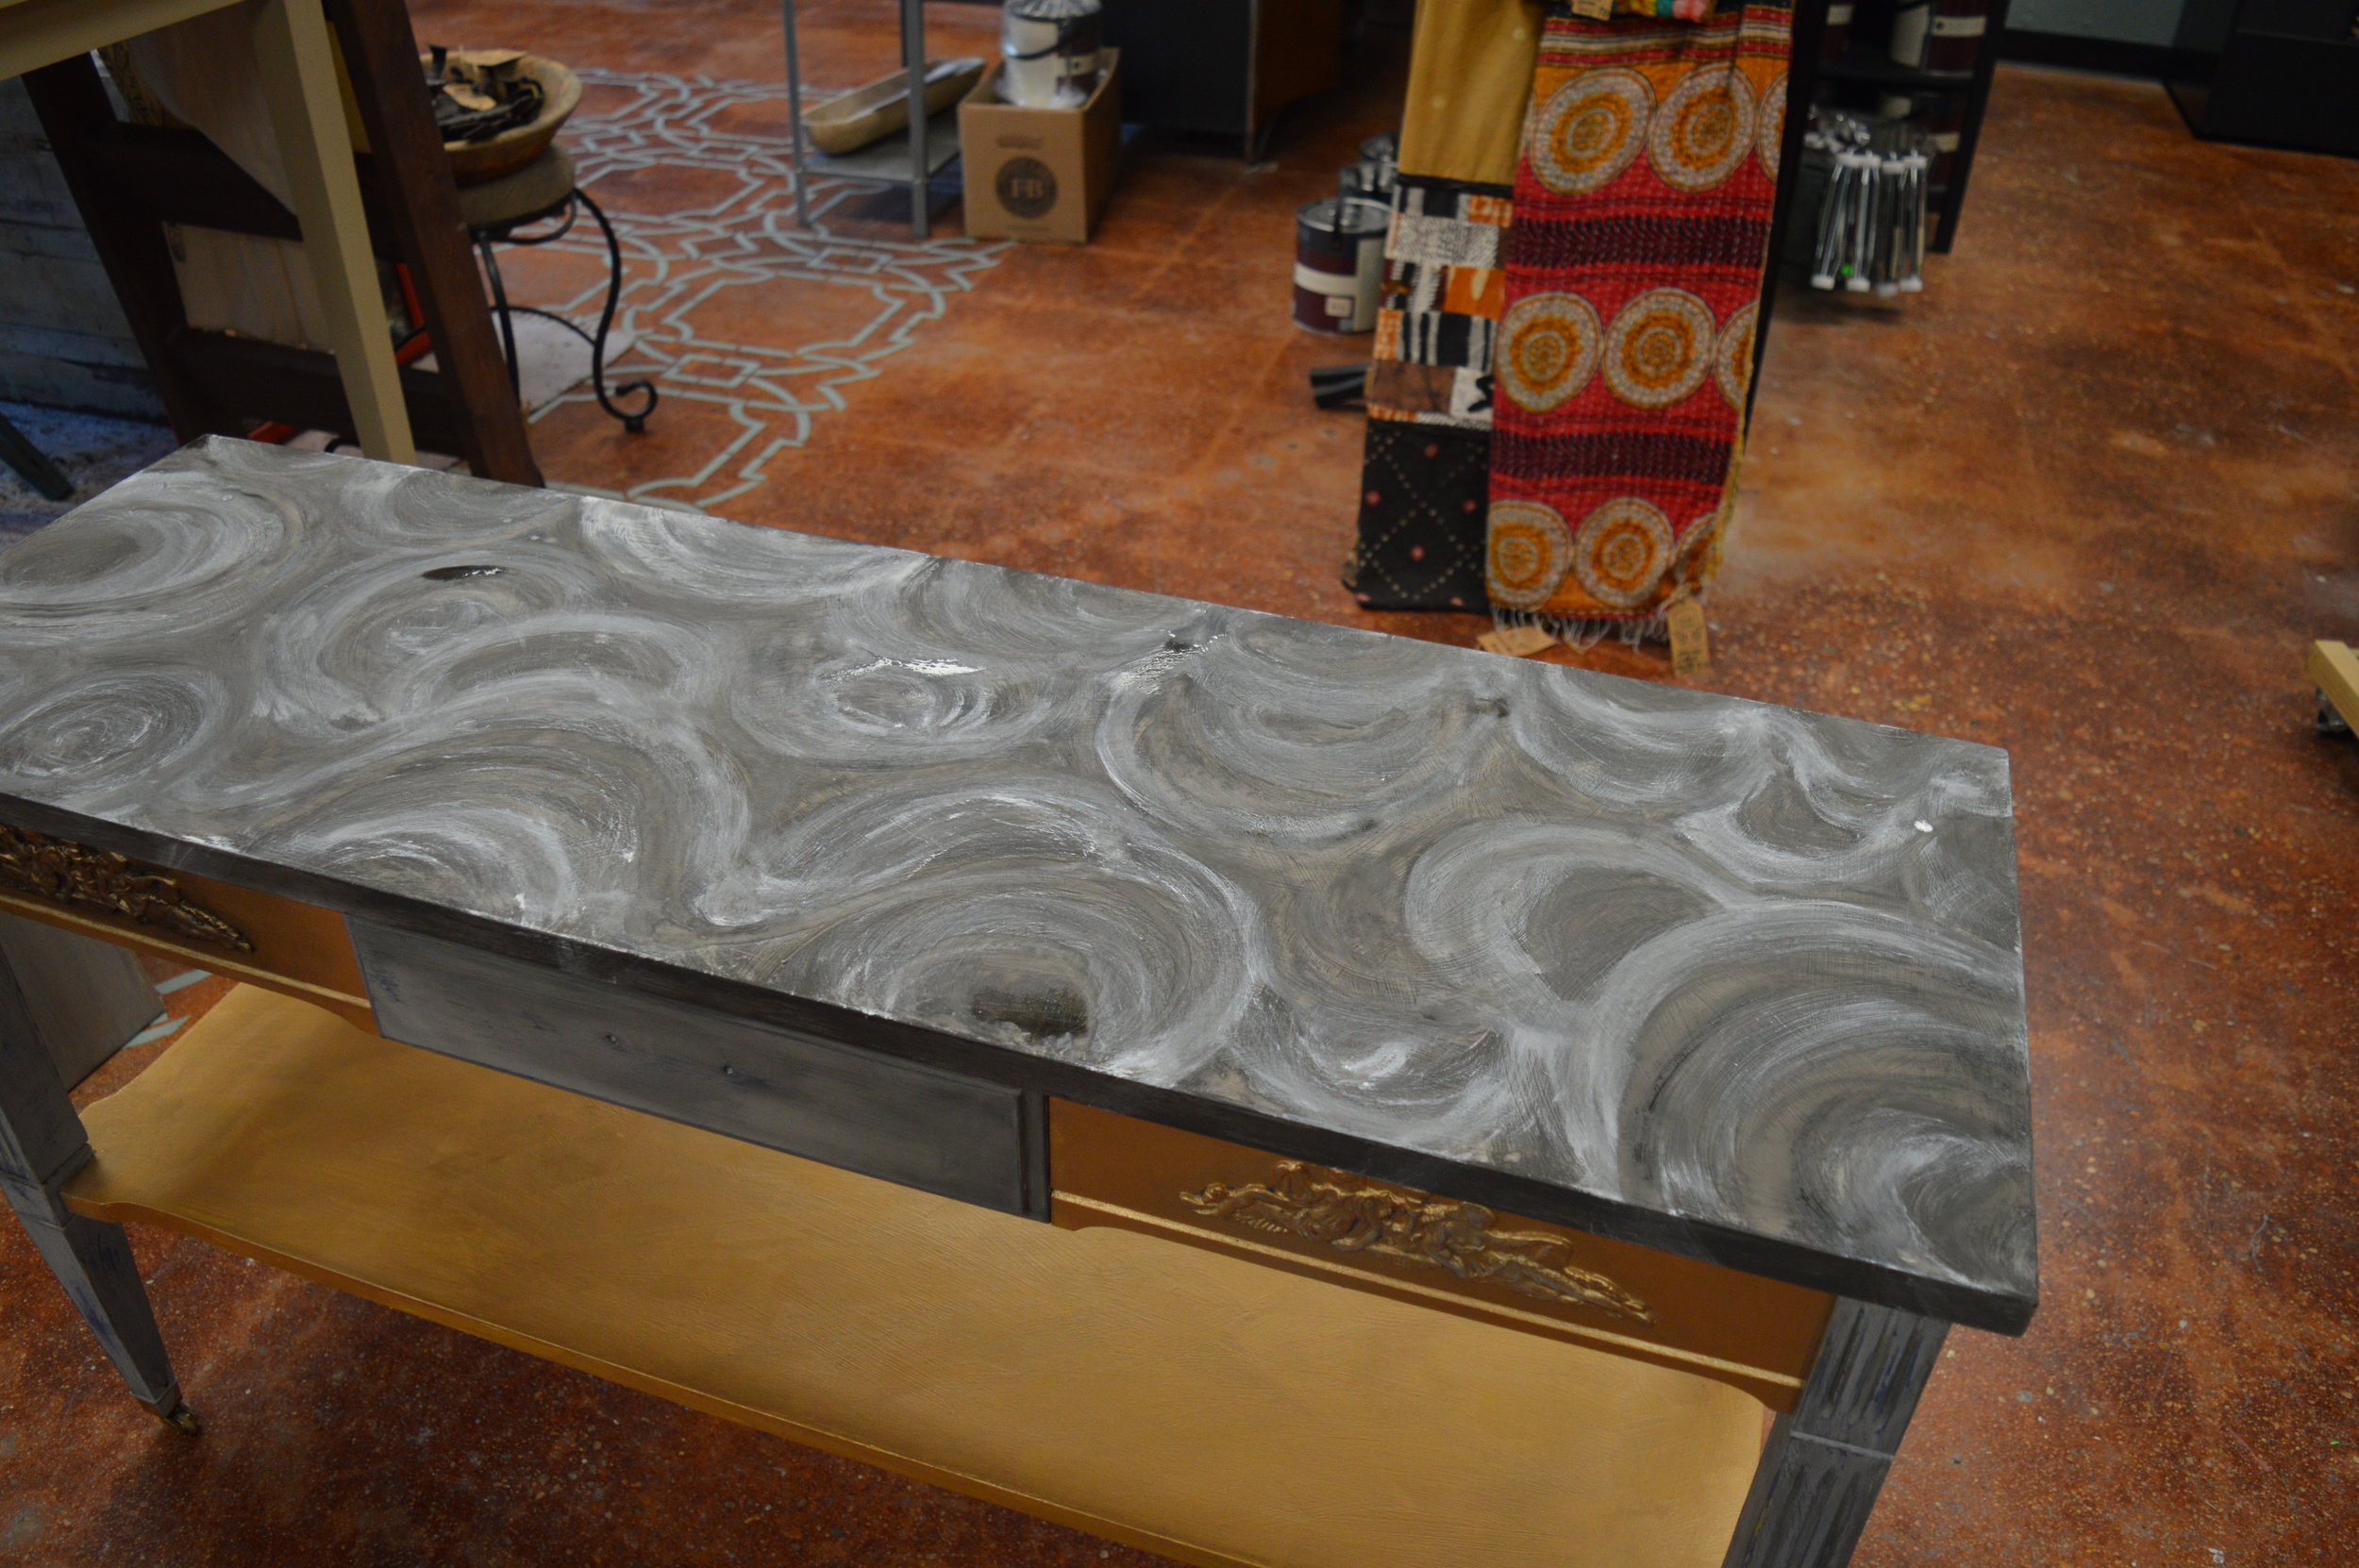
6. We added Chalk Paint® Black Wax around the Efex mouldings to enhance their appearance.
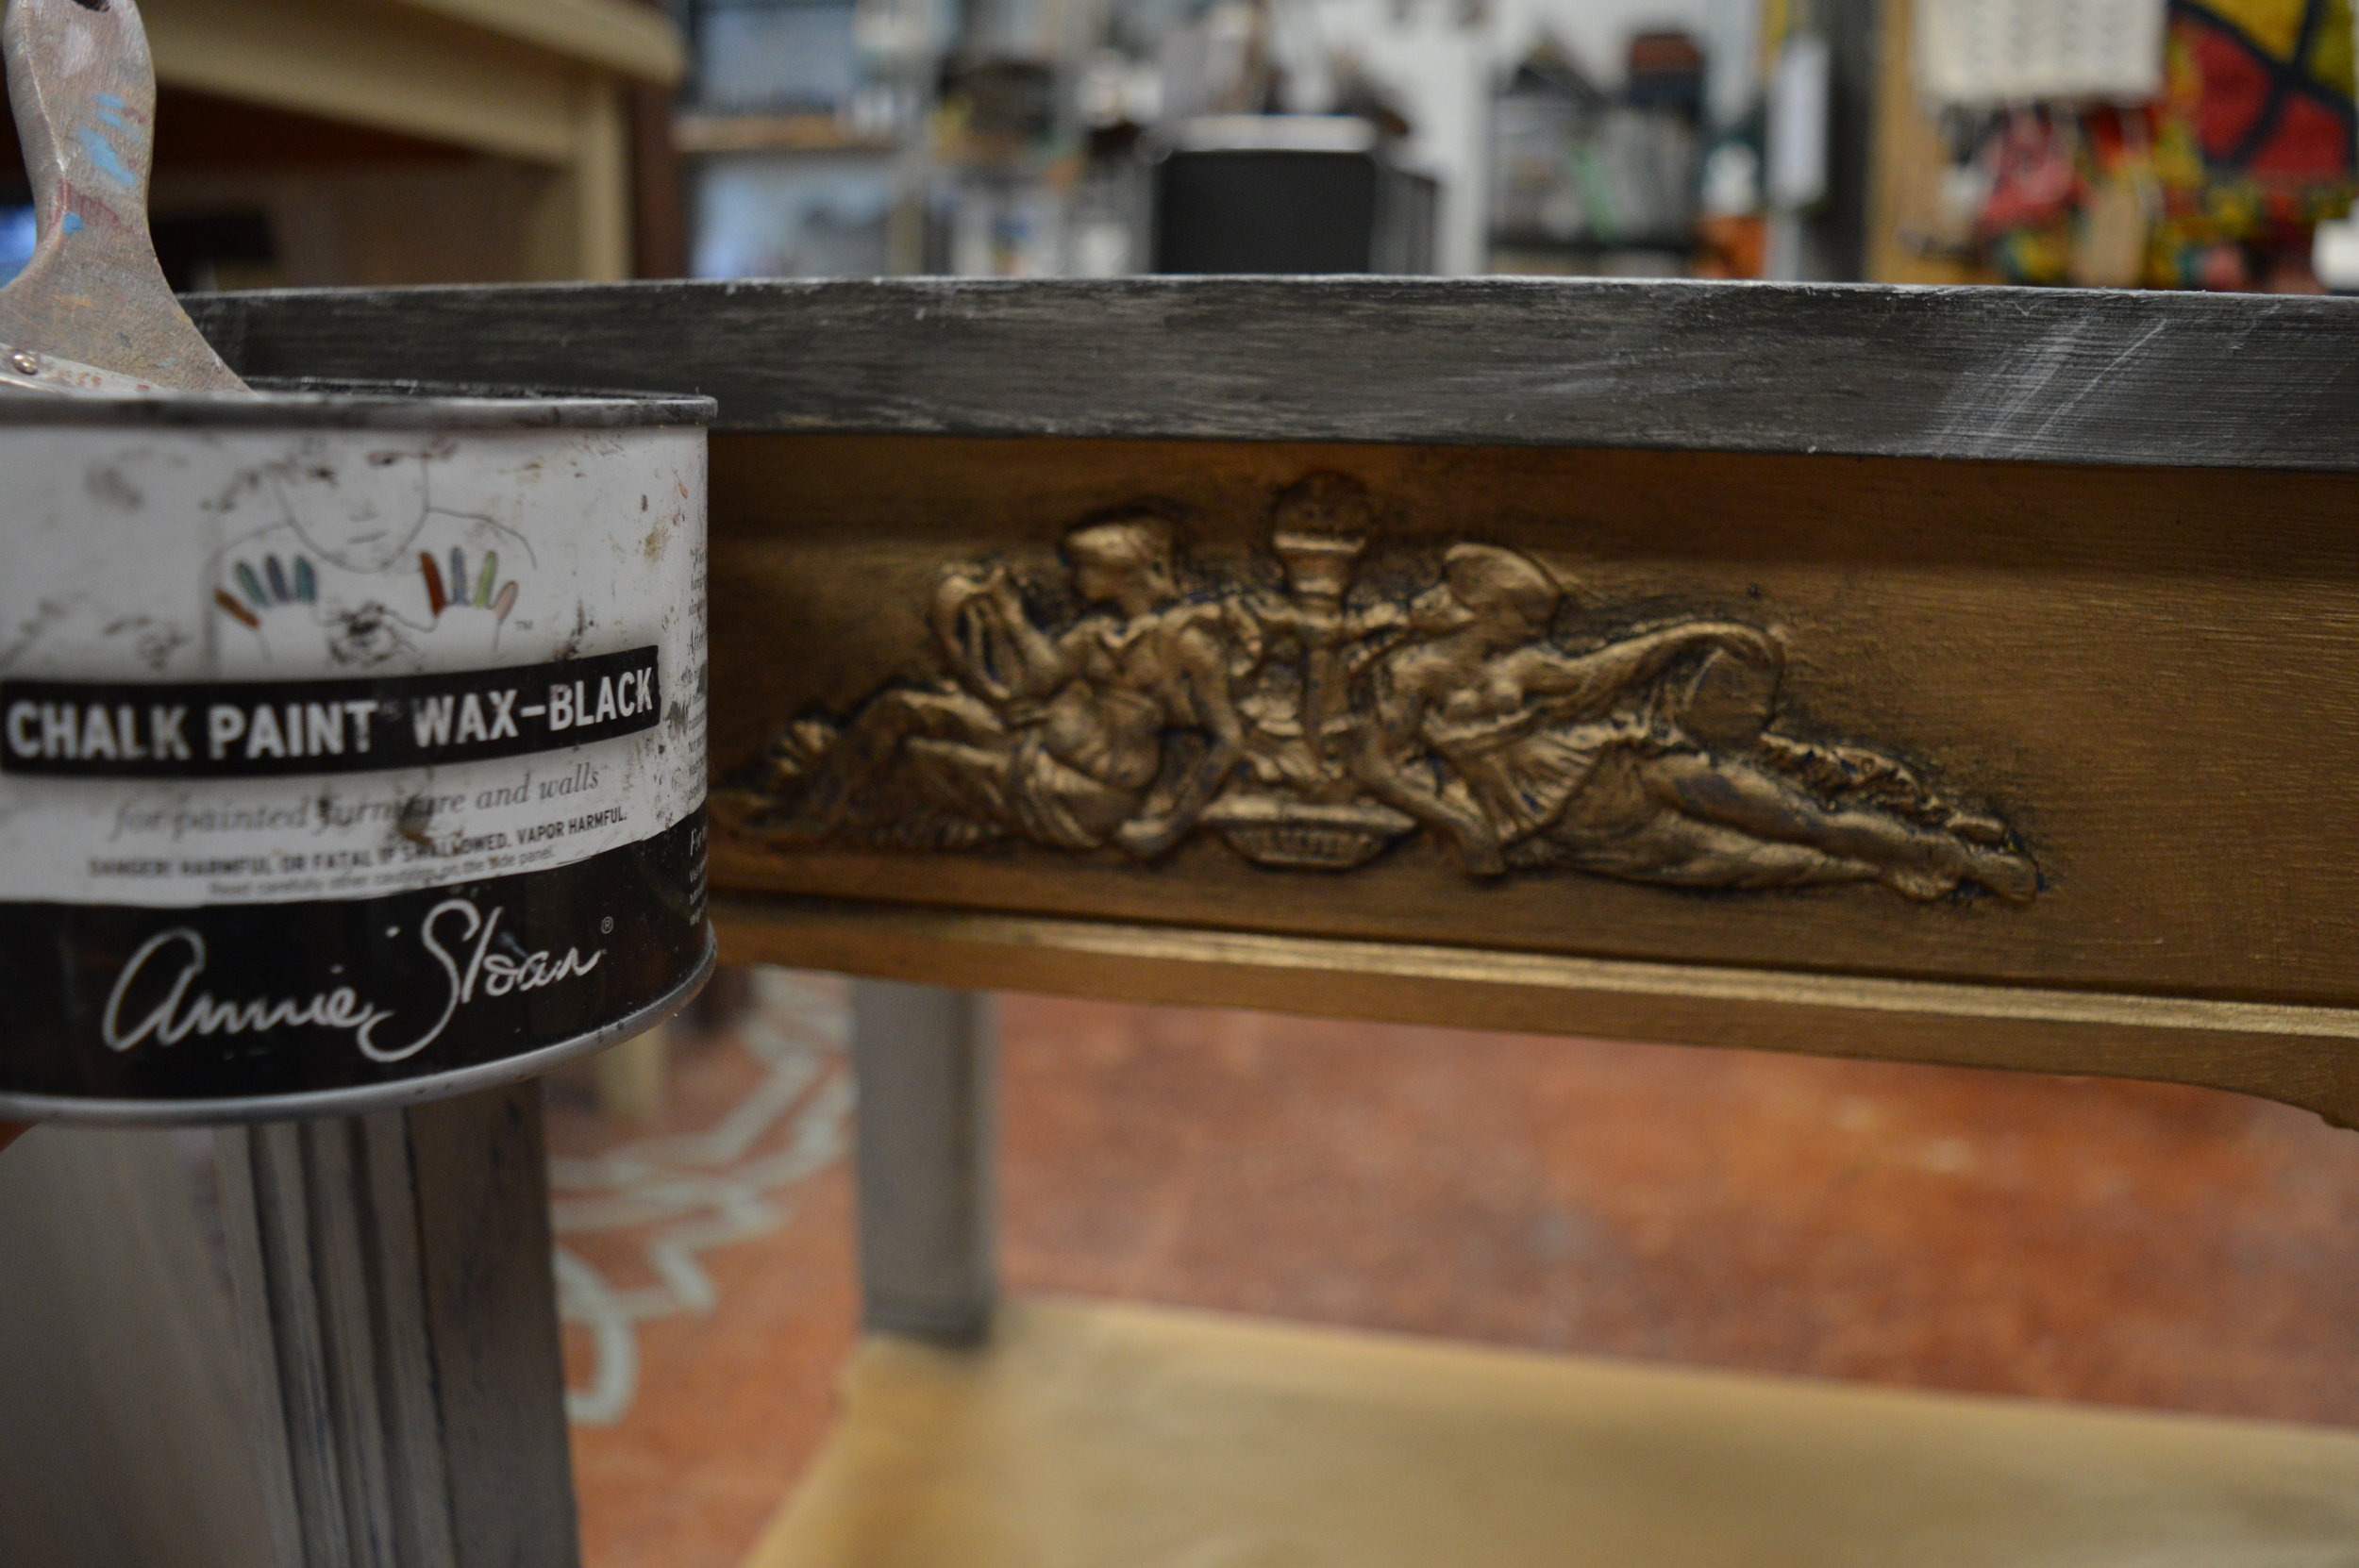
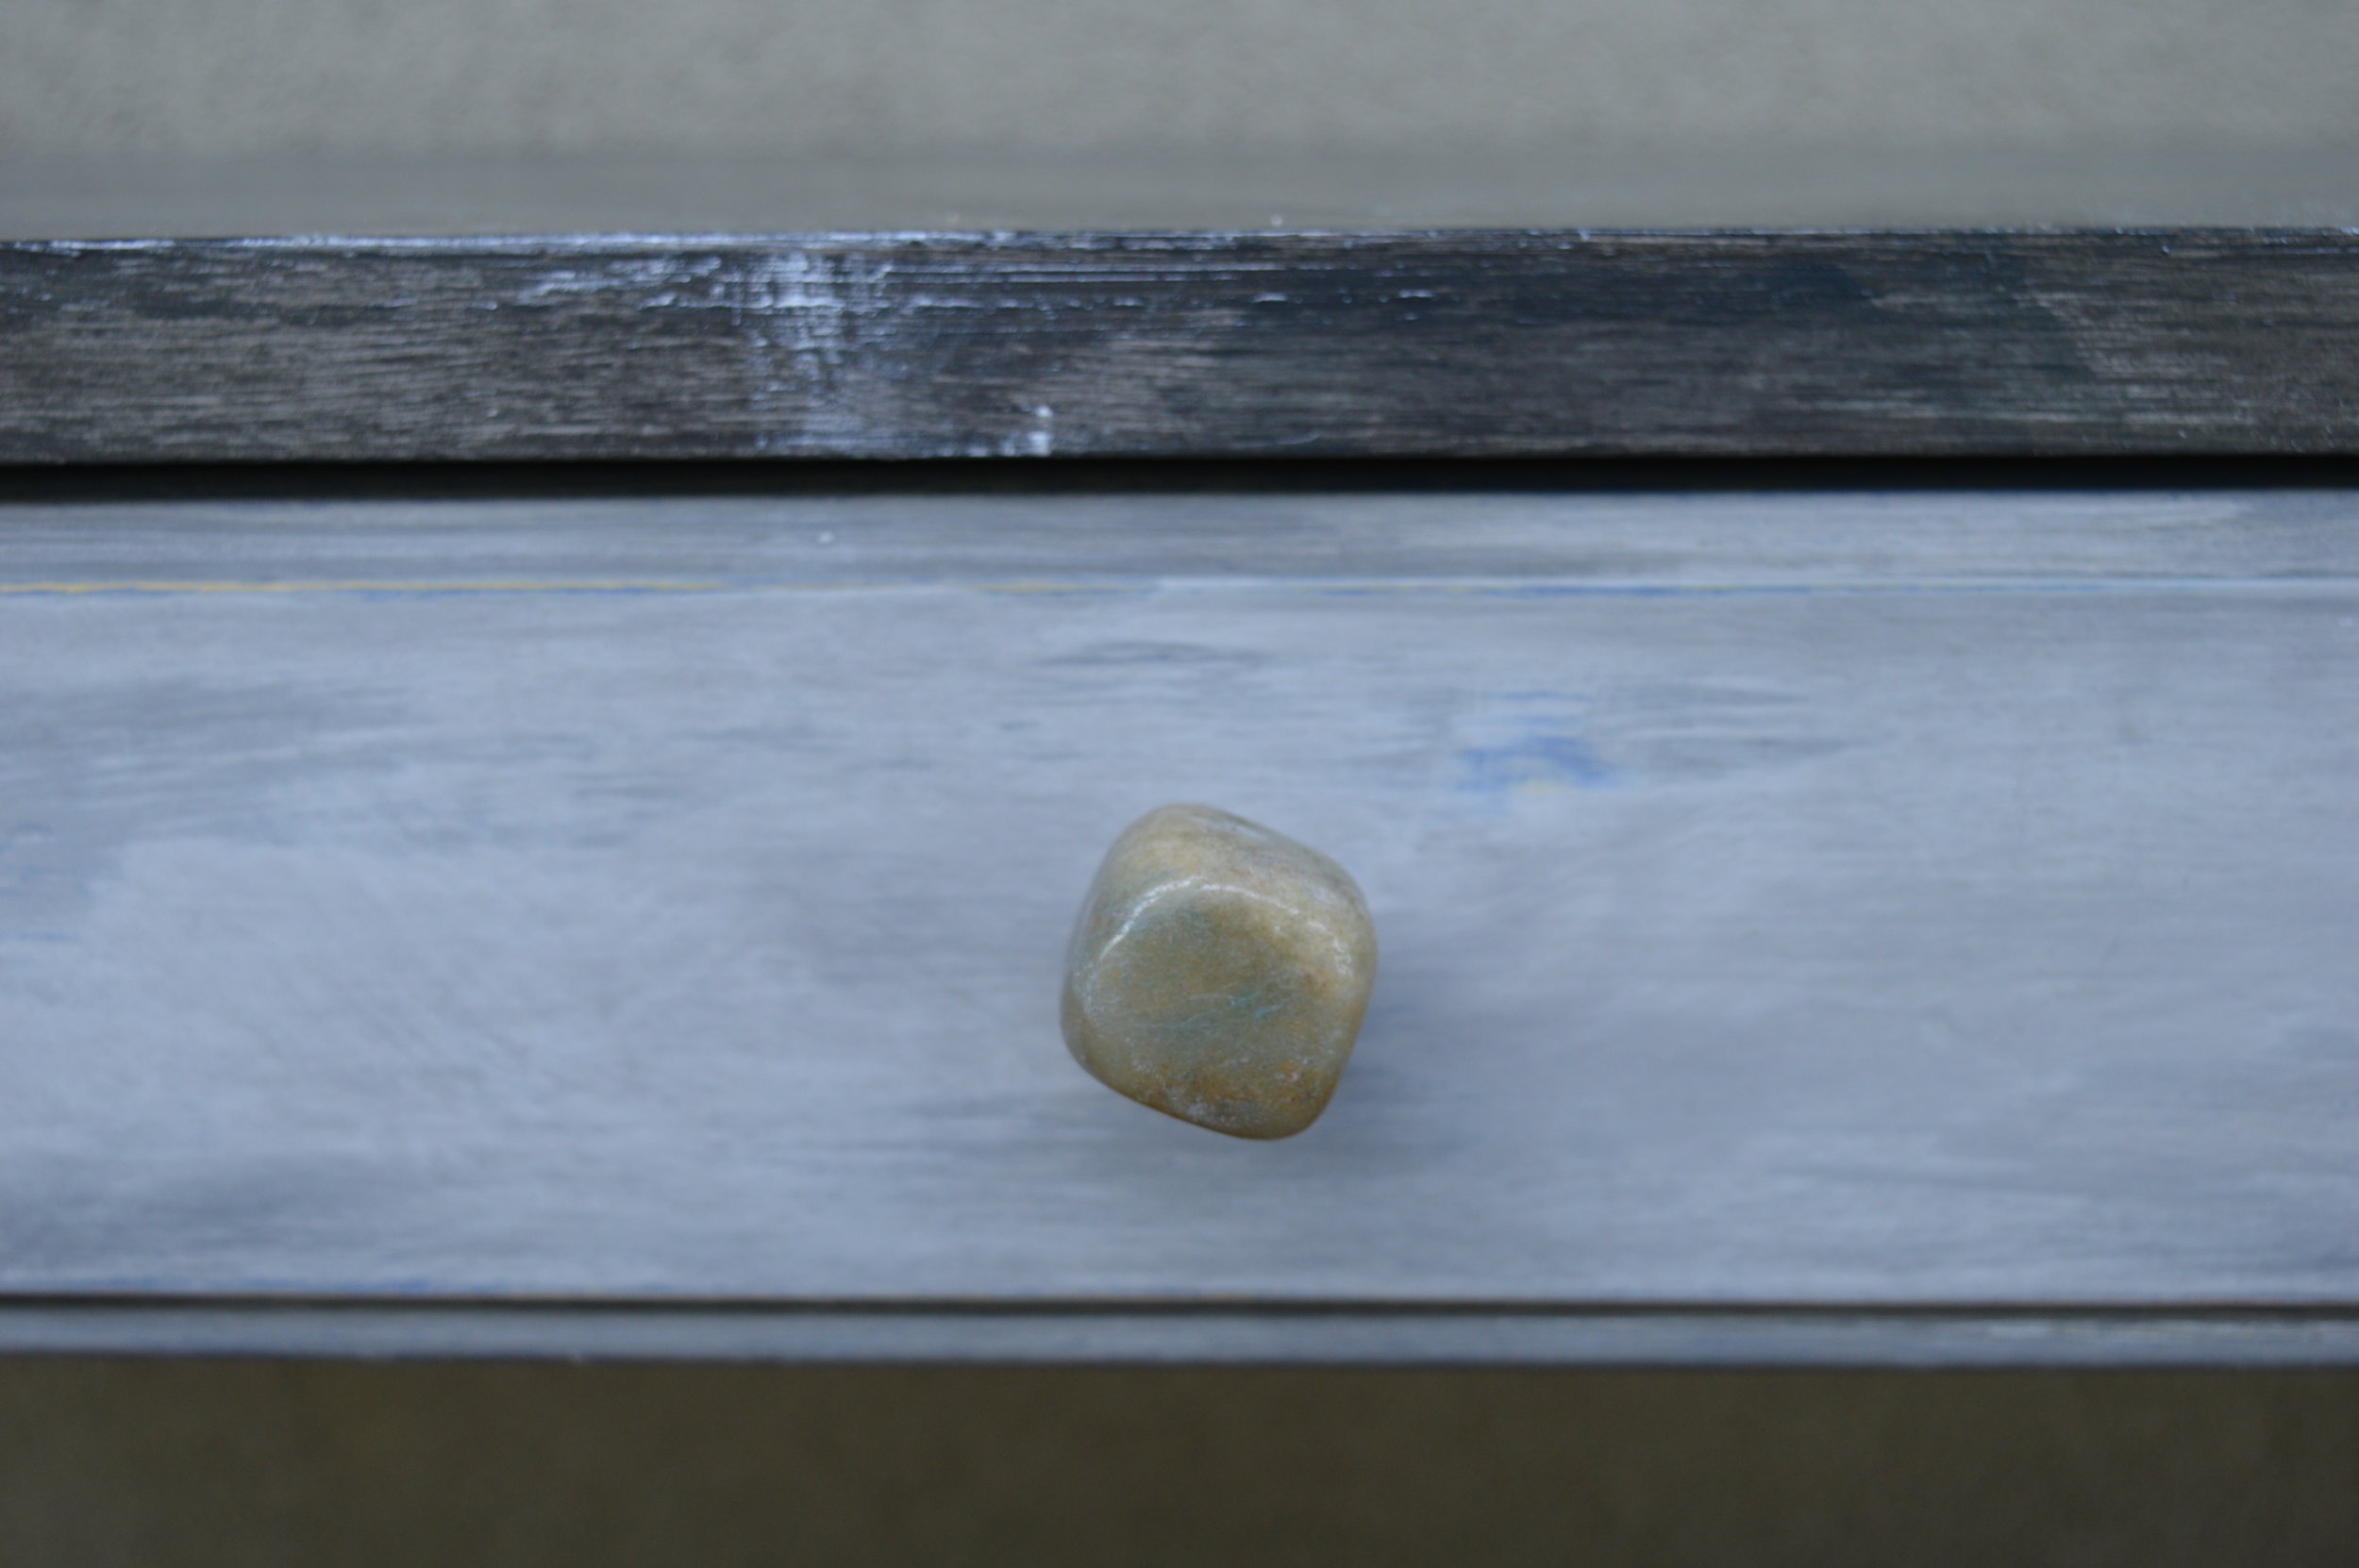
Check out our finished project! We couldn’t be happier with the quality and look of the Efex mouldings that we chose. We also replaced the knob with a stone one, to go with the faux stone effect in the top.


10 Small Yet Impactful DIY Decorating Changes for Smaller Budgets
We break down some ideas on manageable projects that are accessible budget-wise and lifestyle wise.

We’re clearly all about DIY and home interior upgrades here. When we work with clients directly or advise our DIY students and customers, budgets vary highly. Some people are working on higher-tier renovations, and some live in rentals that they are just trying to make feel more like home. For those living in rental spaces, completing home improvements might be limited to changing up furniture paint colors and adding exciting new throw pillows as accents, versus being able to re-paint cabinets or front doors for home-owners. But trust us, as we’re current renters ourselves, there are tons of upgrades that one can do that are accessible price-wise and mobility-wise.
Here are some ideas we’ve put together for anyone on a smaller budget or living in a non-permanent space, which are all are under $200 for the average price range involved:
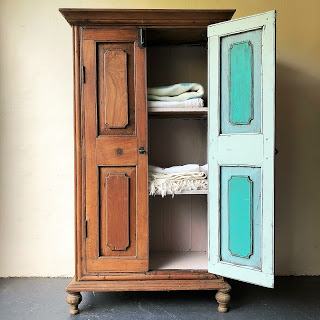
1) Paint your furniture to elevate your space, to make various styles feel more cohesive, and to just plain-old change up your scheme. ($45-$198, not necessarily including the furniture itself— this depends on whether you’ve owned it already or not.)
Whether you’re on a budget, have a varied collection of hand-me-down and thrifted furniture, or just love hunting older furniture with good bones, you CAN make your pieces feel updated and/or more cohesive. It’s great that these days we can find decent furniture in lower-cost ranges, including free (heck yes curb-side finds!).

images from Annie Sloan (left and center), and Farrow & Ball® (right)
With Chalk Paint® by Annie Sloan, there is little to no prep involved to get your furniture ready for painting other than cleaning them well. The bonus is this paint can be worked with indoors due to non-toxic properties and no to ultra-low VOCs, so it’s especially great for those of us who don’t have a garage or outdoor space to work in. Plus you can paint over basically any material (wood, plastic, you name it) and re-create any technique and look that you see.
Follow our FAQ guide on working with Chalk Paint® (the one and only!).

images from Shed Eleven (left) and Annie Sloan (right)
2) Create removable decoupaged drawer liners for kitchen, bathroom, or other cabinets for a secret pop ($25-$68)
Many rental situations come with less than ideal kitchen cupboard and drawer interiors, like old peeling liners and gunked up stains. Such is life. However, drawer liners are a classic fix to this situation! What’s fun is that you can create temporary drawer liners that have a bit more design pop to them these days. First find some cardboard (a great way to recycle, you can find free boxes off sites such as Craigslist) and cut pieces into the dimensions of your drawers. Then decoupage your favorite wrapping paper, napkins, wallpaper, or even fancier handmade papers such as from Paper Source to the cardboard. Then you can insert them into the bottom of the drawers once dried. If you move out, you could even reuse them in your new kitchen or bathroom if the dimensions are the same (or cut them down in size).
Don’t forget to smooth bubbles in the paper out as you go, and to finish the paper with your decoupage medium or even a more water-repellent medium in case the liners need to be gently cleaned.

image from Blue Eyed Yonder
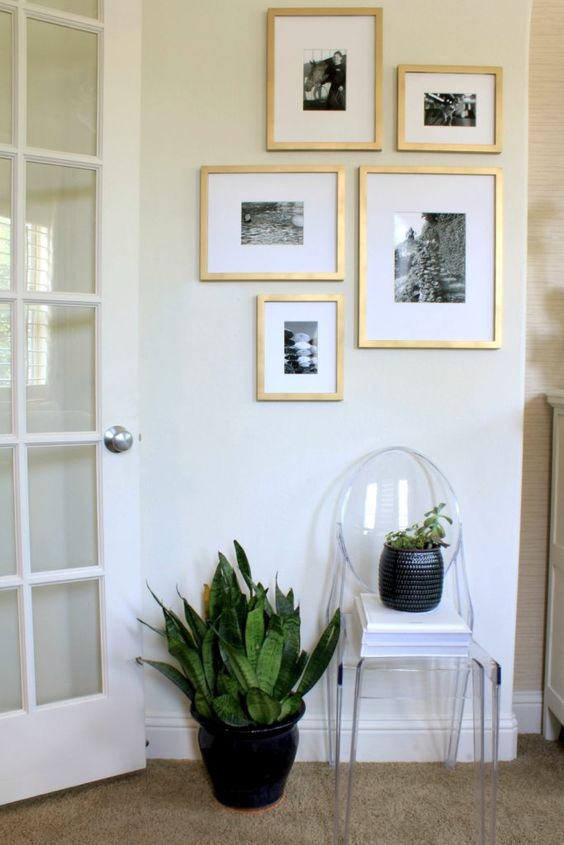
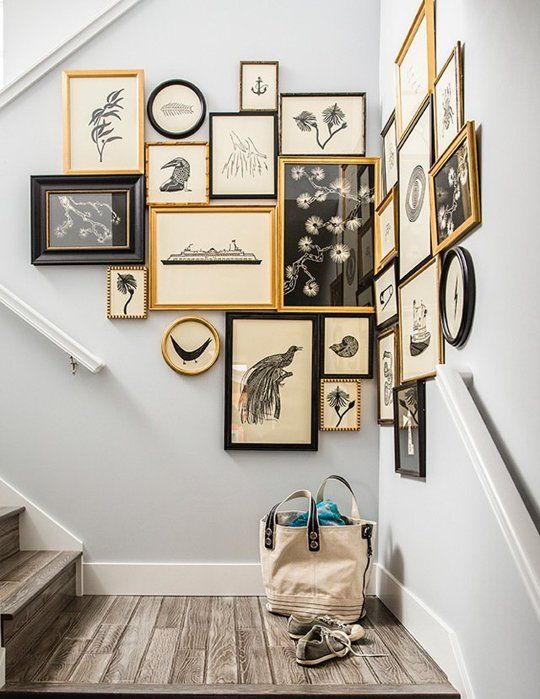
3) Add metallic gilding wax to the trims of collected frames for a gallery wall. ($11- $40)
Gallery walls have been in style for a while, and for good reason— they do serve multiple functional purposes. Large-scale artworks can be pricey, and so a gallery wall creates a large-scale scheme made up of multiple smaller parts; and a gallery wall is the perfect way to display your collection of cards, photos, prints, and more, to fit any style. A budget-friendly way to do this is by collecting frames from thrift stores and yard sales first, and then alter the frames (if desired) to be more cohesive together— because, let’s face it, if you’re collecting multiple frames from all over the place, their designs probably won’t match (although that could be a style unto itself, but that’s another story). Making them all the same color or appear to be the same material can be done in a glam way with GILDING WAXES.
Gilding waxes are magical. Choose from a few different shades, and simply apply the wax over your frame material. Hang the frames once dried. Check out this great guide from Apartment Therapy on how to decorate your gallery wall. You can rearrange your frames anytime, including if you move.
images from ehomedecorations.com (left) and Thomas J. Story via Apartment Therapy (right)
4) If you rent and have a landlord that is very encouraged by you making tenant improvements or will do rental reimbursement after ‘improvements,’ inquire about painting a bathroom vanity, or even an accent wall. ($70-$150)
Not all landlords do this, but if you’ve lucked out, use tenant improvements to your advantage. Take on smaller-scale improvements first, such as painting a bathroom vanity or painting an accent wall, and see where that takes you. Some landlords or agencies might have you re-paint a wall back to their choice color upon moving out, but if it’s still a worthwhile project for you and your space, this can work wonders! And if you own your home, this is a more budget friendly way to start repainting your interior.
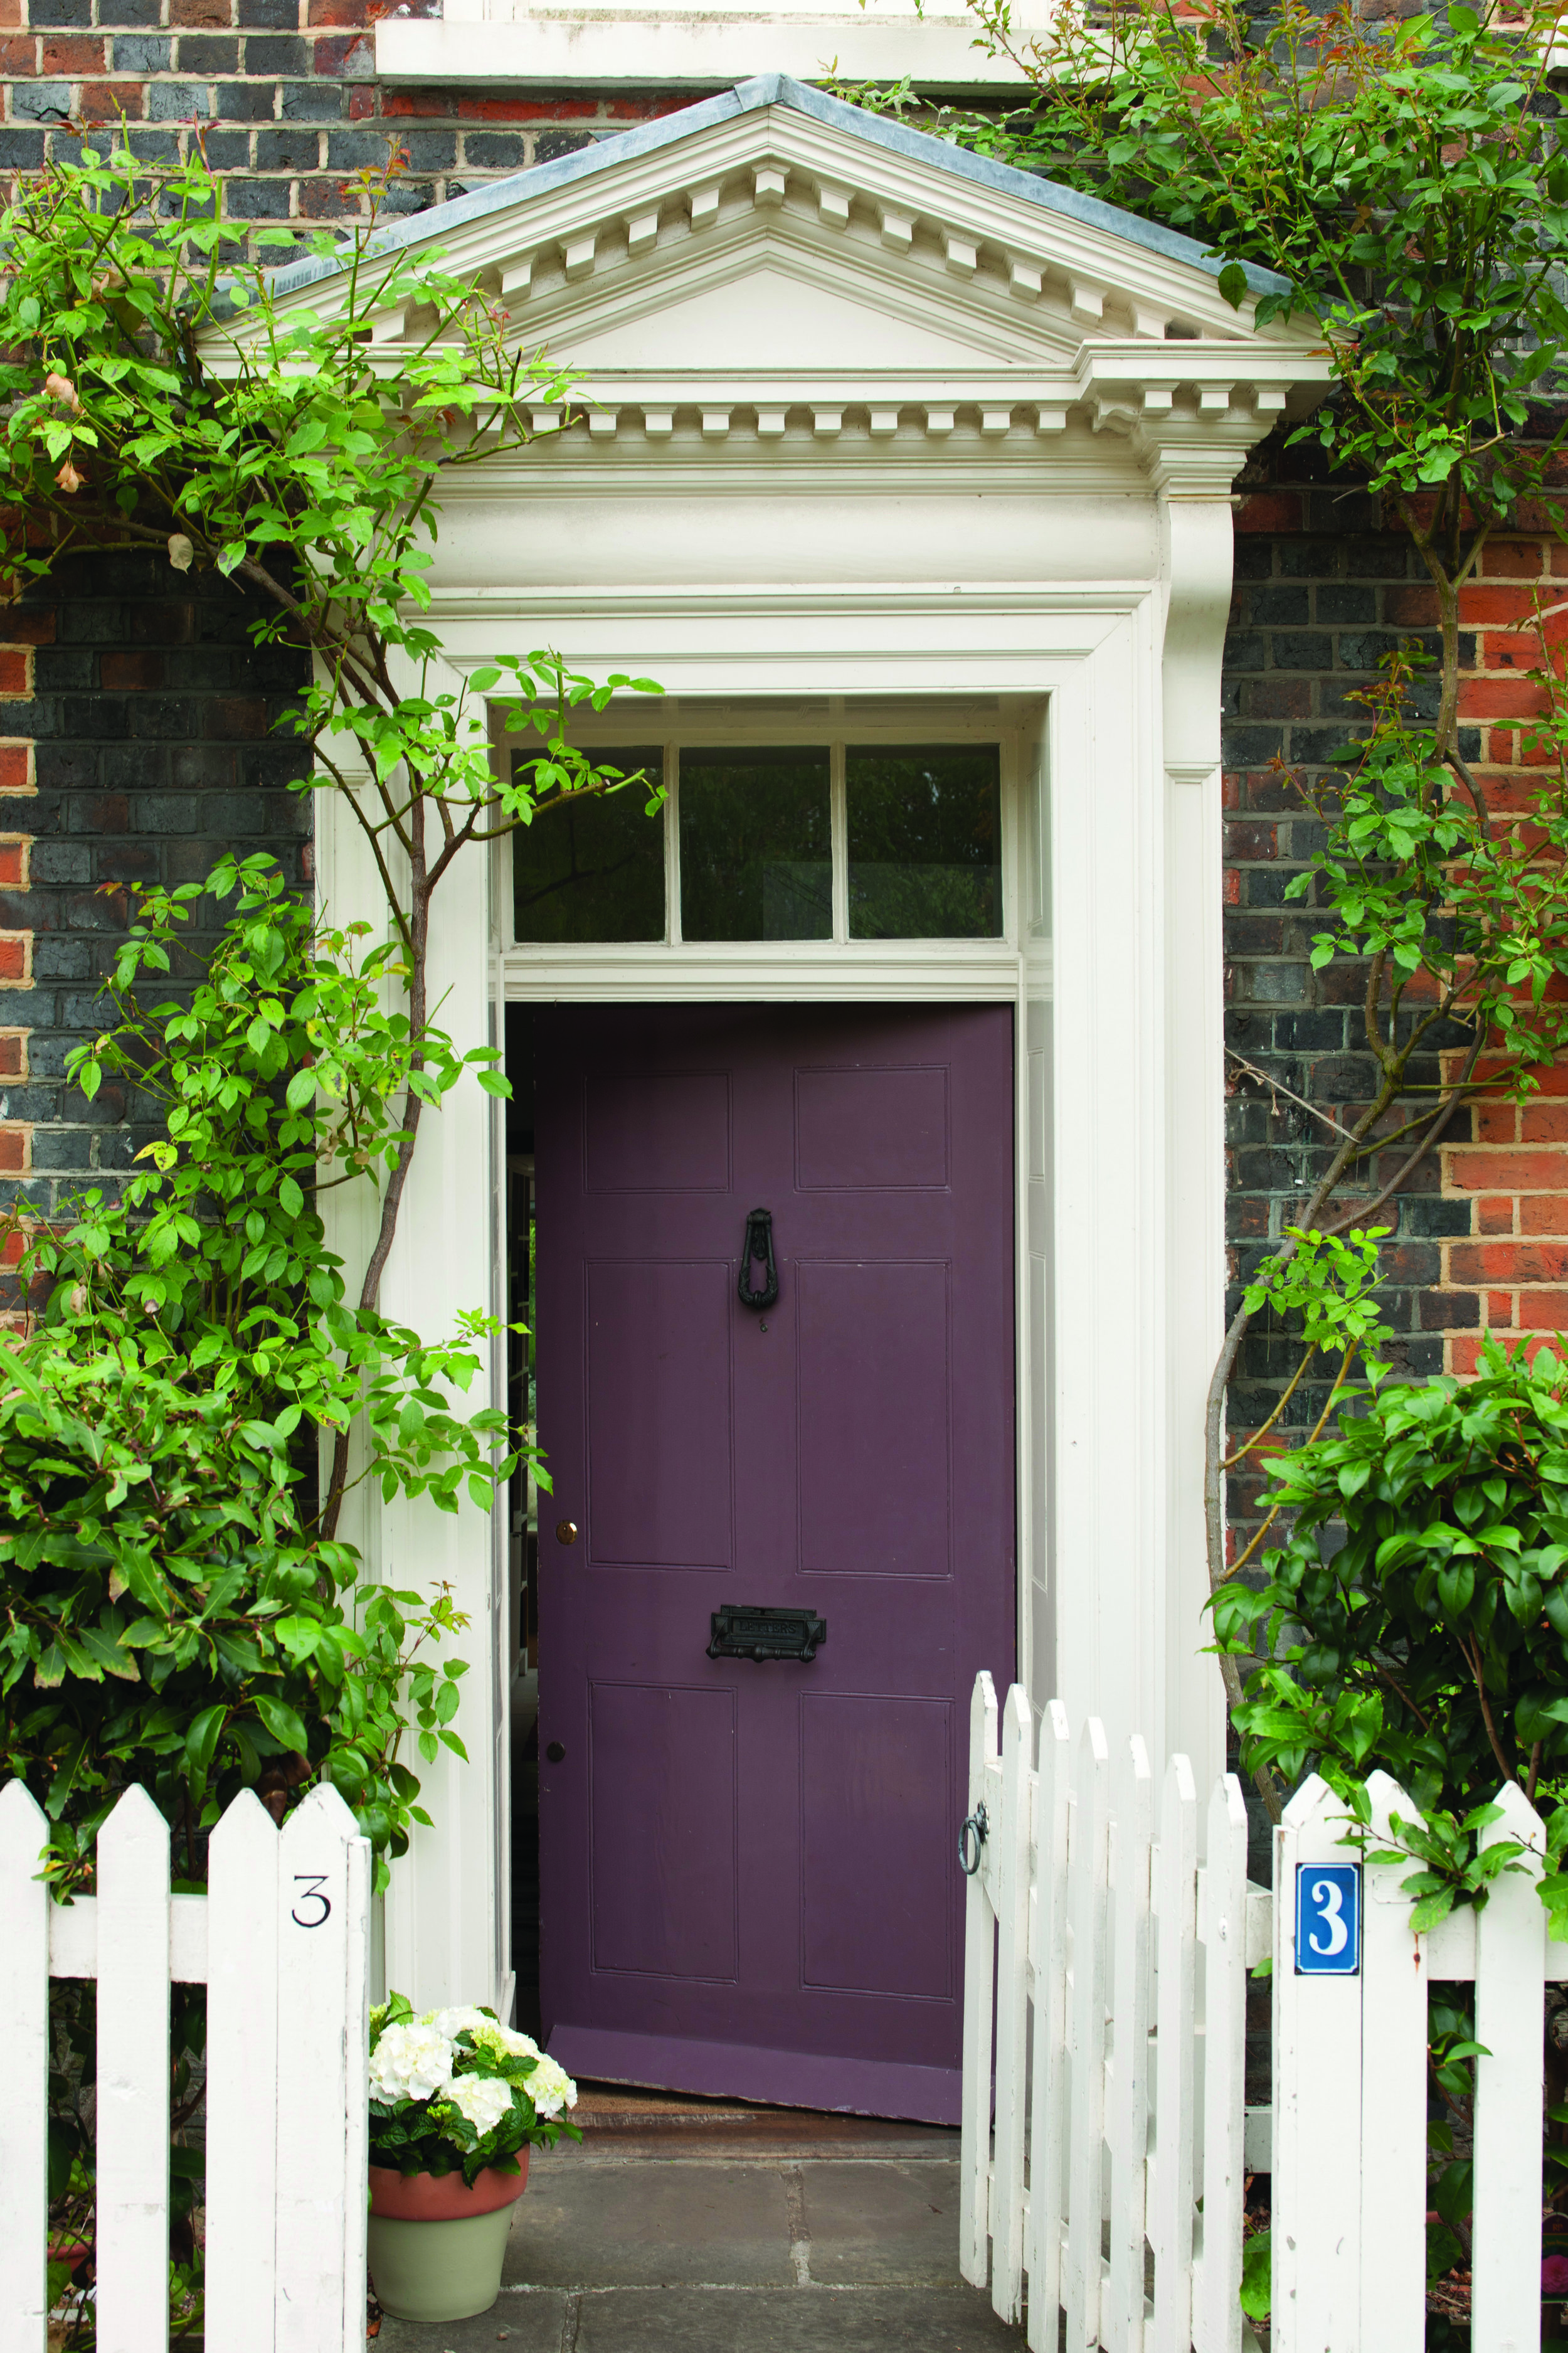
Check out these lovely inspiration photos with projects done in Farrow & Ball® Paints. A gallon of F&B paint typically covers way more than other premium paints out there, has more color depth, and literally cannot be matched at other paint stores. They are also no to ultra-low VOC and non-toxic in formula, so F&B paints are ideal for any home, especially for smaller spaces and rentals. For walls, check out the dead-flat Estate Emulsion for low-traffic walls, and matte Modern Emulsion for high-traffic walls like in kitchens, entryways, and bathrooms.
images from Farrow & Ball®
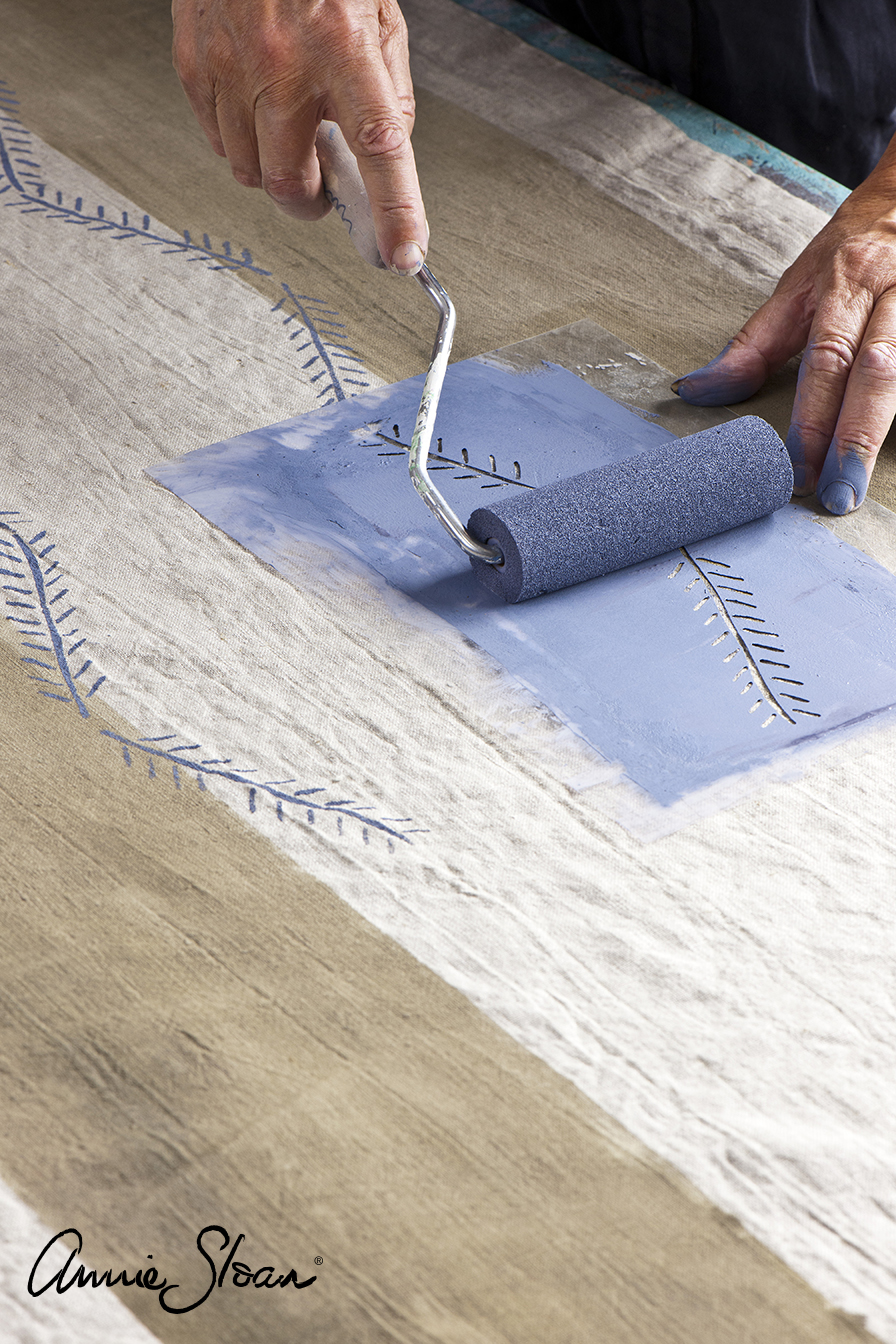
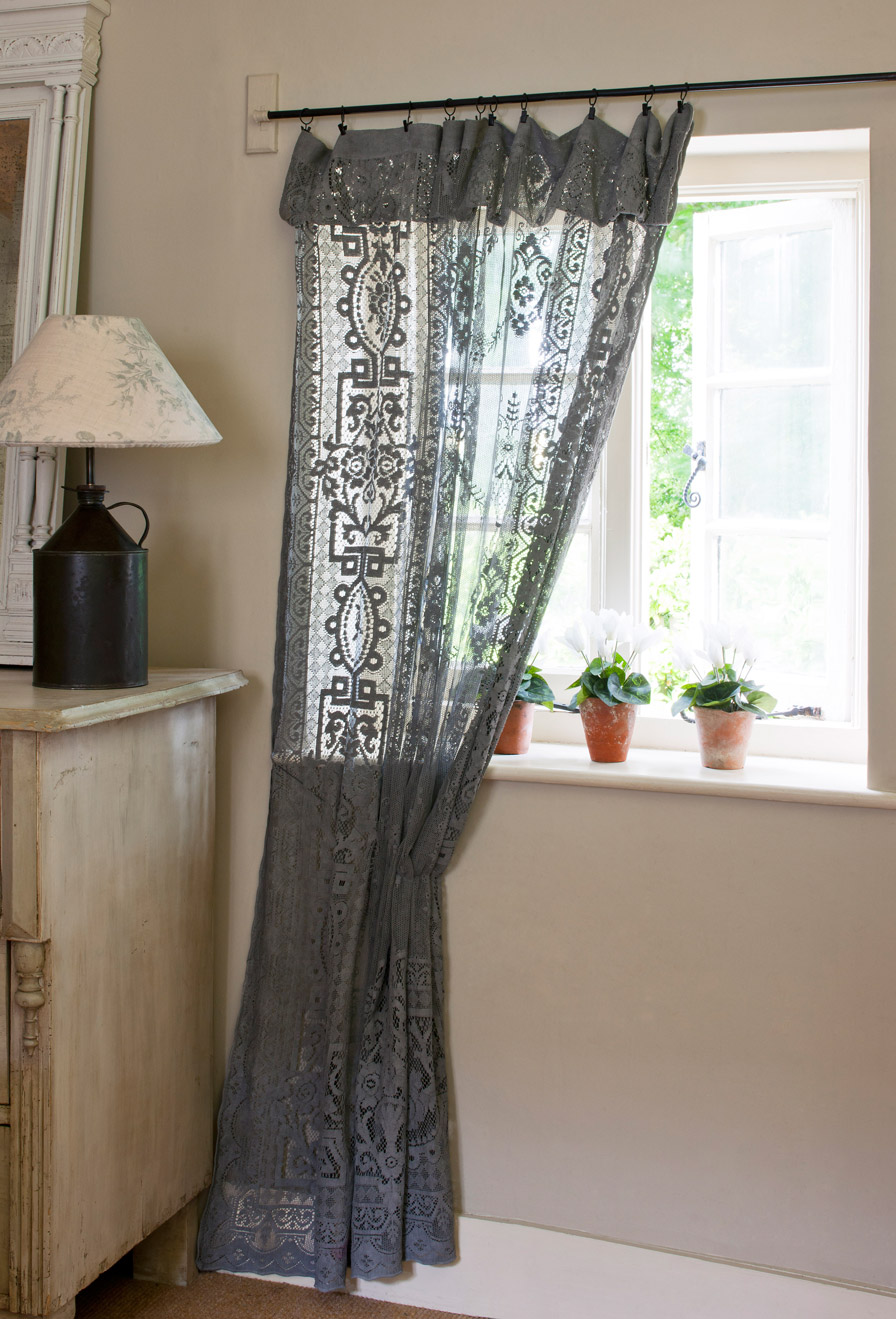
5) Update and/or add fabric items, including painting upholstery and dying or stenciling fabric with Chalk Paint® by Annie Sloan. ($15-$150, not necessarily including the cost of the furniture or decor items themselves— this depends on whether you’ve owned them already or not.)
Add curtains for privacy and decorative effect! Add a cool stenciled pattern to revive that old jute rug of yours! Dye or stencil inexpensive pillow covers! Working with Chalk Paint® has benefits that we’ve addressed many times in this blog, but who knew you could also paint and dye fabric with it? You absolutely can. Read this simple-step blog from Annie Sloan herself on dying lace curtains to look chic as ever (you know, ones that you can find at every single flea market, yard sale, and thrift store).
images from Annie Sloan
You can even recreate painted upholstery on worn out chairs with fabrics from linen to leather (just know that this isn’t necessarily a project suited for every single upholstered piece, but chat with your local Annie Sloan stockist like us for the best advice). Hometalk has a great before and after blog post on painted upholstery with Annie Sloan.

image from Hometalk
6) If you have a patio, balcony, or yard space, paint all the various styles of collected plant pots into a cohesive color collection with Chalk Paint® . ($25-$50, not necessarily including the cost of pots themselves— this depends on whether you’ve owned them already or not.)
We’ve collected so many pots over the years with various patterns, colors, and materials. Some were found for free at the curb, and some were acquired in other inexpensive ways (don’t get us wrong, you can certainly splurge on a new pot from the hardware store or your favorite ceramicist). However if you want to tie them all together, a great way to do so is paint them all in one color for a seamless look, or mix and match complimentary colors and patterns with paint.
Chalk Paint® , again the solution for almost everything, can be used outdoors. On porous pots, you don’t even need to seal them since heat and sun will bake the clay of the paint into the pores. We enjoyed this post by blogger Nicolette Tabram on her pot-painting journey, and you should read it too.

image from Nicolette Tabram
7) Change the hardware on one or a few of your furniture pieces or cabinets. ($15-$85)
This is perhaps one of the smallest yet most impactful changes one can make without changing the finish on furniture and cabinets themselves. If you rent, keep and store the old knobs and pulls and just change them back when you move out! We here at Silk & Sage especially love the unique knobs and pulls from Anthropologie, however there are plenty of fun and budget-friendly hardware sources out there.
BONUS IDEA: change out a light fixture if you feel daring enough (and ditto, reinstall the old fixture when and if you move out).

image from Anthropologie
8) Lovingly placed plants work wonders. ($0-$75)
Choose plants that work with the amount of sunlight you receive as well as your lifestyle. Seriously, doing so will not only change your space but will also elevate your mood. If you have a green thumb, you don’t have to buy new— just watch for plant sales and browse Craigslist including their ‘free’ section, because people often let go of plants that they think are dead but have plenty of life leftover once revived with patience. Don’t forget to choose pet-friendly plant options too! Check out Apartment Therapy’s Indoor Plant Finder Guide and Guide to Indoor Plants for Small Apartments.

image from POPSUGAR.
9) Add more storage space wherever you can with good-looking DIY shelving. ($15-$65)
This is a perfect change or addition on a couple fronts: shelving adds character to your space as a design element while offering nooks for your other decor items (picture frames, crystals, books), and shelving adds more practical organization and storage for limited areas such as small kitchens.
First measure the space where you want the added shelving to gauge the best dimensions for the shelving itself. Then cut a wood board (or multiples as needed) to the correct size— most hardware stores or lumber warehouses will do this for you for no to low added cost. Then either paint, stain, or oil the shelves to fit your design scheme. Attach to the walls sturdily by resting the shelving on cool brackets (we love these from Anthropologie) or making hanging rope ties. Don’t forget your level, measuring tape, and screw anchors!
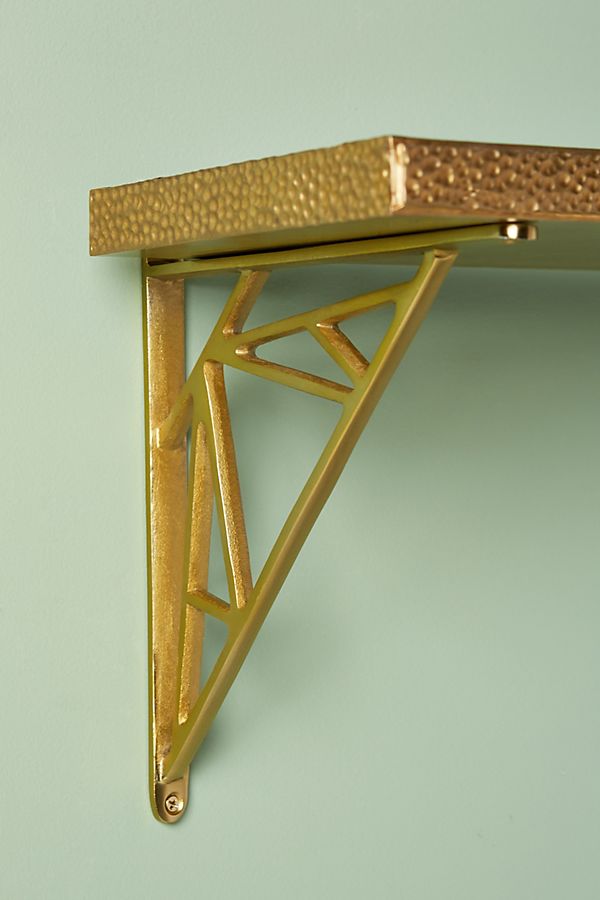

images from Anthropologie (left) and Annie Sloan (right)
10) Add a mirror to a smaller space to open it up— a tried and true solution! ($15-$195)
Home owners and renters have incorporated mirrors into their style scheme for almost any reason (do you really need an excuse?), and when used correctly, a mirror can open up smaller rooms and spaces. Just pick and choose your favorite style per your budget— and if you need to change up a thrifted or outdated mirror frame, just paint it or use metallic gilding waxes.
Isn’t this mirror from West Elm just dreamy?
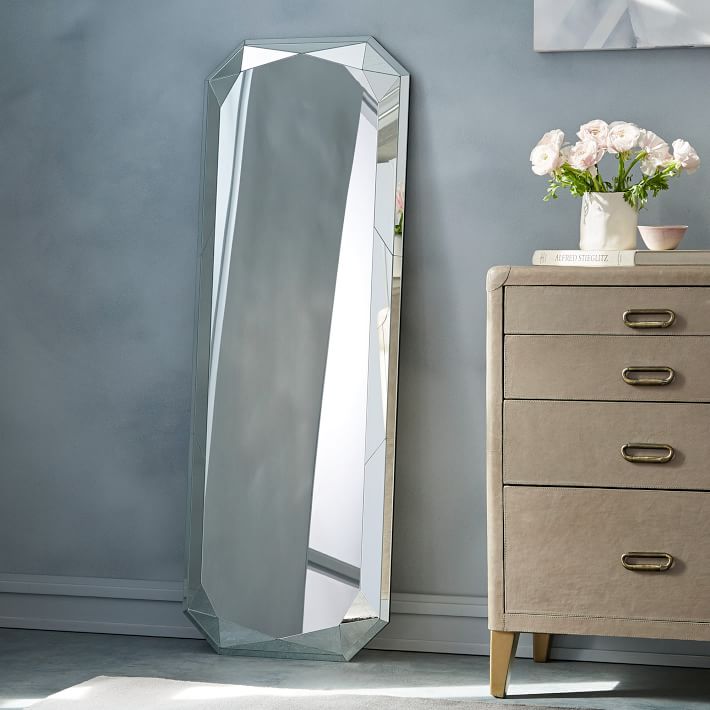
image from West Elm
These are just ten of many possible changes that can make your space feel more personal, no matter if you are renting or can’t expand yet on all the changes you want to make in your home right away. Some of these price ranges may vary due to the depth of your project, what kind of painting techniques you may do, etc. Also, please note that we are not affiliated with the links, retailers, and blogs provided other than with Annie Sloan and Farrow & Ball® . The other links, retailers, and blogs are just some that we have been inspired by and felt we should share with you too!

How to Open the New Chalk Paint® Litre Tin Lids
Have you bought an updated litre of Chalk Paint® but not been sure how to open the lid easily? Using these tips it should be a breeze for you.

Hello! Happy February. Our 2019 is in full swing, how about yours? Part of our new year has been an introductory to the updated packaging for the new Chalk Paint® litres. Have you tried the ‘global’ Annie Sloan paint yet? In case you’ve missed it, Chalk Paint® recently got a tiny update on the amount of clay in the formula, and therefore will be a little bit thicker in feeling going forward. We’ve been LOVING how creamy it is, and dare we say we didn’t know how it would ever possible for Chalk Paint® to get any better than what it’s been (since it’s so dreamy)… but it has. Our students and customers have been loving the update too.
The other part of that update is that the large tins will be transitioning over to litres from quarts, so you’ll be getting a tiny bit more bang for your buck as well. Opening the litre lids is a little bit of a learning curve, so we decided to highlight the best ways to open the lids without mangling them. All in all, they will be easier to press shut with just your hands going forward (instead of hammering them shut, eek).
Opening the tin
Ease the tin opener between the top of the lid and the edge of the tin.
Apply slight pressure and lift upwards.
Turn the tin a few degrees and repeat the motion. You will feel the air tight seal break and hear a “pop” noise.
Continue turning the tin until you have covered the whole circumference of the lid before attempting to pry the lid completely off.
Be as gentle and light handed as possible.
Following these steps will prevent the lid buckling or damaging the tin.
Closing the tin
To secure the lid after use, set in place on the top of the tin.
Place both palms on the lid and apply pressure down until you here a “pop”.
*The Wax, Lacquer, and Chalk Paint® tins are all the same, so you can use this method with every Annie Sloan tin. All metals are susceptible to some bending and denting if not handled gently.
If you haven’t made it to the ‘new’ formulated colors yet, visit us to get a quick painting demo to try it for yourself!
Happy Painting :)
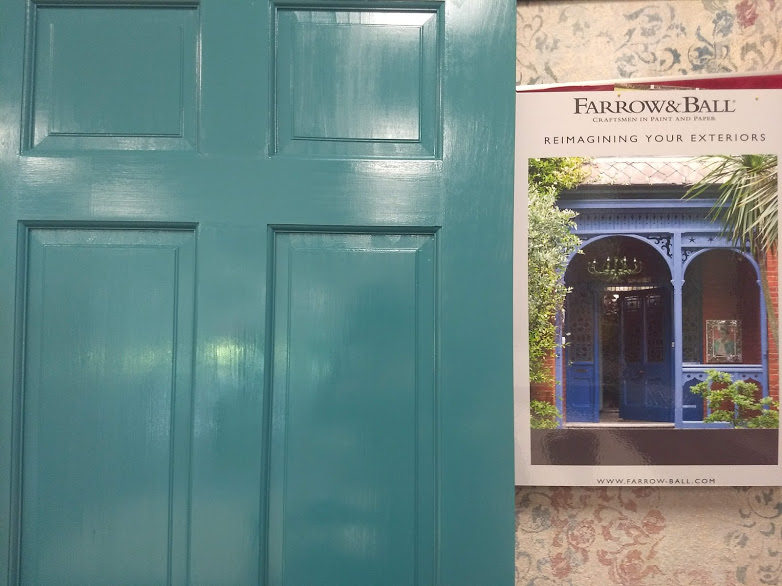
How to Paint Your Front Door with Farrow & Ball®
Some great tips and tricks for painting your front door with F&B paints!
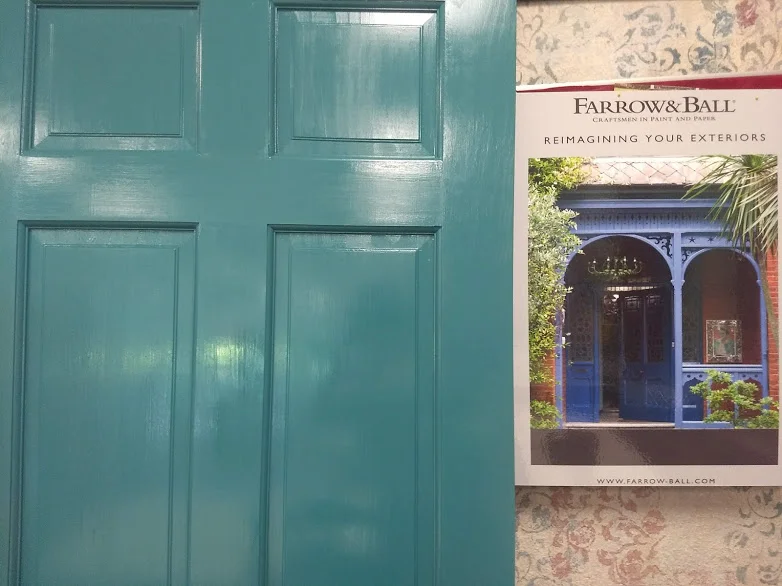
We were joined last week by Ben McCabe from Farrow & Ball® for two free demo sessions on how to paint your front door, which was helpful for not only door projects but also for any projects in which someone might use F&B exterior-grade paints. In case you missed it, we have a little recap for you! The luscious color featured on our large door and smaller demo sample doors is Vardo, in case you want to replicate the look.

First off, why work with Farrow & Ball® paints? F&B has been around since the 1940s and is well known in the design and home-improvement community for their durability and eco-friendly paint properties, as well as for their fabulous colors and sheen levels. Their paints have more pigment and paint solids in their recipes so more solid coating and color is left behind once the paint dries, which is best for longevity and wear. Also their paints are water-based containing no acrylic or latex.
For exterior projects we always go with their exterior-grade paints, which are the Exterior Eggshell (20% sheen), Exterior Masonry (2% sheen), and Full Gloss (95% sheen)... and Exterior Eggshell and Full Gloss are for those exterior metal and wood projects. For wear and longevity we also always follow their recommended primer + paint process. We choose the correct primer for the job (please visit our F&B Primer Guide Page) and add one coat, then apply 2 coats of the correct paint for the job. This will ensure the paint adheres correctly and stays true to color, per their warranty on exterior-grade paints.


Here are some great tips specific to painting doors with the paint:
- Always make sure to thoroughly stir the paint up from the bottom before using-- do not machine-shake the paint cans like you would with other brands of paint at the hardware store. Machine shaking is too vigorous for the paint and pigments and may result in an uneven appearance.
- If you can take your door off the hinges and bring inside to work, that's great! But that's not always possible. If you can't, tarp and tape around the walls and floor to protect from paint splatter. While paint dries you may also hang a plastic sheet in front of the door to protect from pollen and debris (do not wrap the door though of course).
- If working during hot times of the year, work during the cooler parts of the day for ease and maximum paint and primer performance. If humid, you may need to extend dry times to wait until the next day for the next paint coat, especially for Full Gloss.
- Normal recoat time for primer is 2 hours, and normal recoat times for exterior grade paints are 4 hours (extend for humidity).
- Use the right tools! For paneled doors like we worked on in the demos, use smaller brushes for the panel frames, then medium brushes for the flat panel fronts and the trim around them. Use rollers for longer continuous parts of the trim or for flat doors.
- We recommend starting on the panel frames, then working toward the flat panel fronts. After those are completed, we recommend doing all horizontal parts of trim (not including the very bottom panel of the door), then doing the vertical trim in small pieces in the center of the door. Next we recommend painting one of the long trim pieces on the side of the door, then the very bottom horizontal piece, then the remaining vertical side trim piece. *Piecing out a paneled door into smaller sections ensures you don't disturb places that are a little tacky and drying, and also help ensure even visible sheen especially on Full Gloss.
- For flat doors just keep a wet edge, working from one side to the next using the proper roller.
- F&B paints are self leveling, wow! But we always love to 'lay off' the paint in a continuous stroke per section. We do this with the proper sized brush for that section which doesn't have much paint added to it (it's okay if there's some leftover paint in the brush from earlier strokes, just not newly added paint).
- If you mess up or leave a weird texture, or something gets in your paint, just let it dry properly per recoat time. Gently sand out whatever is undesirable, then paint back over the section that it's in for a paneled door... for flat doors, if it's tiny you may try to do a tiny spot-treat, however it's most likely you'll need to do another coat after sanding it out.
- No topcoats needed over the paint when working with F&B exterior-grade paints.
- Always clean and prep your door before painting over it with F&B paints. Clean off gunk and let thoroughly dry. For pre-existing doors, no need to strip off the finish. If painting over an old gloss, make sure to just sand down the gloss a bit (before cleaning so you can wipe off everything at once). For new wood doors make sure to give a scuff sand with 150 grit sandpaper, even if the door feels smooth to you!


Stop by our Shop & Studio for color samples, demos, tips, and more!