
What are the Differences Between the Three Chalk Paint® Whites?
Learn what the differences are between the now three colors of whites in the Chalk Paint® line!
Happy New Year and welcome back everyone. We’re moving into our 2019 with all the best intentions, and are getting some awesome new product additions in-stock. Some are the new Chalk Paint® by Annie Sloan colors… which includes a ‘new’ white— the color ‘Original’ which has been included in Annie’s European collection for some time now and is just new to us. We’re thrilled to finally have it though!

Due to the fact that ‘Original’ has some creamy, warm undertones, and that the global ‘Old White’ has thus always been a bit cooler than what we’ve had in the USA, Annie has now adjusted the ‘Old White’ to be consistent with the global coloring as well. So what are the differences between the three Whites now, and what do they look like? For starters, we always have waxed samples at our Shop & Studio for you to view in real life, but here is a fabulous educational diagram:
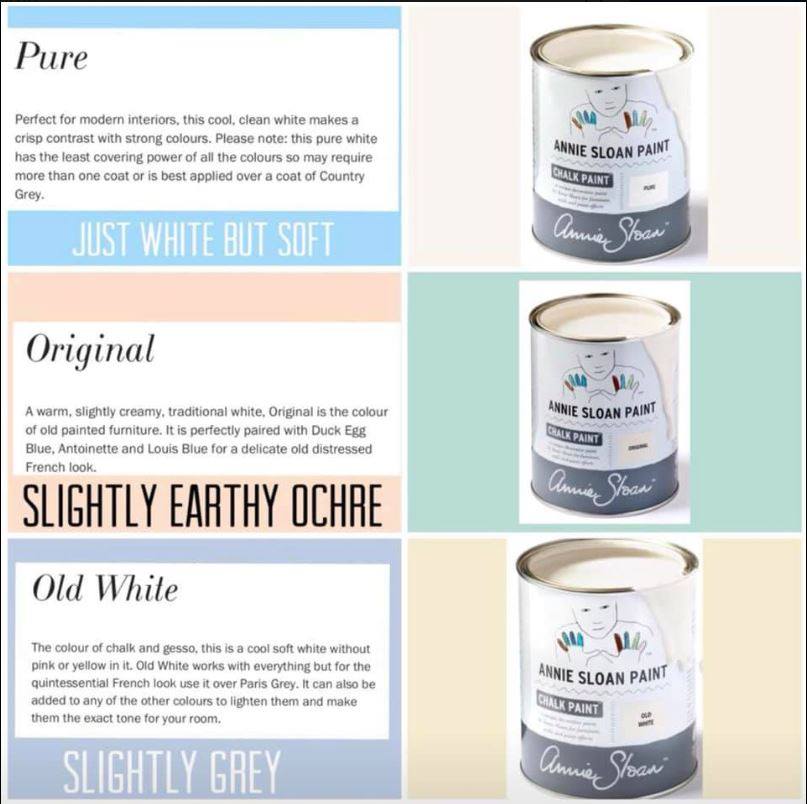
While there is not much difference in the new colorations versus the old, we definitely suggest you visit us to see samples in-person. If you’re trying to paint a piece to coordinate with some other previous whites, you may find that the ‘Original’ is the most similar to what your old ‘Old White’ used to be and may coordinate best.
Another major plus in ensuring the colors are 100% consistent throughout the globe is that there’s been a small update to the paint’s consistency as well. We find that the paint is even more luscious and creamy. Pop in for a demo with the new paint as well!

What are Chalk Paint® Waxes and How to Apply Clear Wax
We want to teach you the quintessential waxing technique for Chalk Paint® Waxes- watch the demo videos with Clear Wax.
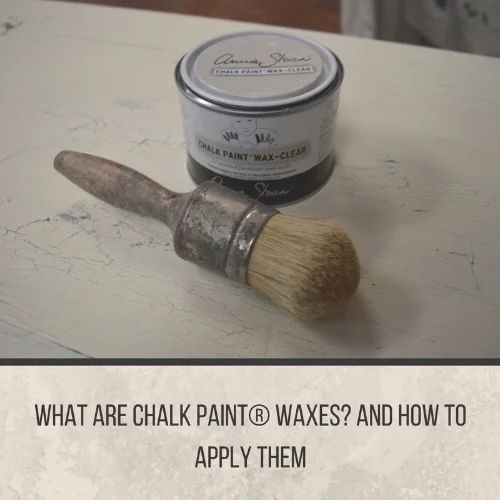
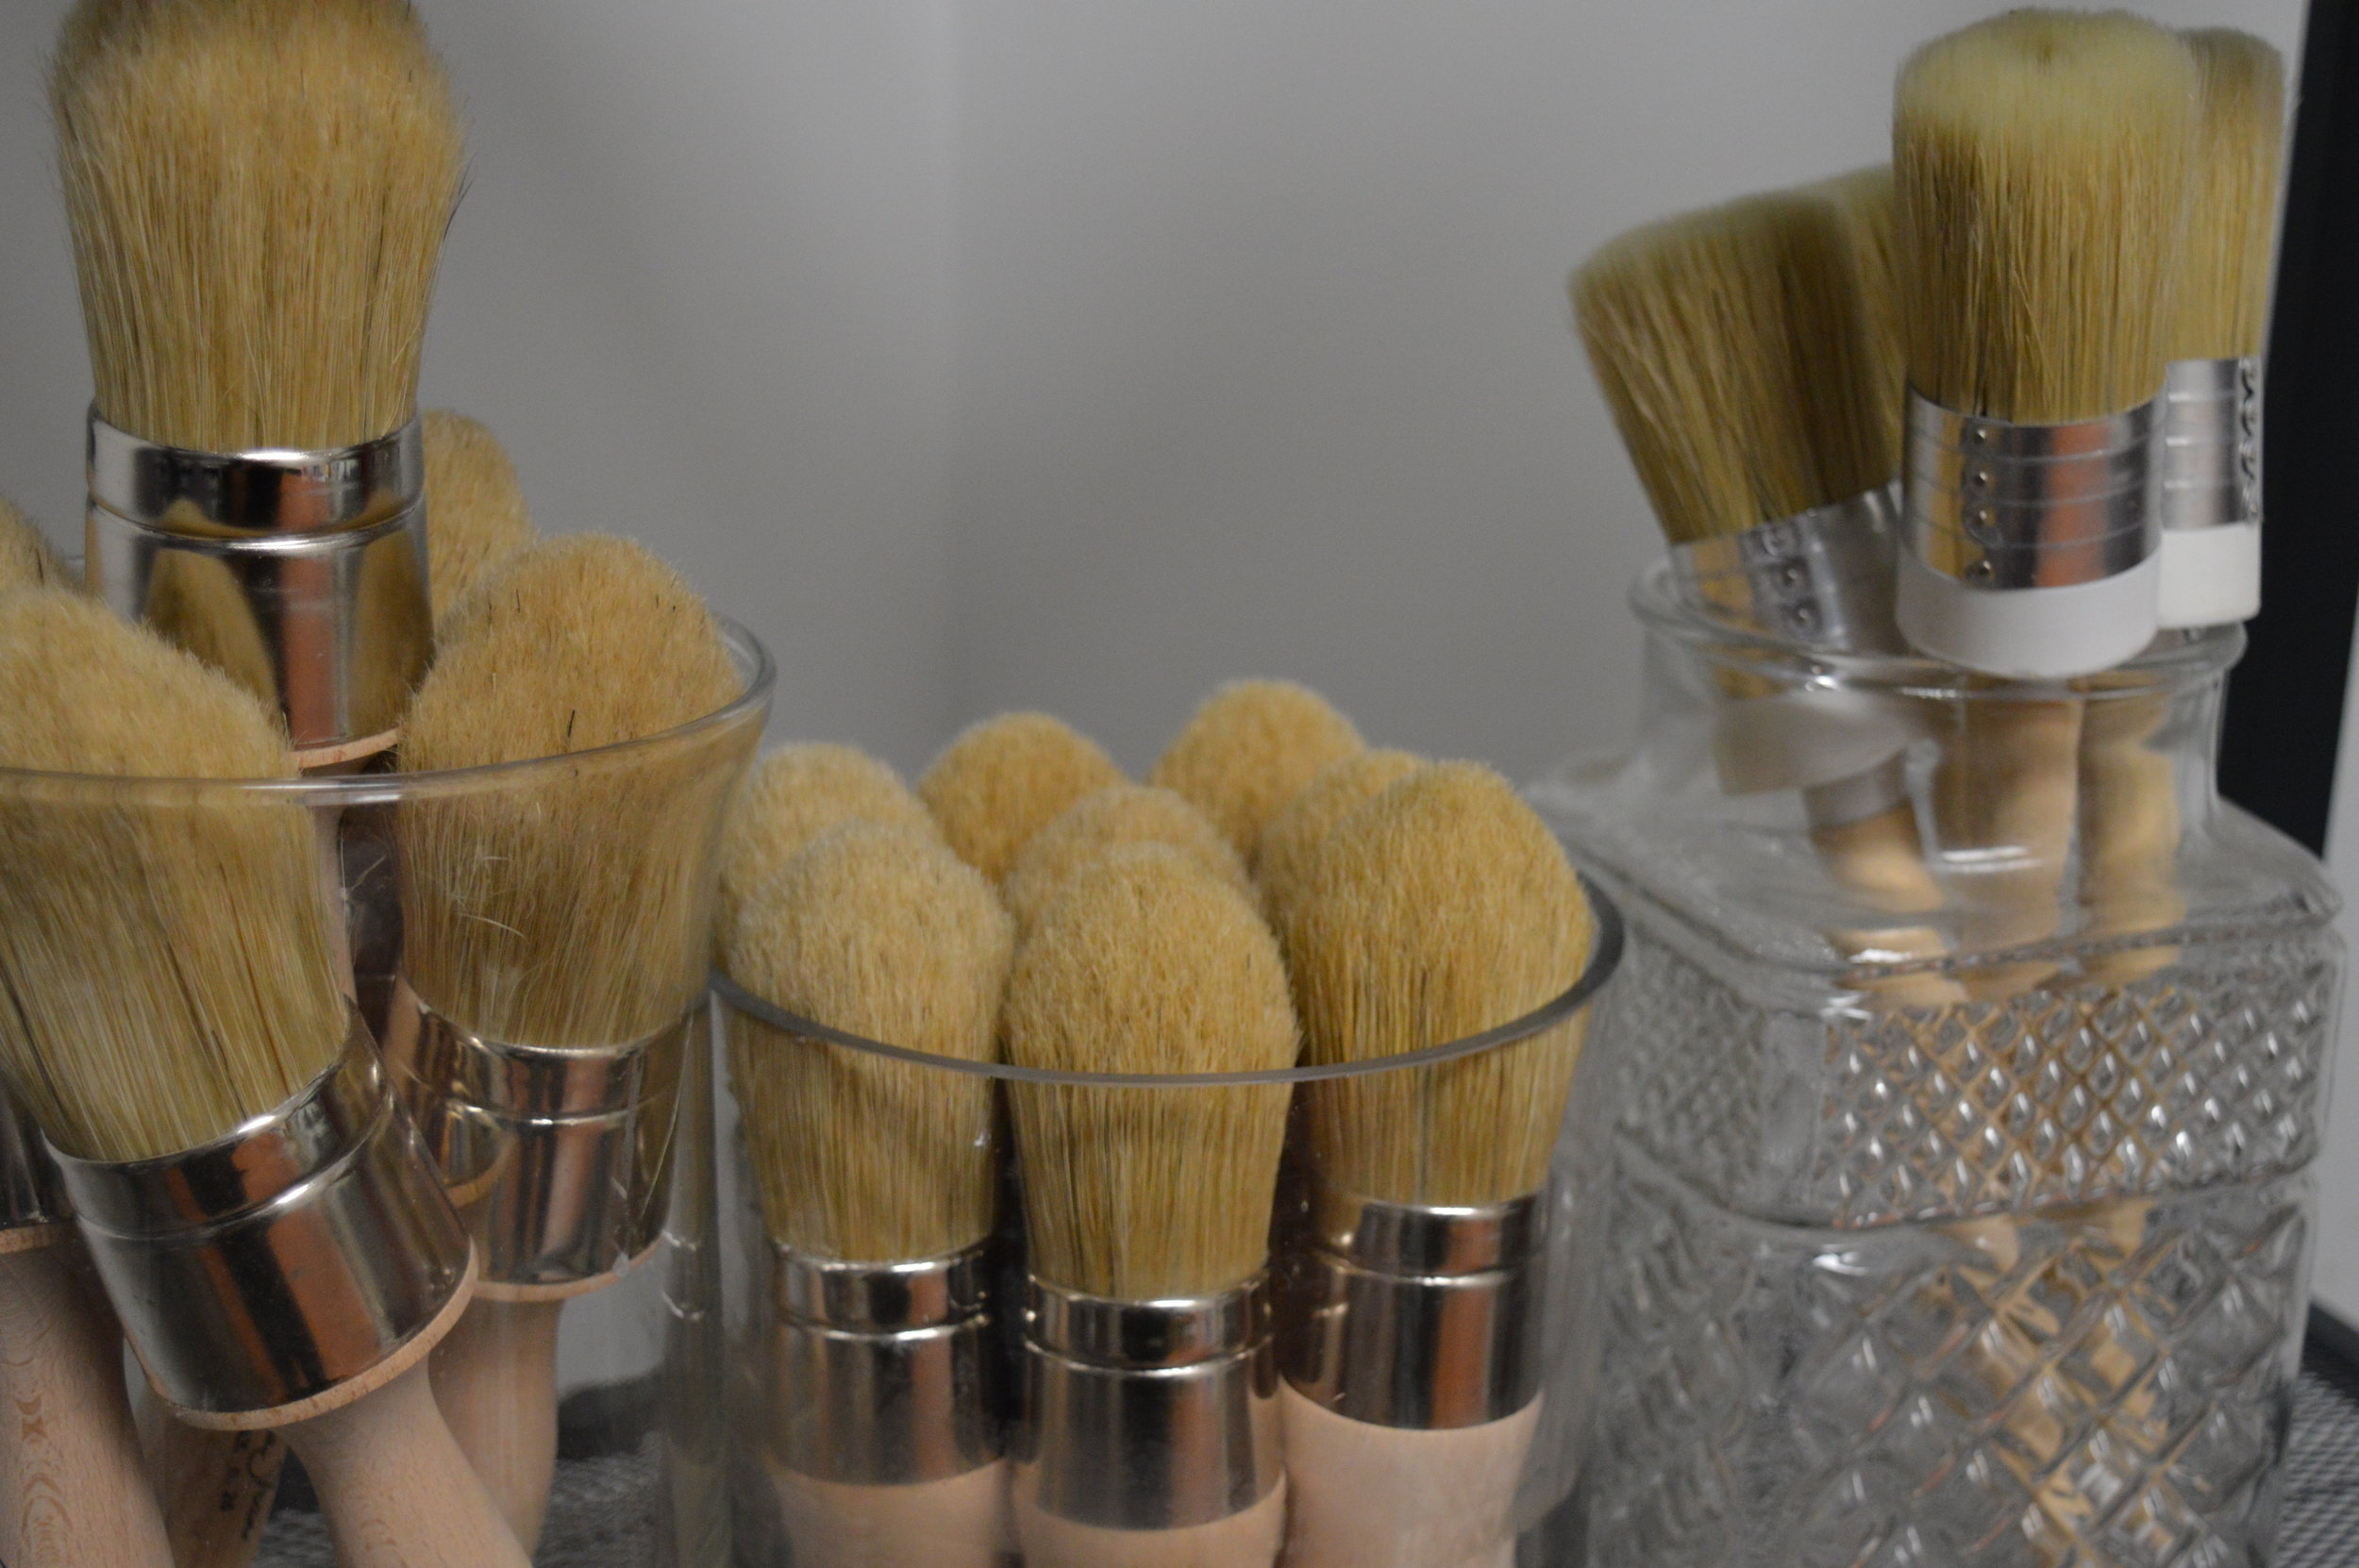
Have you worked with Chalk Paint® waxes? Waxing is a crucial step to finishing your work and creating a durable surface to seal the decorative paint. We're constantly perfecting our technique, and because we know there are many questions (as well as misconceptions) about it, we're off to task to share our tips with you! Feel free to also pop on over to our Chalk Paint® FAQs page.
The waxes come in four types: Clear, Dark (brown), White, and Black. They can be protective AND decorative at the same time. Waxes:
- are completely non-toxic when dried and cured, and even suited for 'child-safe' applications.
- should be at a slightly-melted crisco or butter-at-room-temp texture (sit in a sunny window or warm environment if they feel a bit firm to work with).
- fill the pores of a surface painted with Chalk Paint® decorative paint and cure to leave behind a hard surface that has bonded to the paint.
- in the case of Clear and White Waxes, are applied directly to the painted surface.
- in the case of the Dark and Black waxes, are applied over a wiped-back layer of Clear Wax (so you can control their depth)- the exception to the rule can be over Graphite since it's such a dark color to begin with.
- can be mixed together to create mid-tones like beige and grey.
- can be tinted with a drop of paint for an extra pop, if you need an exciting green or pink wax for example.
- can be layered up to 2-3 coats total for extra durability for heavy-traffic surfaces like cabinets and dining table tops (wiping back thoroughly and waiting 24-48 in between coats).
- dry within 24-48 hours for each coat, however need to be gently-used until they finish curing.
- cure and reach full hardness within a period of 2-4 weeks, depending on how many coats have been applied and humidity (again, gently use your surface depending on its usage- you can probably put your dishes back inside your cabinets, however that kitchen table will need to wait a bit longer to be ready for your dinner party!).
- are water-resistant.
- are interior-grade only.
- once fully dried and cured provide a brilliantly durable surface, which is easily maintained by wiping food spills, dirt, and dust away with a damp cloth or mild soap and water at most- we've also gotten crayon, marker, sharpie, highlighter, and other stubborn marks off by cleaning with more wax, which pulls it right up and out of the surface.
- are as durable as polycrylic-type topcoats when applied correctly and let to fully cure before heavy use.
- can be buffed to a soft satin sheen, or left relatively matte in finish.
Using wax brushes to apply all waxes ensures we don't apply too much or unevenly, and also prevents as much wasting of wax as possible. Here are some in-depth video demos of a preferred technique that works for most surfaces:
Part 1: Using Your Wax Brush to Apply Clear Wax
Part 2: Wiping Your Excess Wax Back, Finishing Up
And here's a concise recap of the waxing process to conclude:

Remember, patience is key when allowing topcoats to fully dry and cure during a DIY process. When you buy new furniture, topcoats have been allowed to fully cure before being put on a sales floor. We do have other topcoats with the same durability for different finish sheens (such as semigloss), for exterior projects, and others that might cure a tad bit sooner for heavy-traffic areas (ex; if you work with wax for your coffee table just keep in mind that you need time to let it cure). For all topcoats on tables we do recommend using placemats, coasters, etc. anyway to protect the finish as long as possible (nothing is completely iron-clad y'all). However we do say 'trust the wax!' because you can't beat it over hand-painted finishes, and can easily spot repair it if unexpected damages do occur.

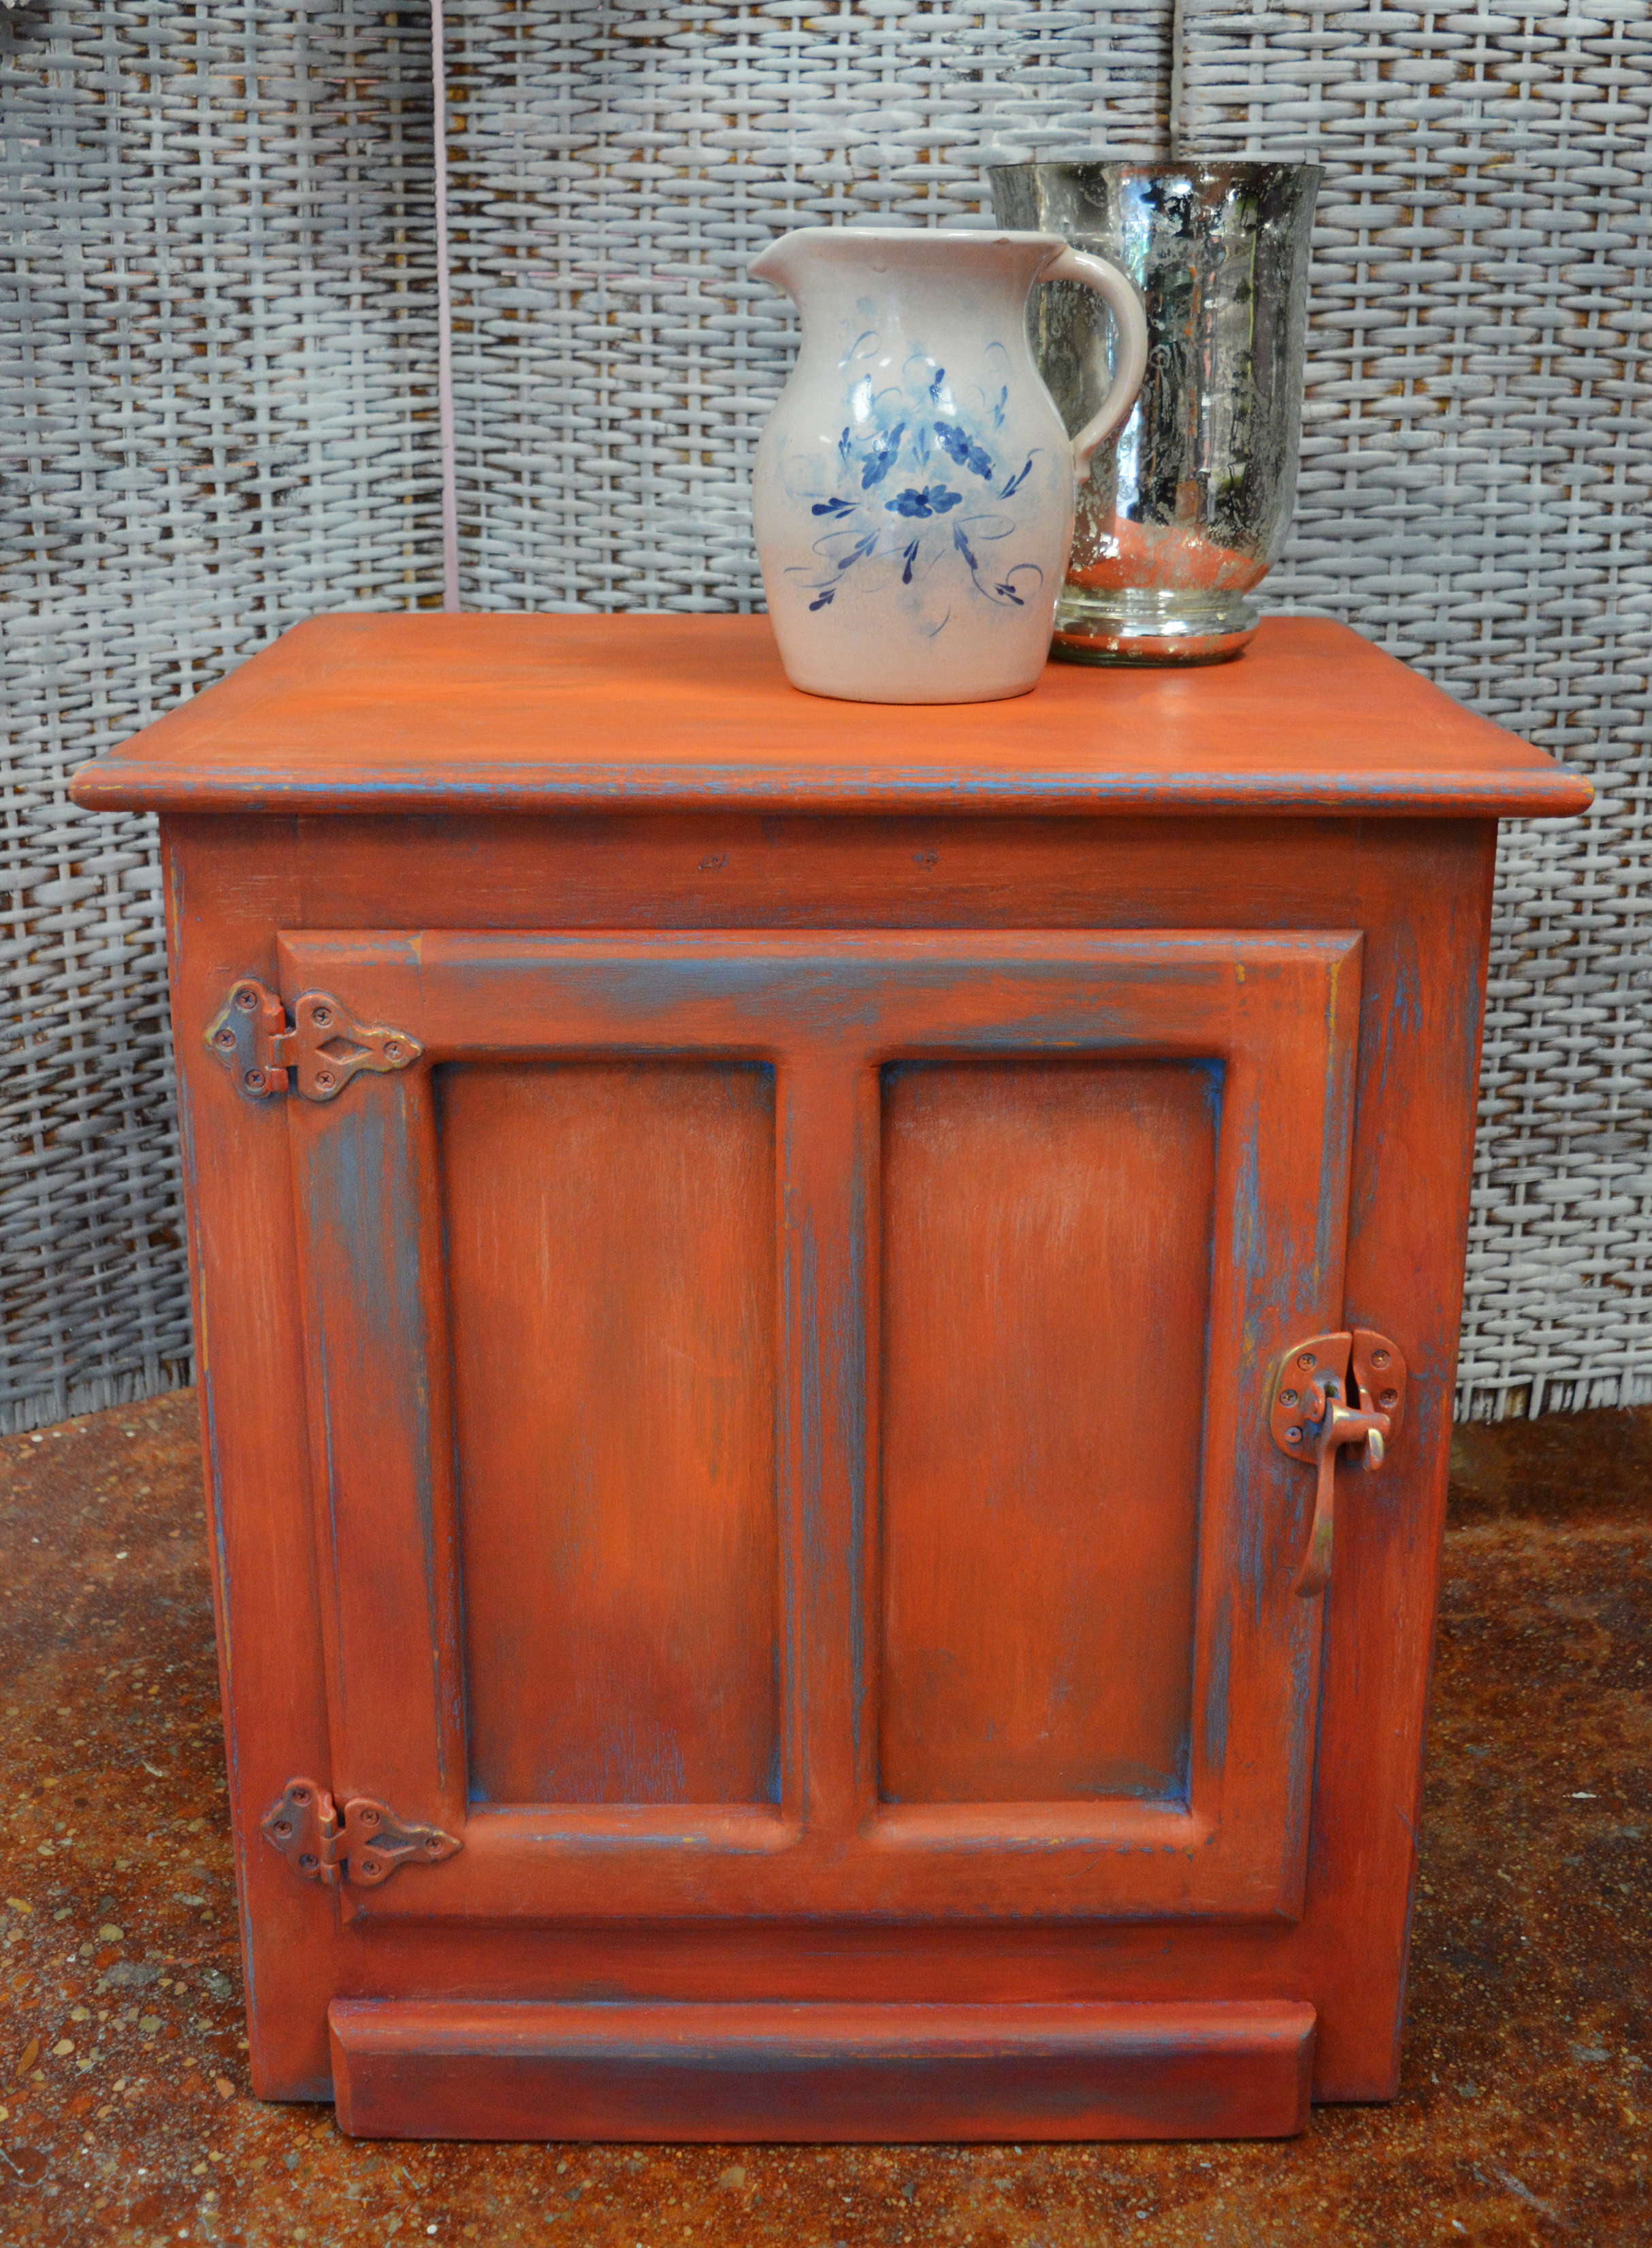
Before & After: 'Persimmon' + Greek Blue Cabinet
A pop of color is just what this little cabinet needed...


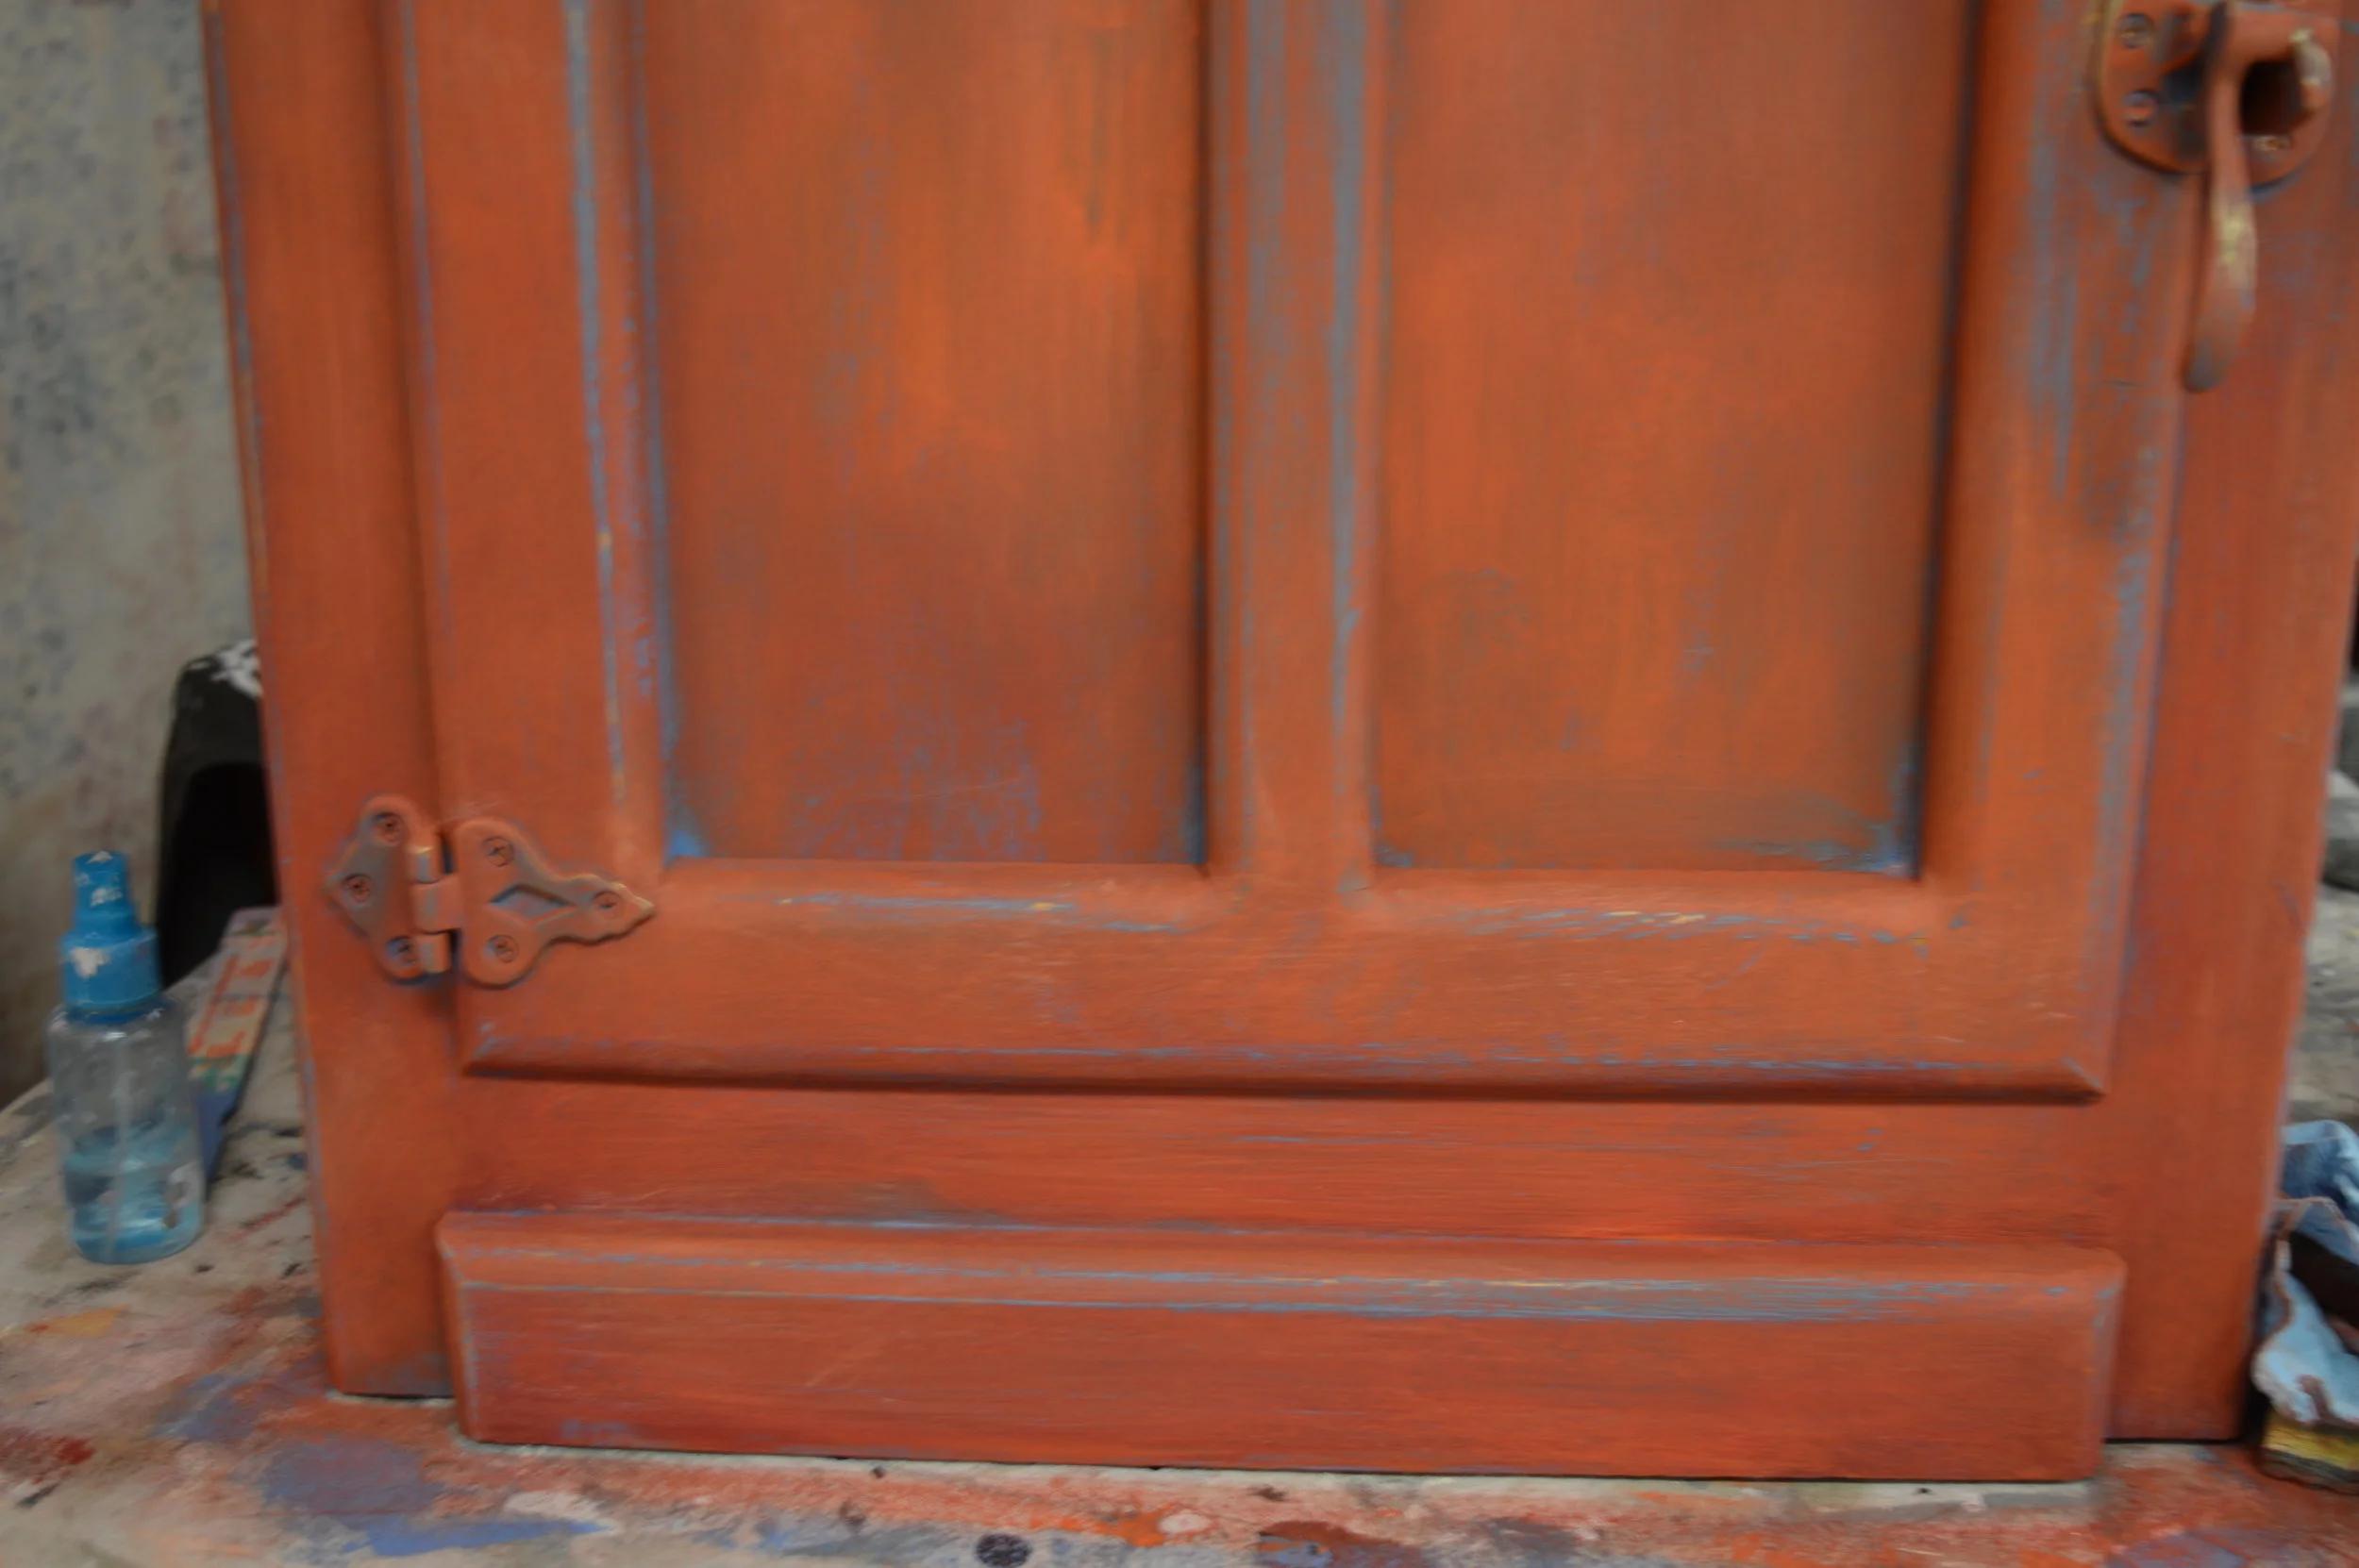
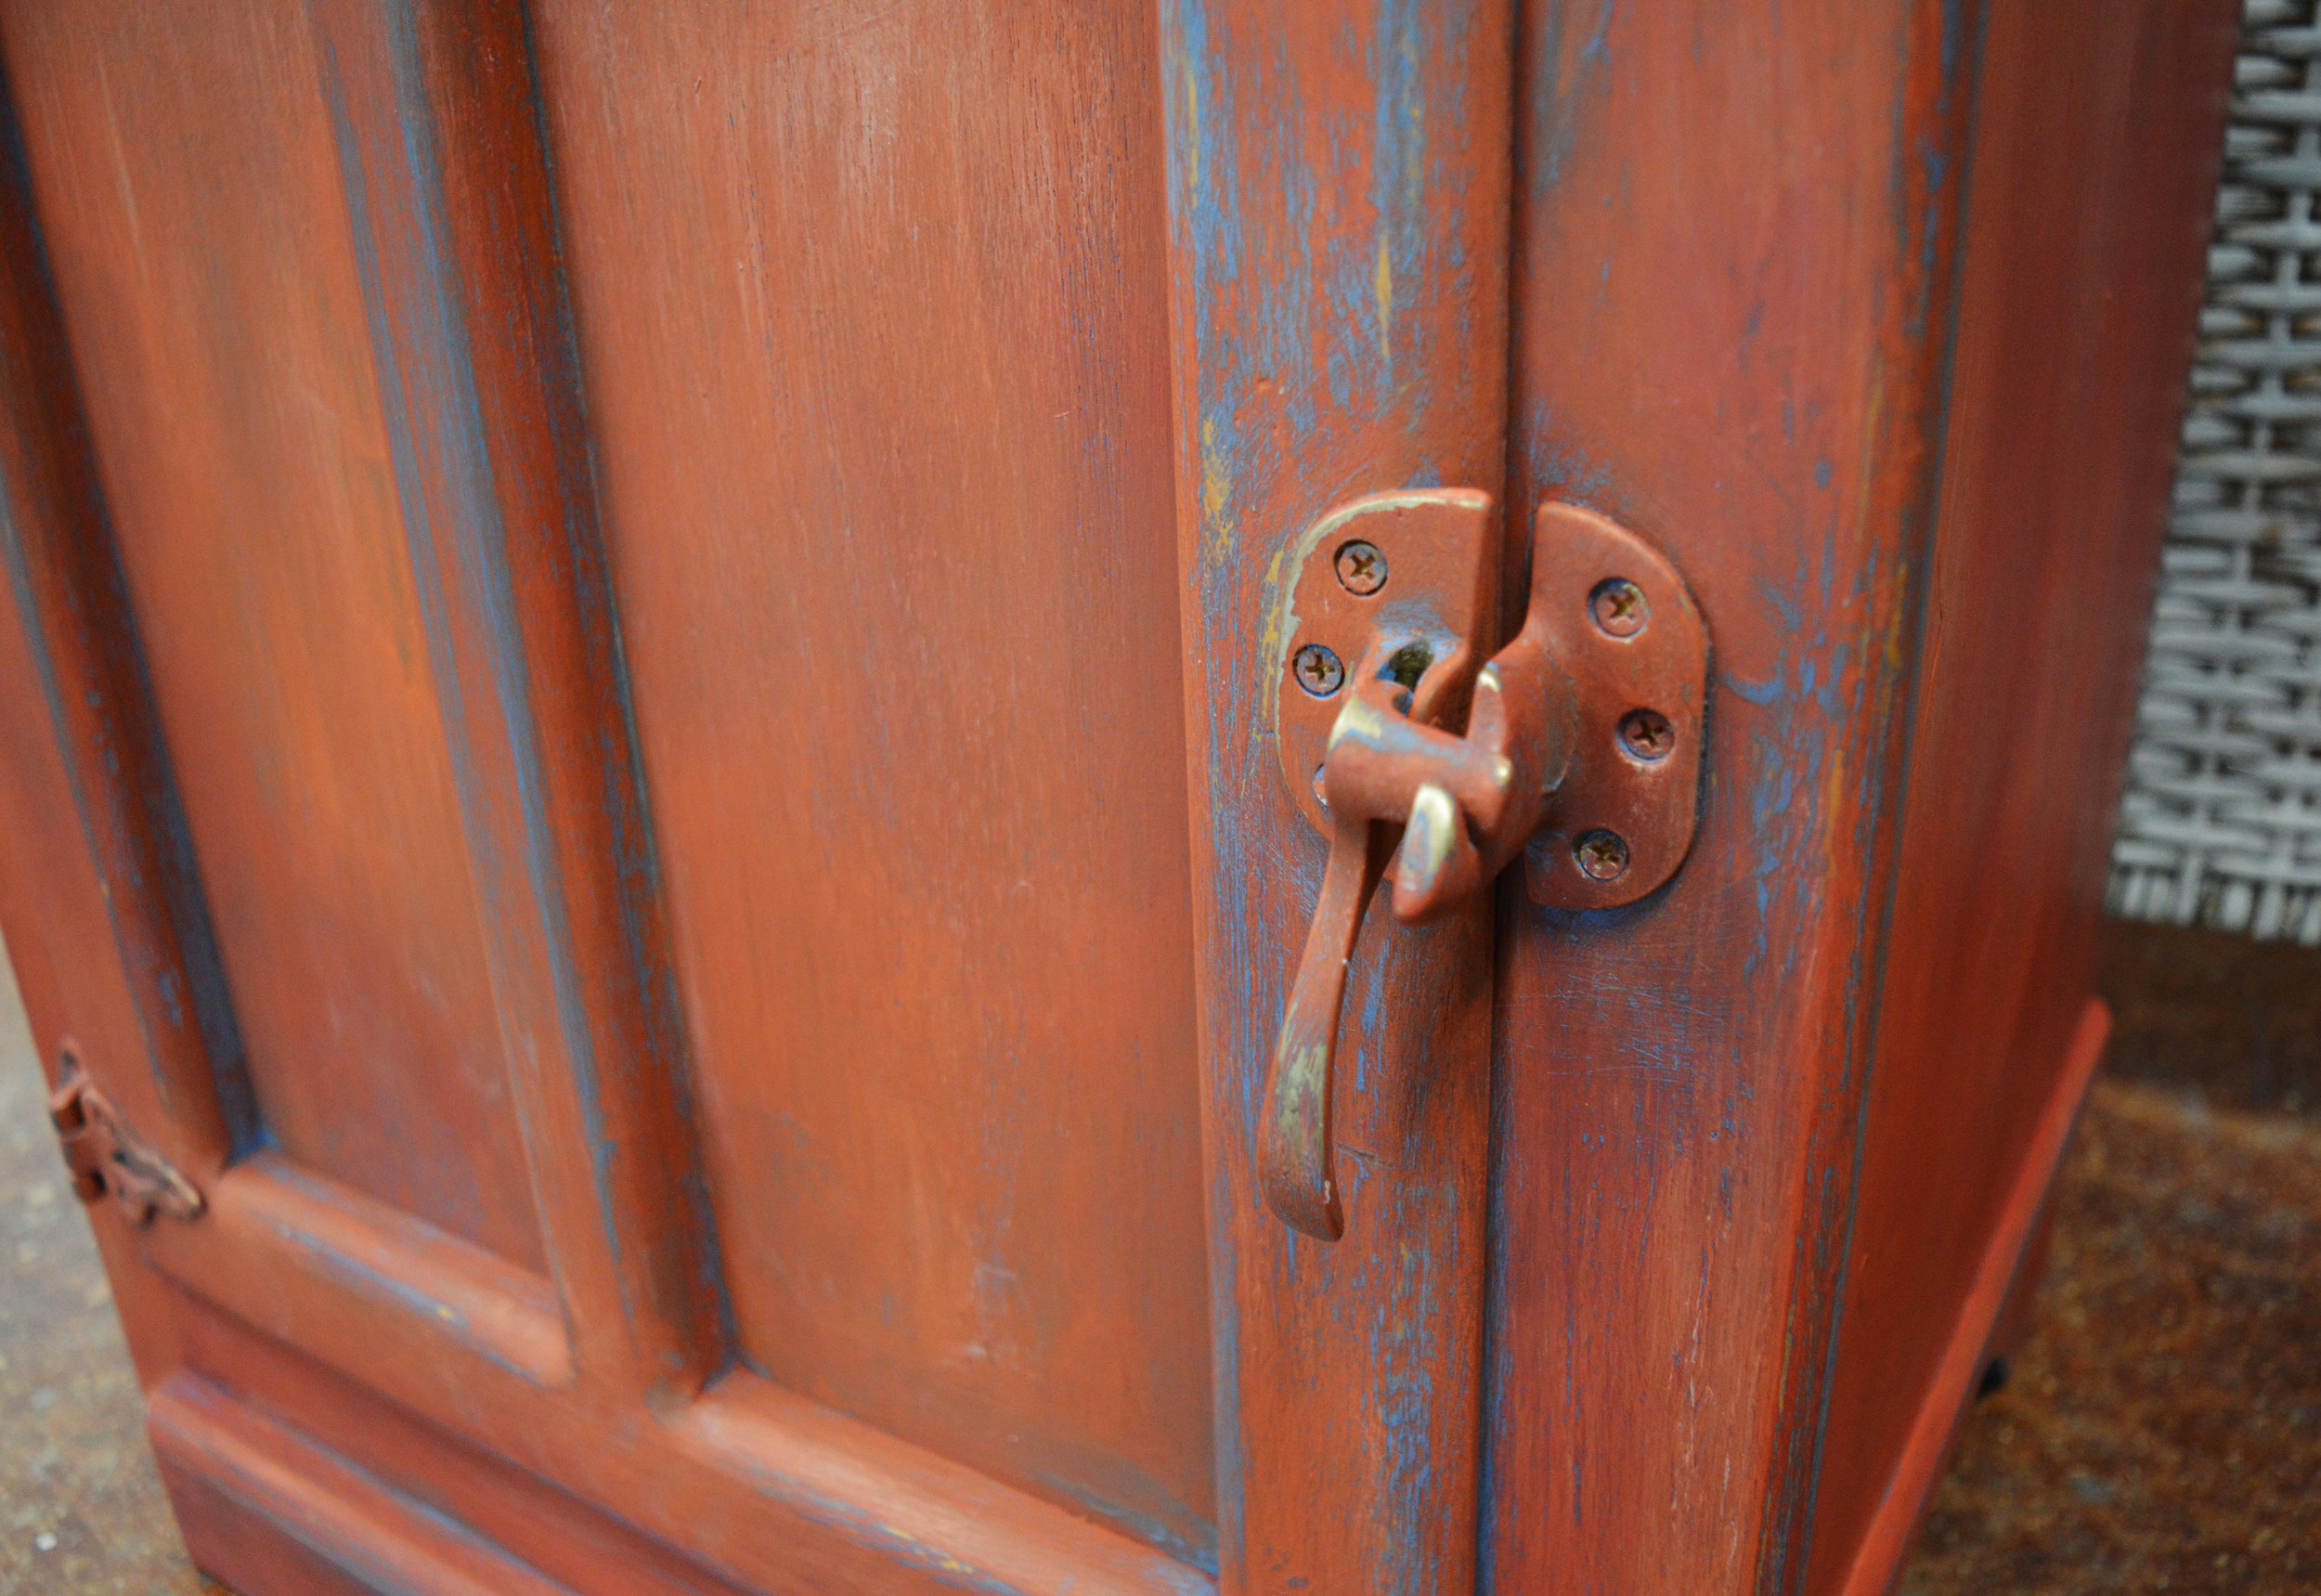
For us furniture and interior painters, we know that projects often go in 'inspiration stages,' during which choosing the color can be the hardest part! We had a little boxy cabinet that was hanging around the studio just waiting to be painted, that we knew should have a pop of color and texture. We were a little stuck... until we remembered a piece that we had been previously been inspired by, by Leslie Stocker. Using Chalk Paint® decorative paint in Greek Blue, Barcelona Orange and Emperor's Silk blended together, and Old White accents, we created a finish that we absolutely LOVE! The idea was to combine opposite colors from the color wheel for a distinct look (such a great design technique for you to explore on future projects).

As usual, we cleaned the piece down first. Then we base-coated with Greek Blue, applying it thickly and essentially glopping it on for texture with our medium no. 12 Natural Round Brush. This brush helps create anything from barely-there texture to thick hills and valleys! We also waited for some paint to dry for 10-15 minutes and then brushed back and forth over it to pull up even more texture, and then let dry. We wanted the texture to hide some of the water damage to the varnish on the very top.


Barcelona Orange and Emperor's Silk were applied next simultaneously with two different brushes, blending together on the surface while wet. The more texture and visible layering, the better! We let some of the Greek Blue show through still in corners and strategic spots, and once the 'Persimmon' tone dried, some Old White was dry brushed over raised edges for accents. The goal was a look of an aged color patina. We even painted right over the hardware!
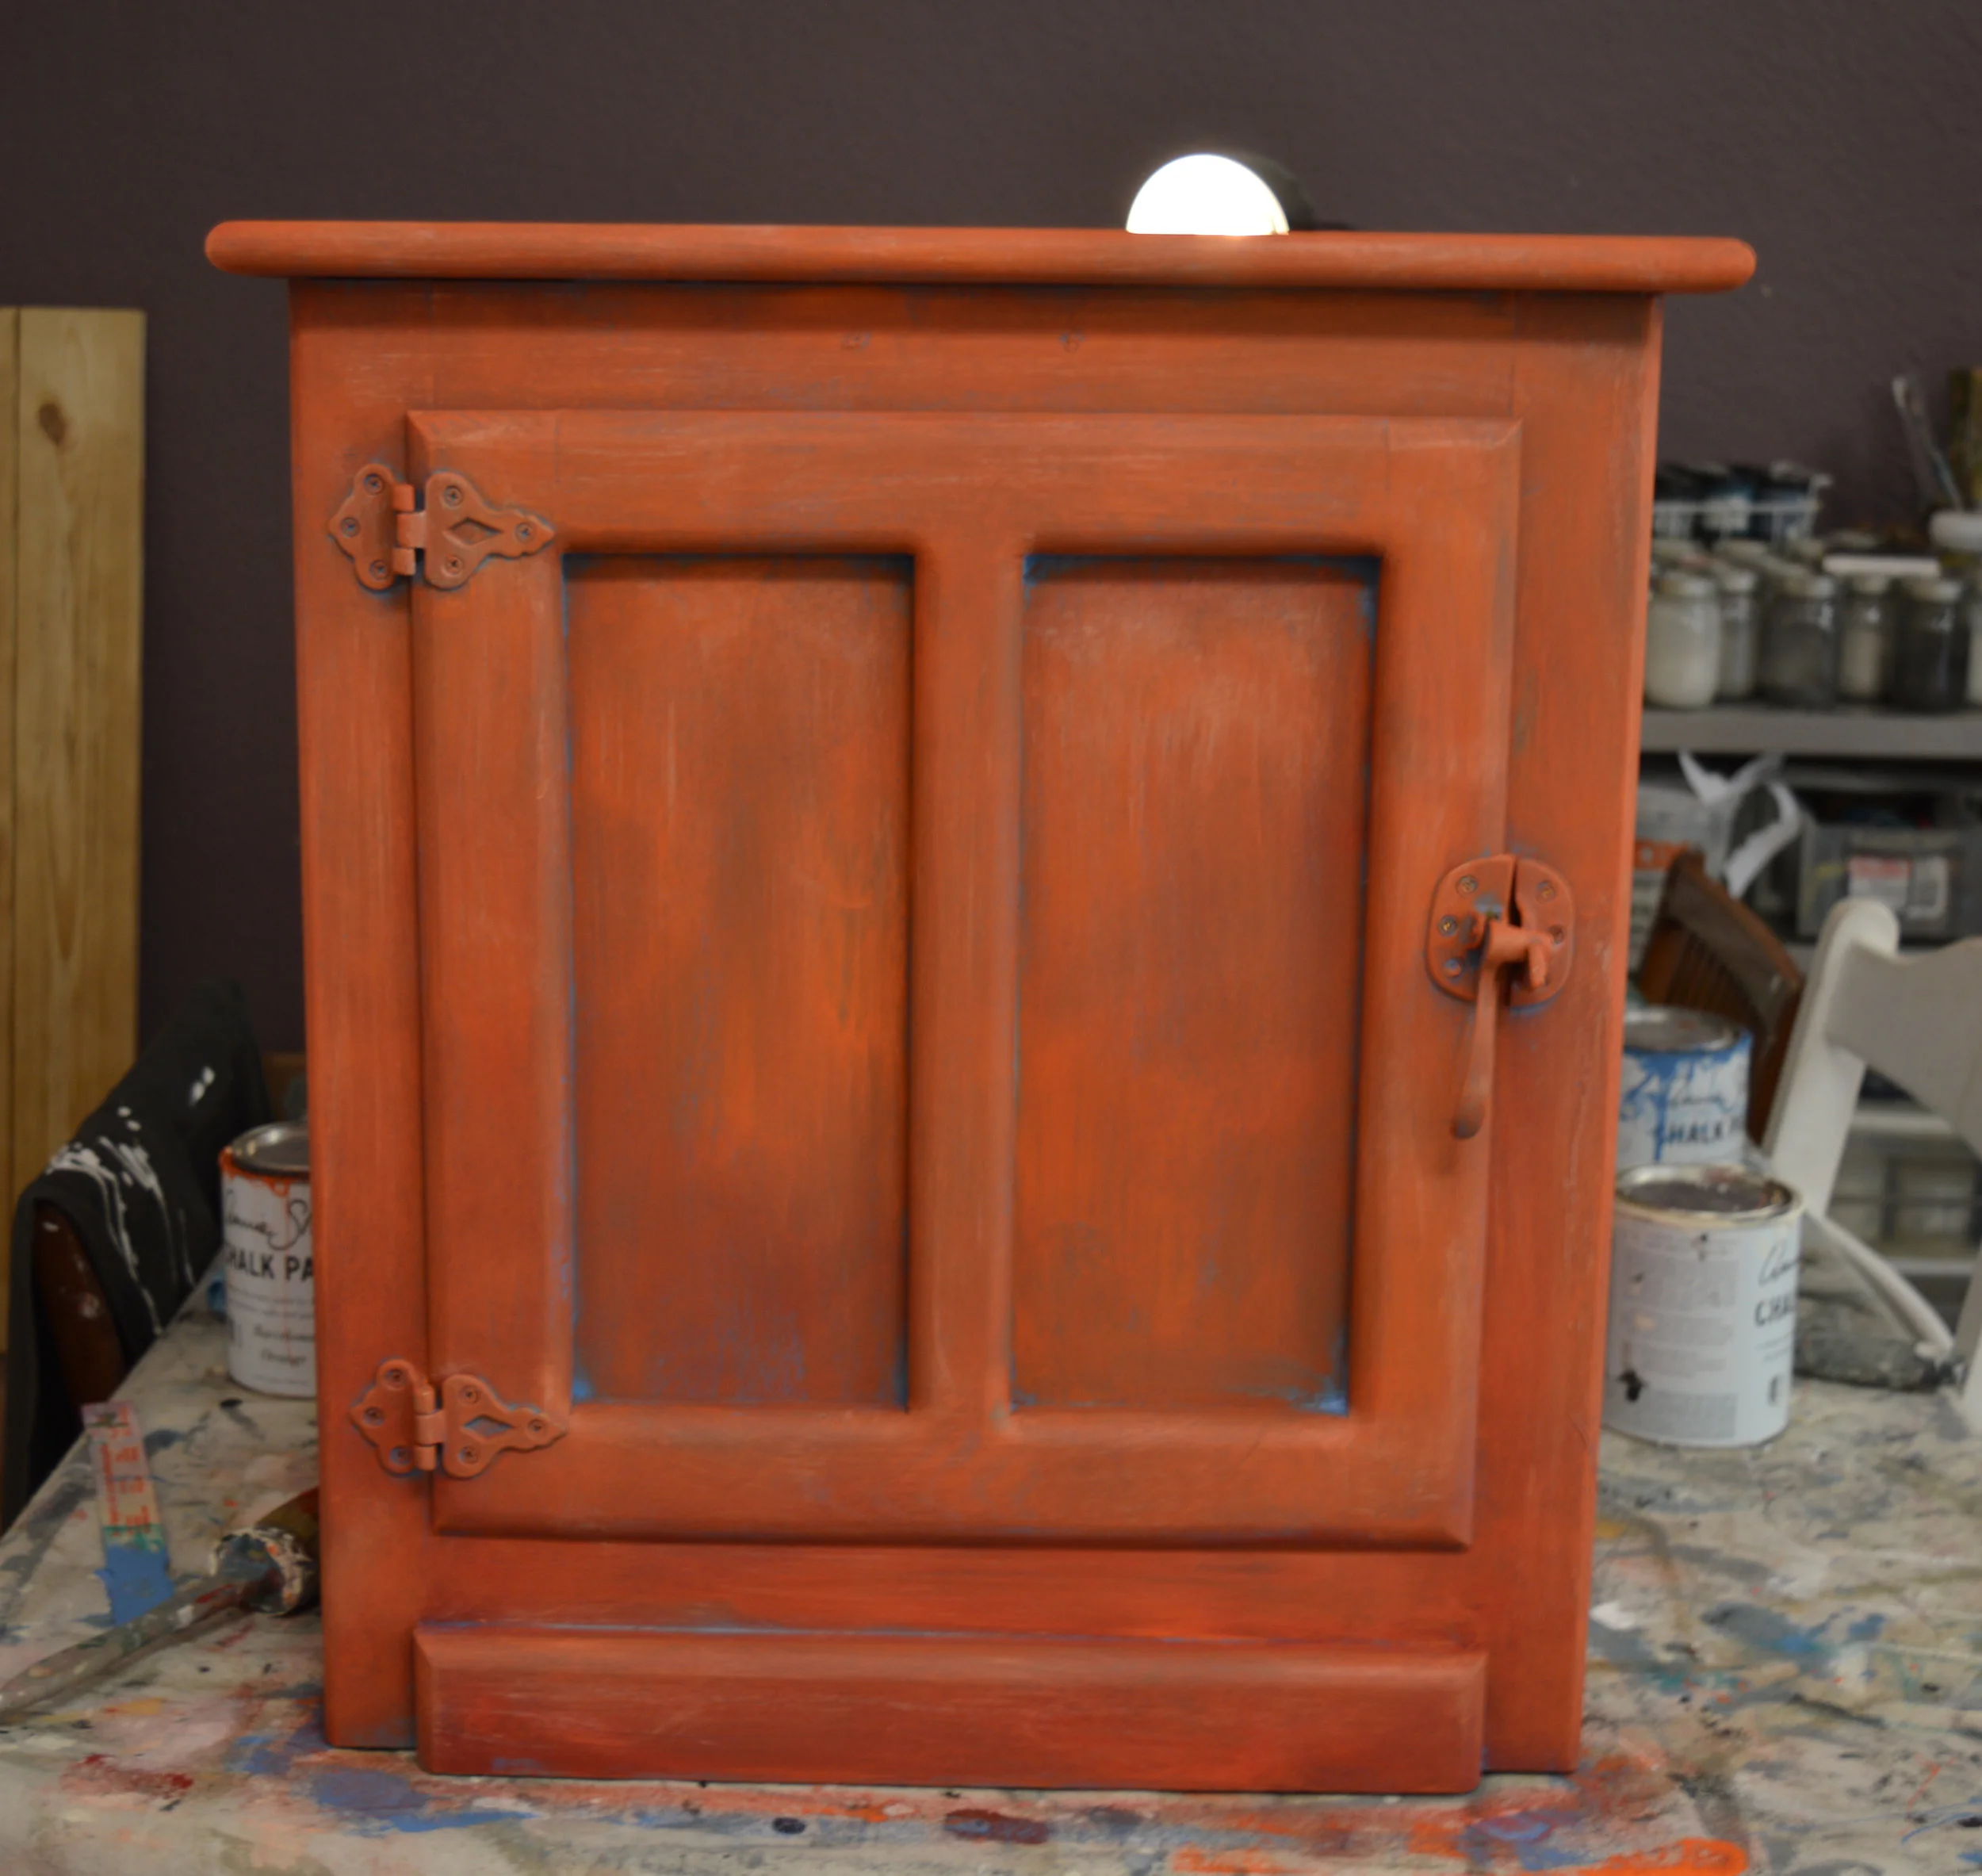


Then the distressing happened in a natural manner on edges and raised areas that might have aged with the piece if it was truly old (see our previous blog on tips for distressing). We went a bit heavier in areas right along the front and near the handle. Both 100-grit sandpaper and dampened edge of scrubbing sponge were used. And then we applied Chalk Paint® Clear Wax to finish.


We're delighted with the results and might replicate them in our own home! For now though this little piece packs a punch, and is at the shop waiting for its new home. Stop by to see it in person!


Create An Upcycled + Floral Mother's Day Gift Under $75! + GIVEAWAY!
We have a step-by-step tutorial to create the BEST Mother's Day Gift, which has upcycled and floral elements, for under $75! Enter our Mother's Day Giveaway while you're at it!
With Mother's Day right around the corner, we wanted to share a great idea for a simple gift that looks fabulous, and will make Mom feel special. Being involved in the creation of your gift makes it heartfelt, and with our tutorial you can create something similar for under $75! Of course these are general guidelines, so feel free to expand or simplify as much as you want! We'll also get into our Giveaway down below...
You'll need:
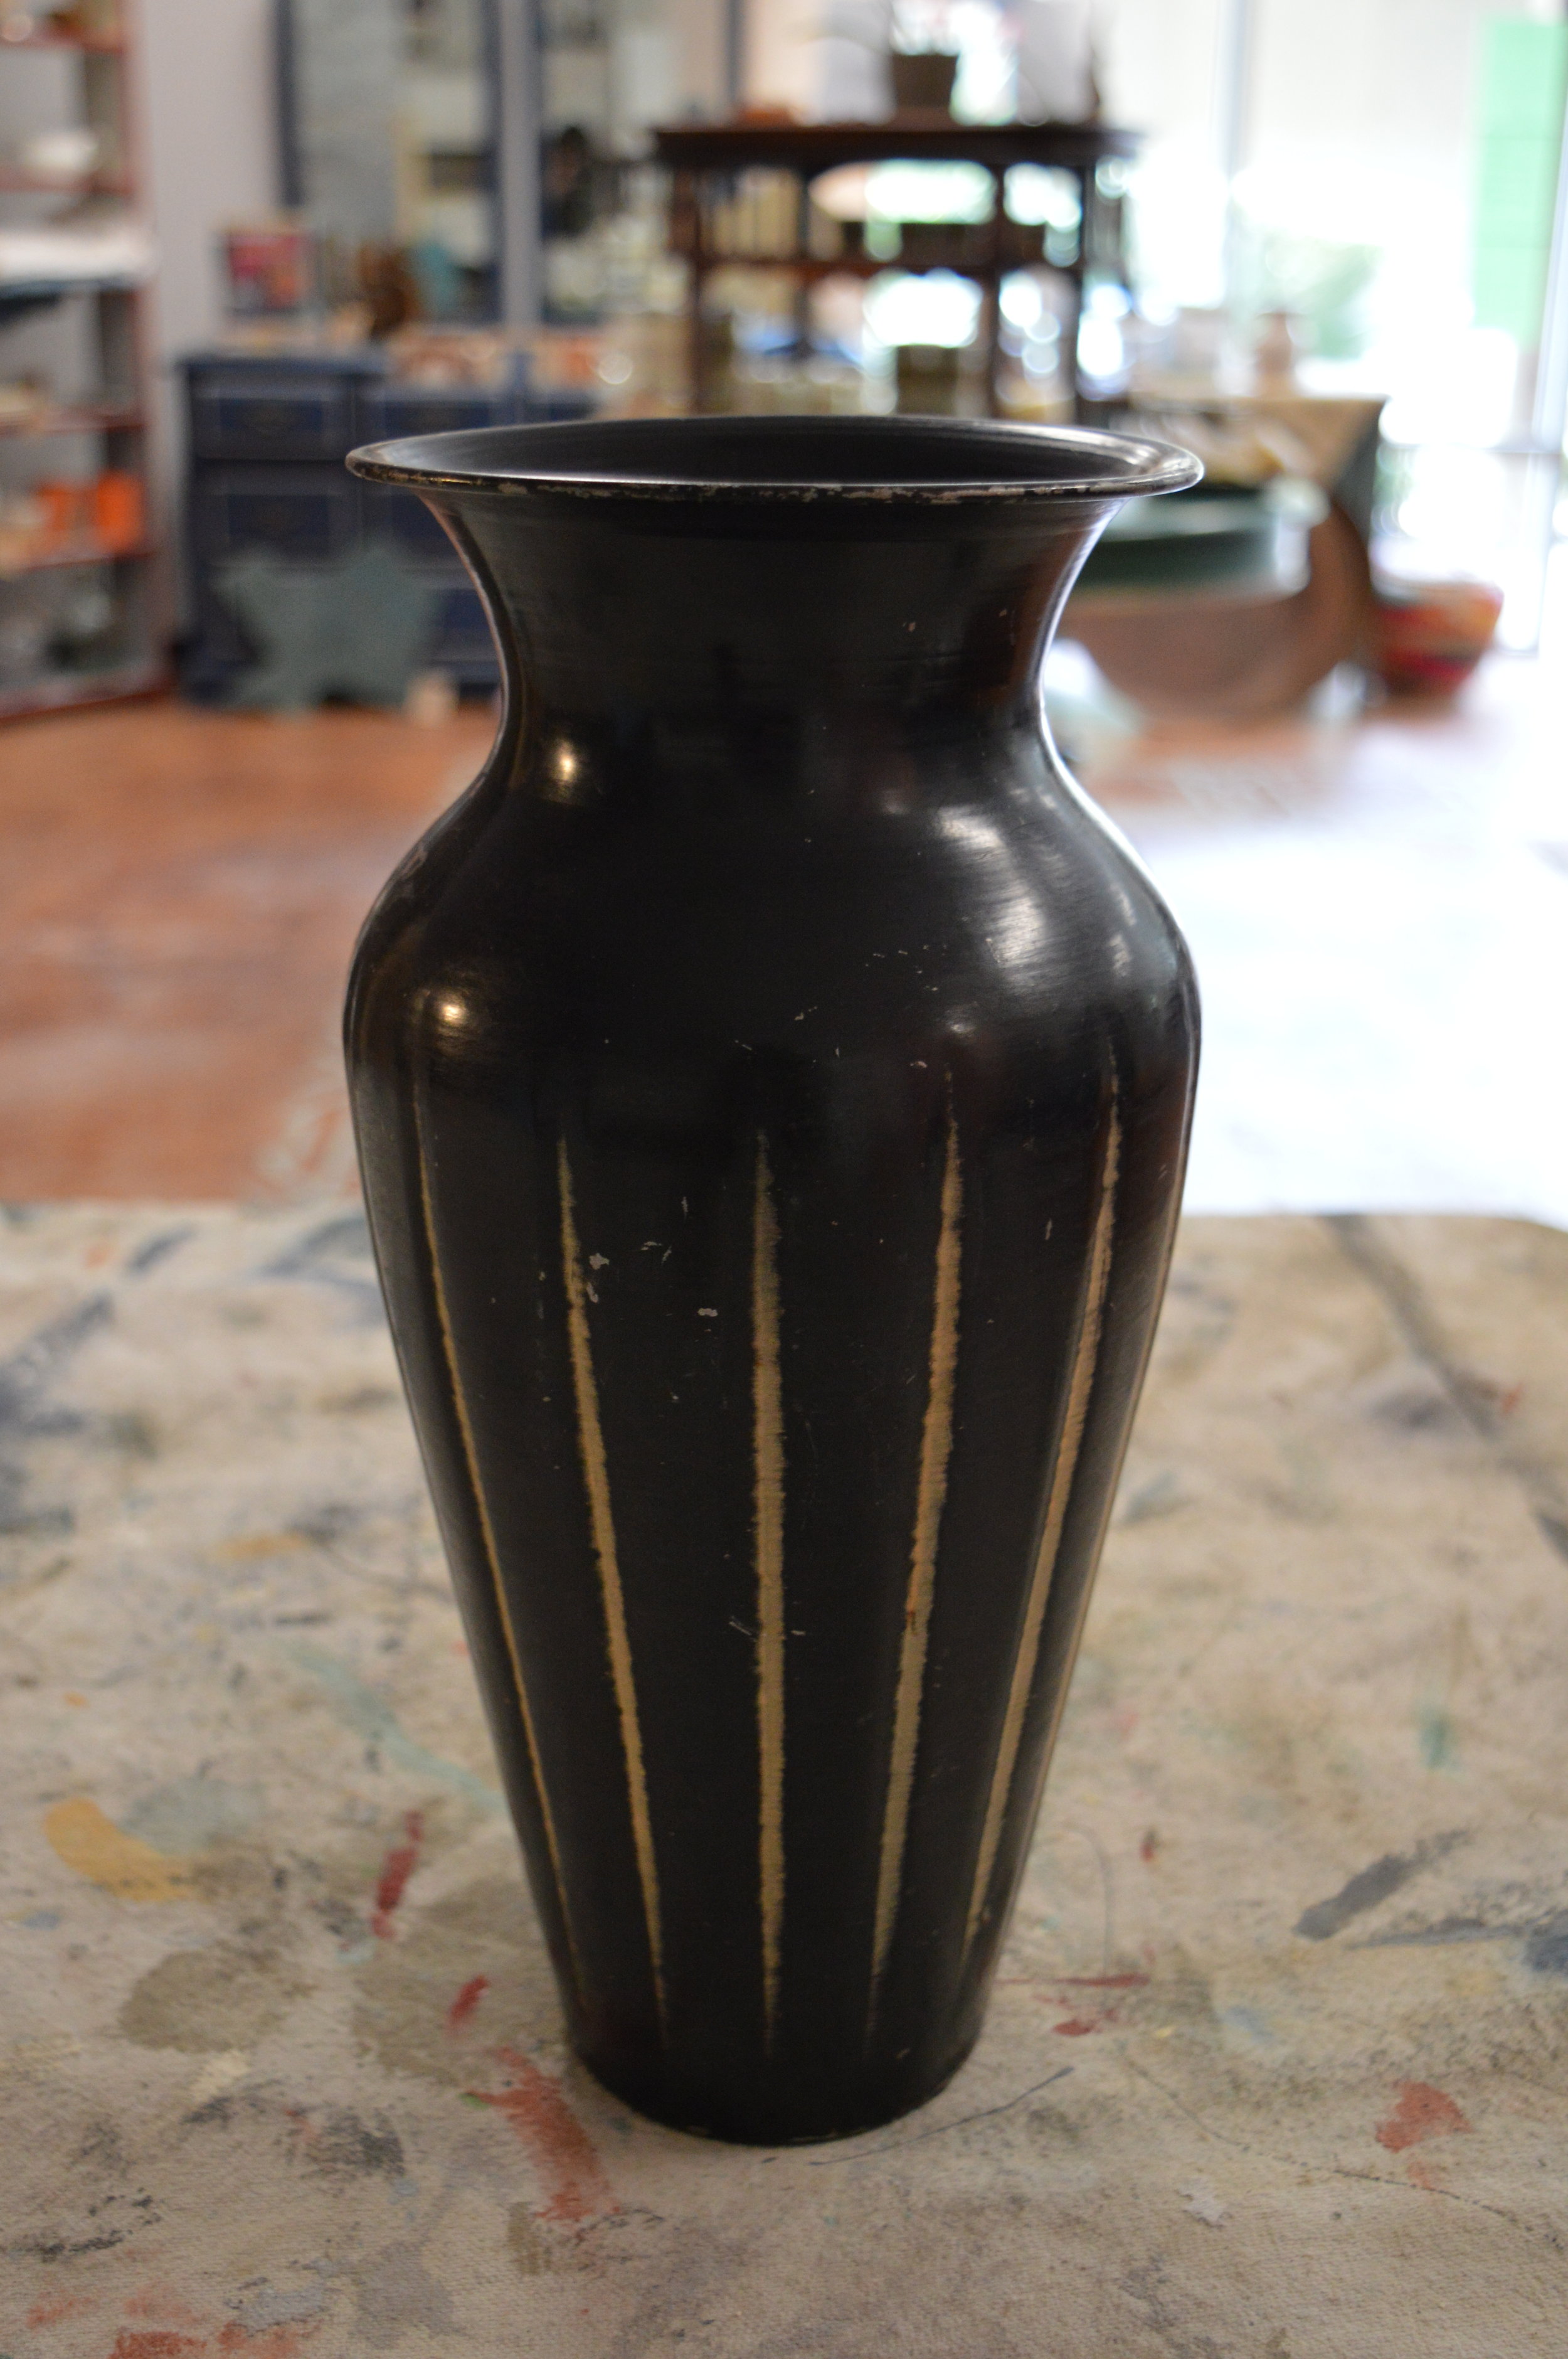
- One vase or container that's metal, glass, ceramic, wood- $0-$5 (We chose a thrifted find for $5, but you may have something at home already that can be upcycled.)
- Chalk Paint® decorative paint Project Pot color of choice- $15 (We chose Versailles for it's sagey-French appeal.)
- Sandpaper sheet or dampened textured scrubby sponge- $0 (Cost depends on whether you have some at home already or need to buy some. Use that dampened sponge to distress to save on cost!)
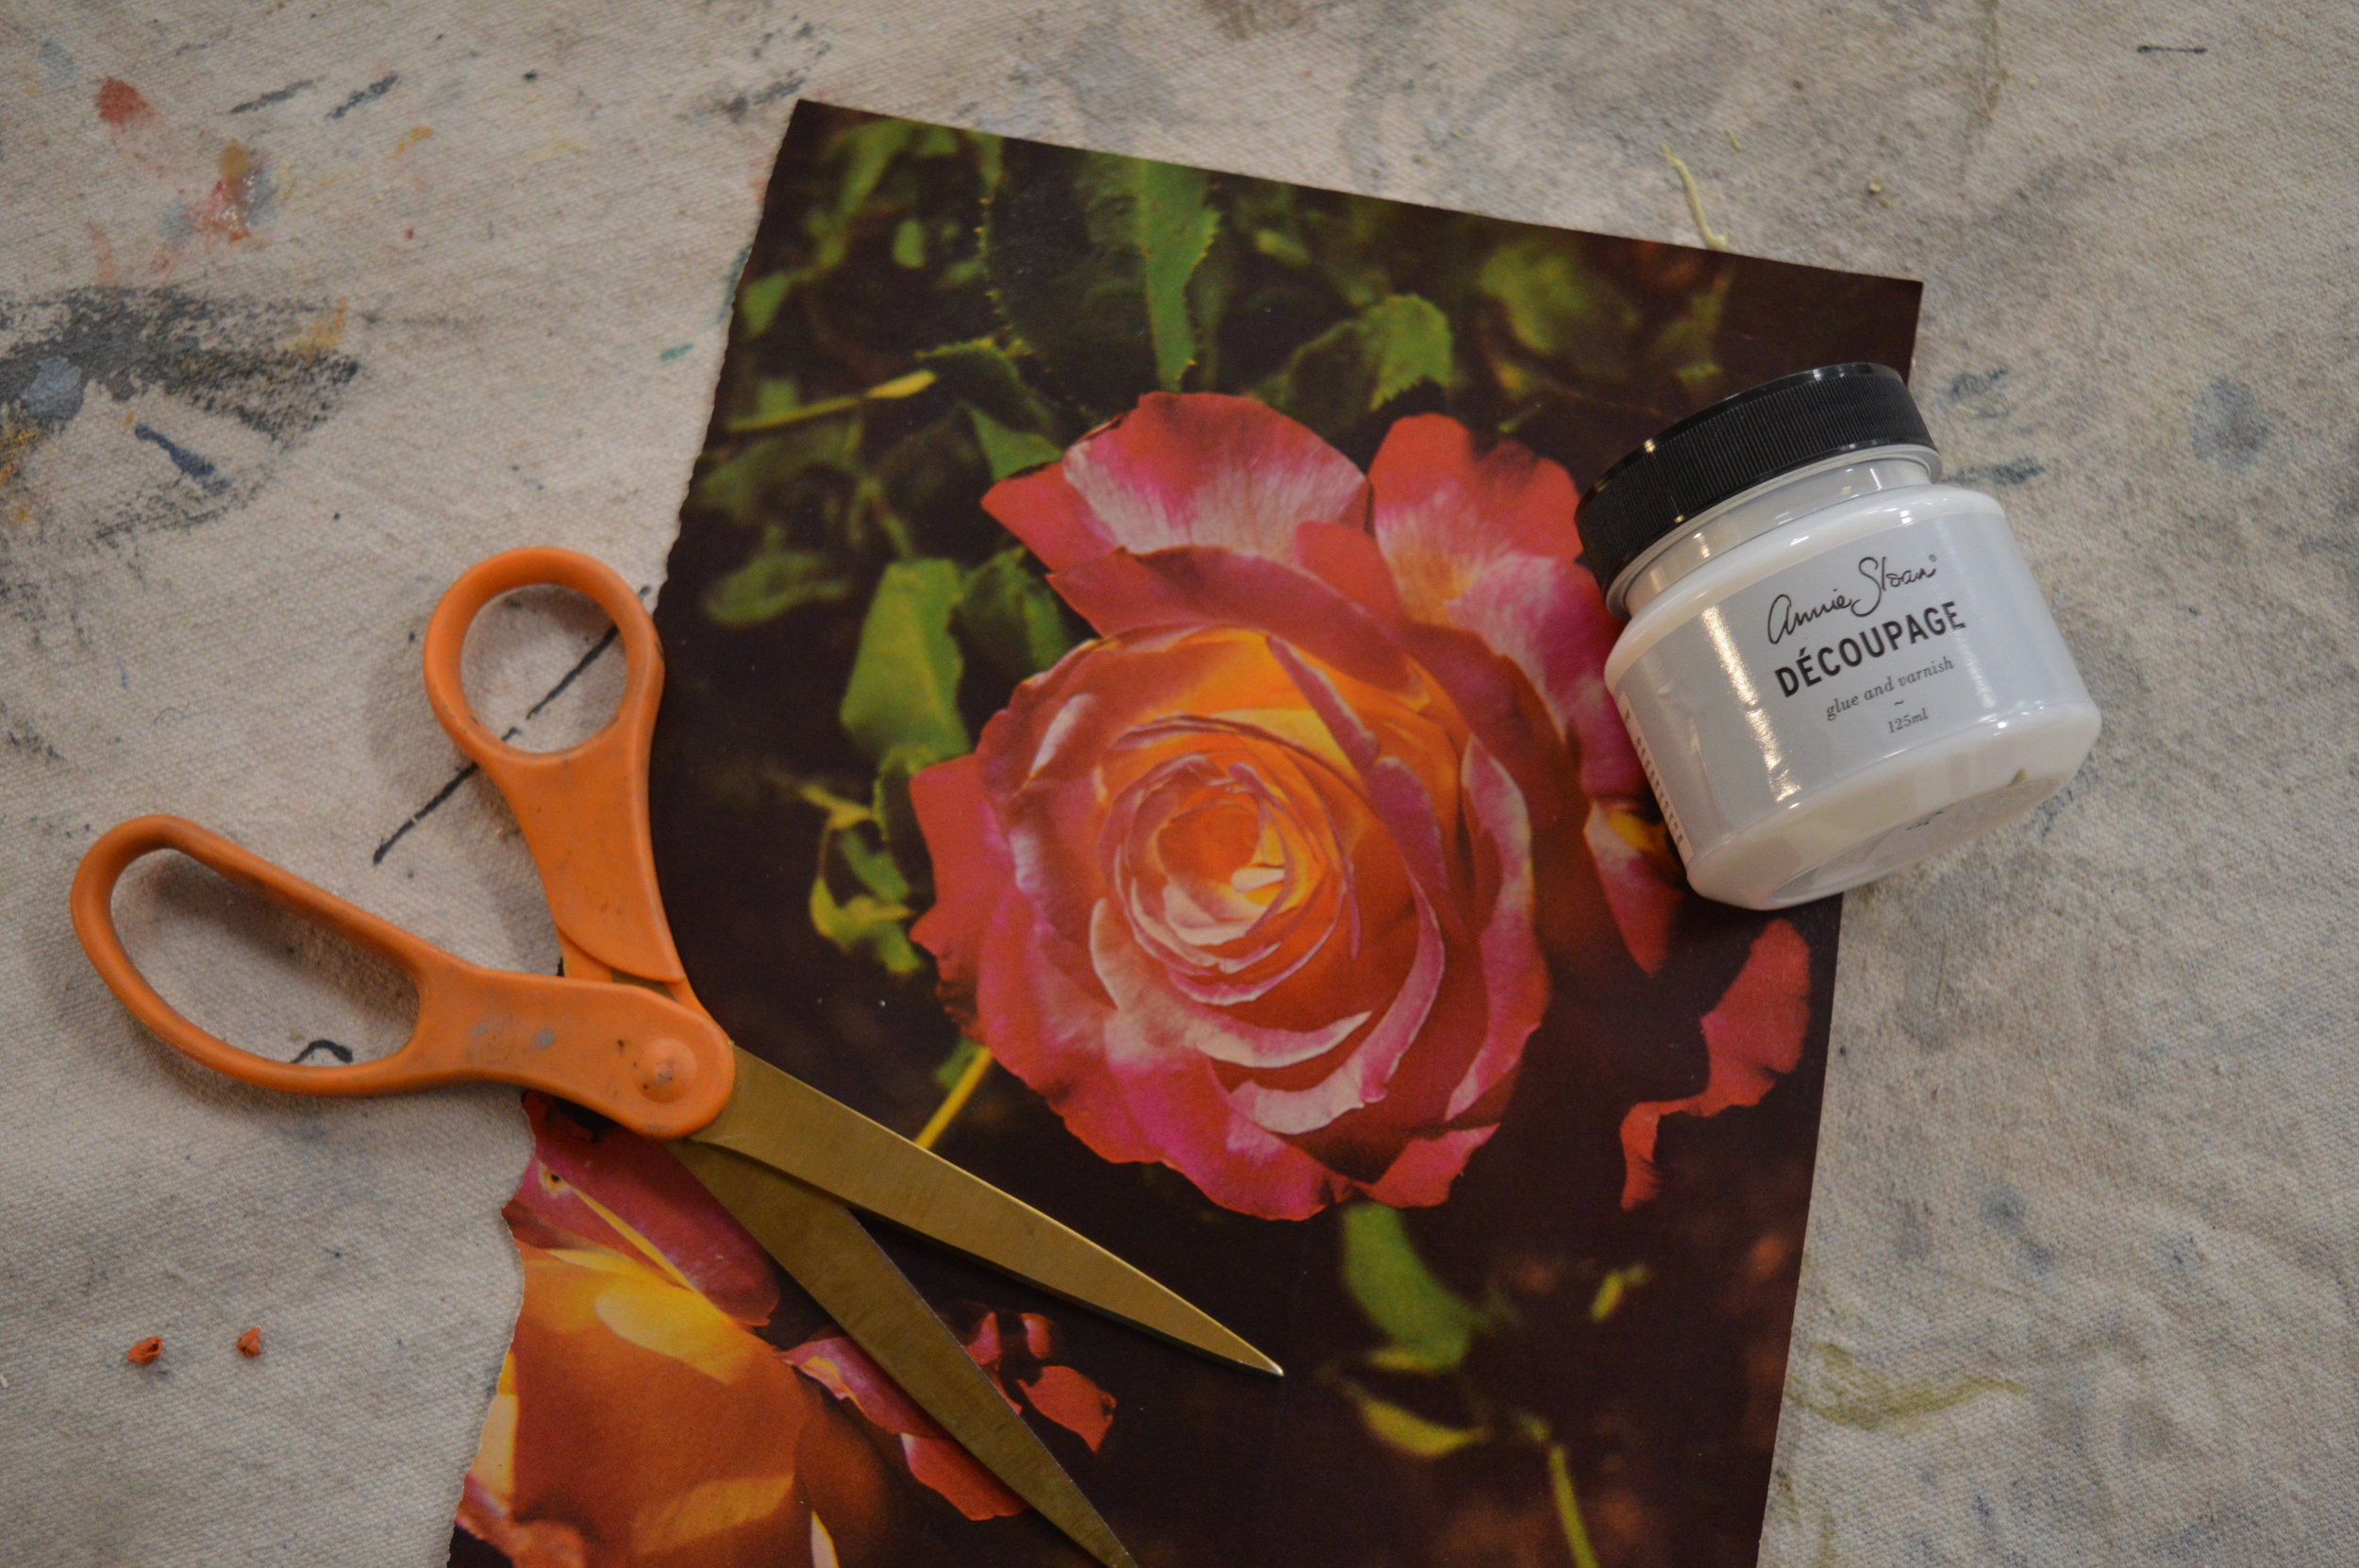
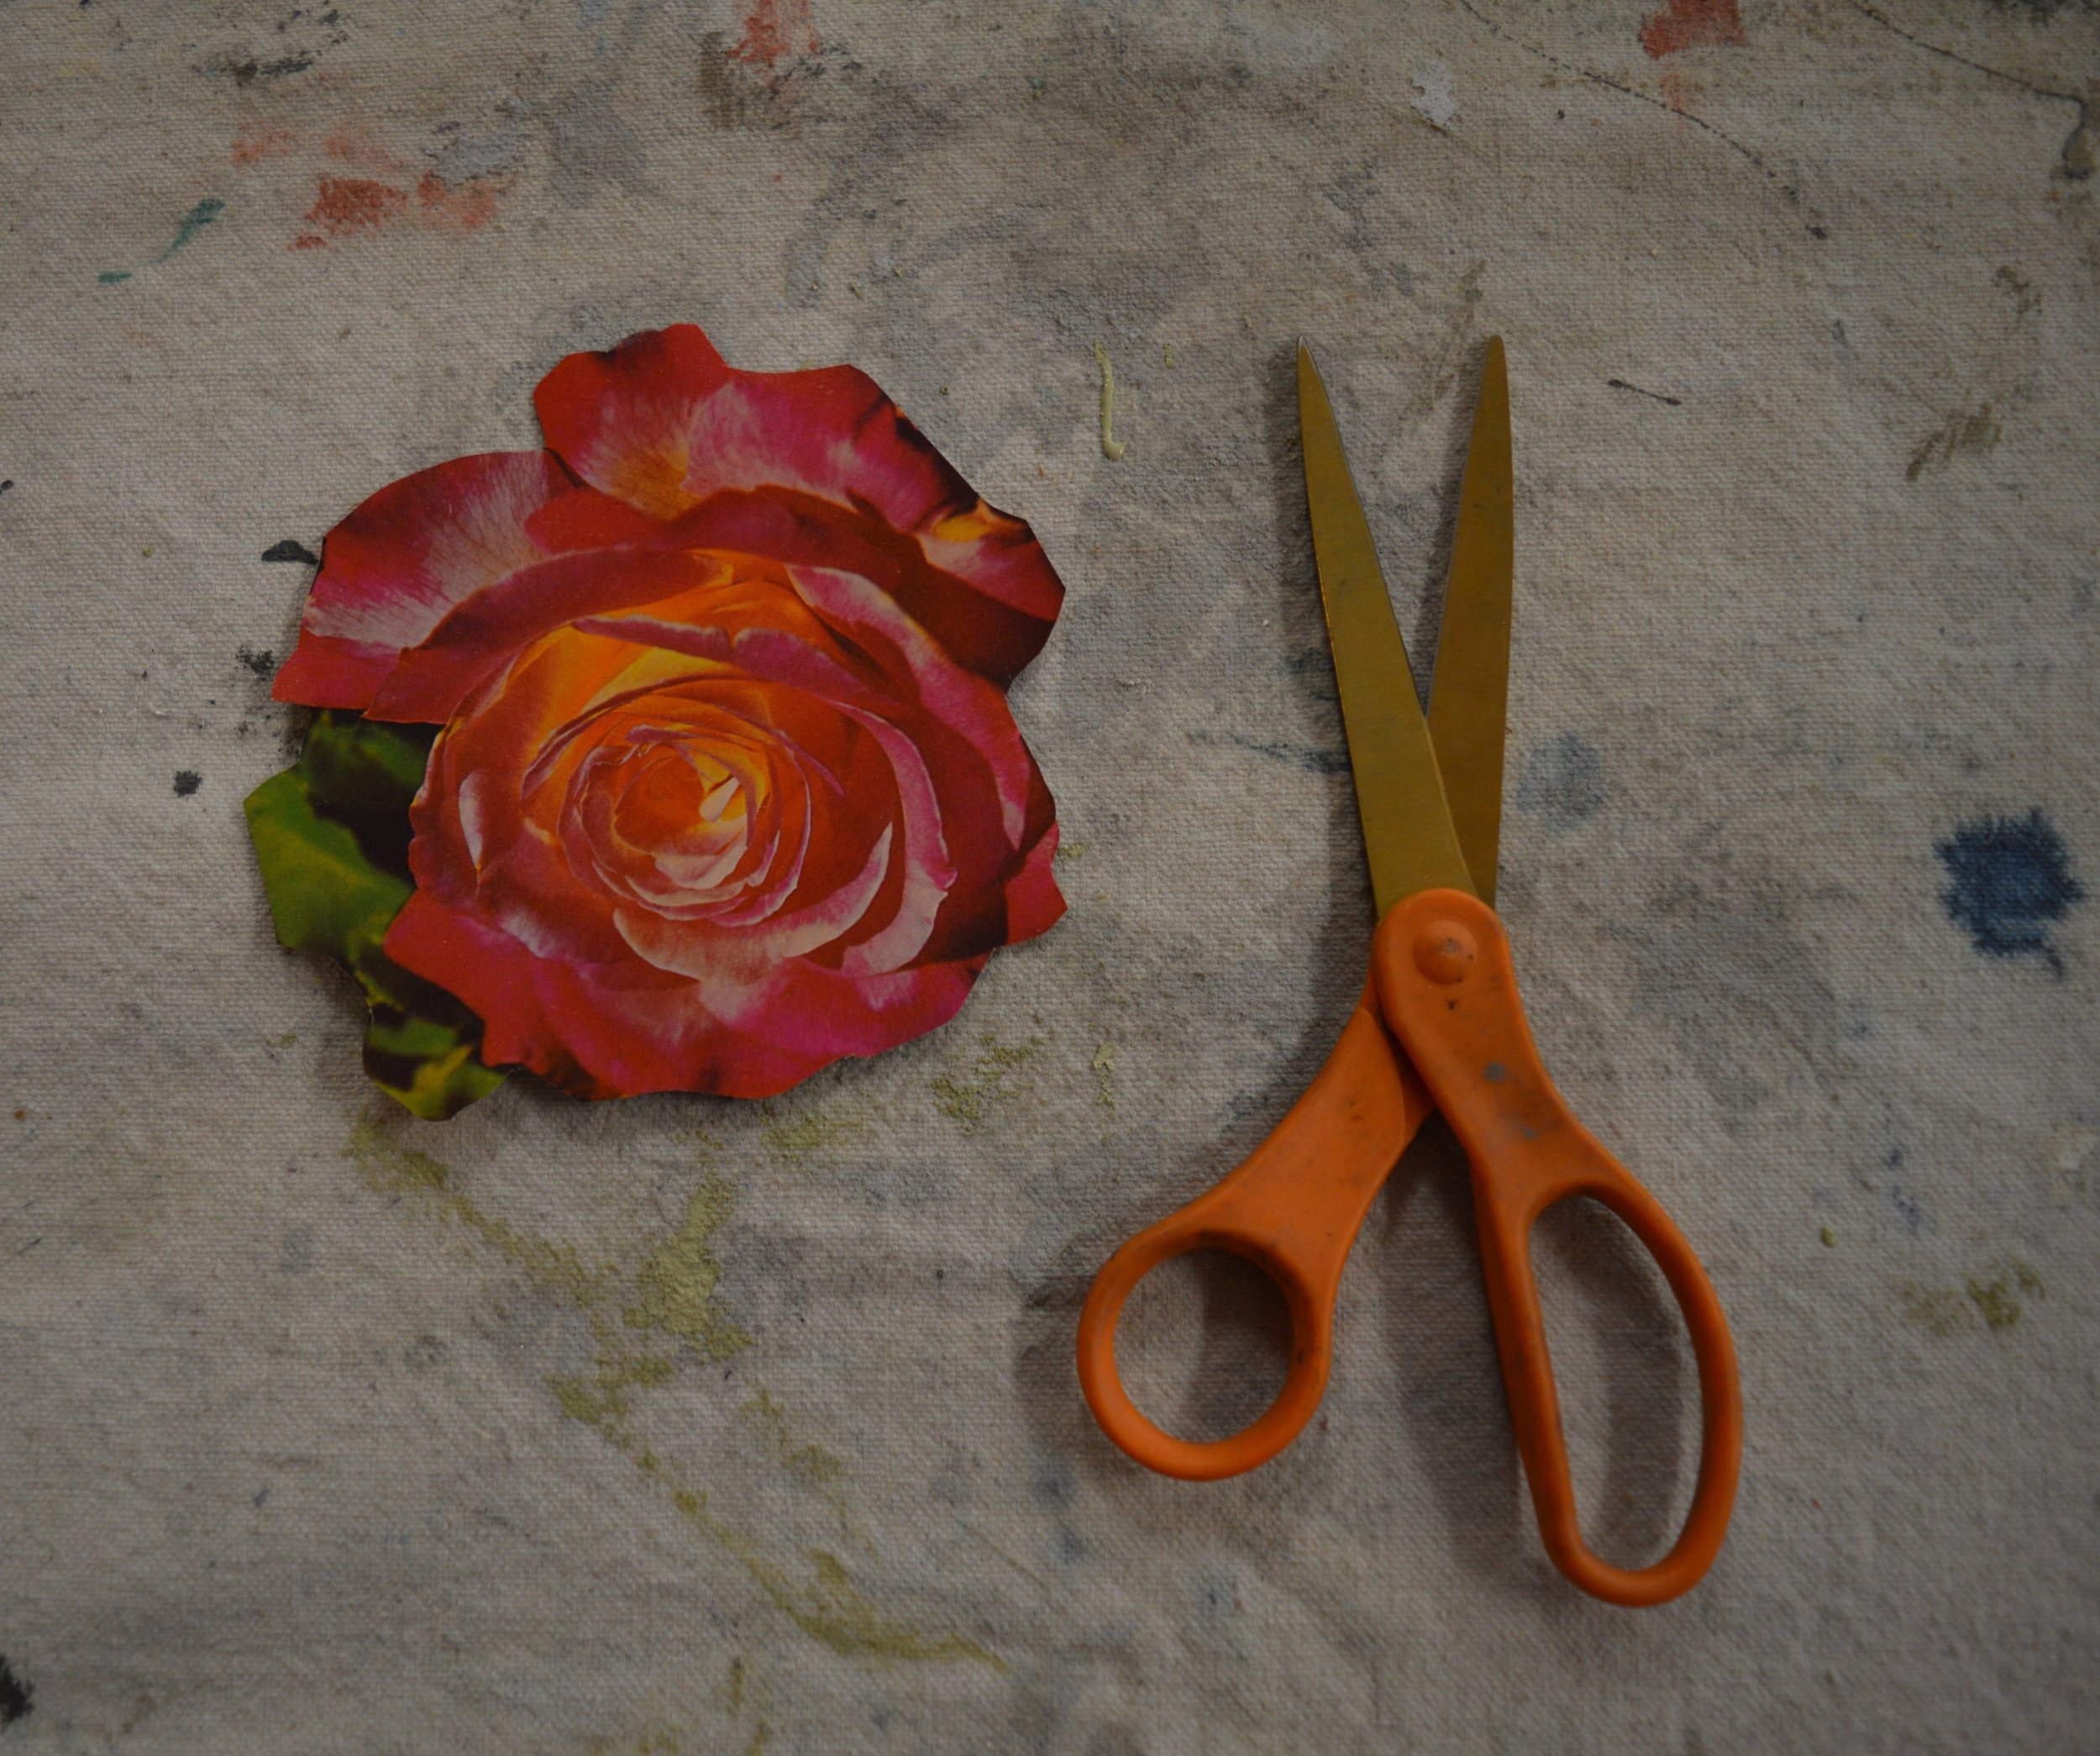
- Magazine, paper, newspaper, thin fabric, or tissue paper cutout- $0 (Almost everyone has something at home already that has a cool image on it that can be cut out!)
- Scissors- $0 (Again, almost everyone has a pair of scissors at home or a pair that can be borrowed from a friend or family member.)
- Chalk Paint® Image Medium / FKA Decoupage Varnish- $20.50 (This item is a bit of a splurge, however it lasts through many uses and does decoupage and image transfer in the best way, without smudging inks from printed images- however if it isn't friendly to your budget, you may forgo this part of the project!)
- Small Paintbrush- $0-$15 (Most individuals have a brush at home, however we have a range of brushes from $3 to $15 in the shop that would suit a small project well.) We chose our Annie Sloan Small Flat Brush
- Orchid, plant, or floral arrangement- $16 (We visited our neighbor, Freytag's Florist on West Anderson Ln. in Austin, for a mini Orchid so that Mom can continue to grow her gift! Shop local and sustainable- find your own favorite neighborhood florist!)
Here are the steps:
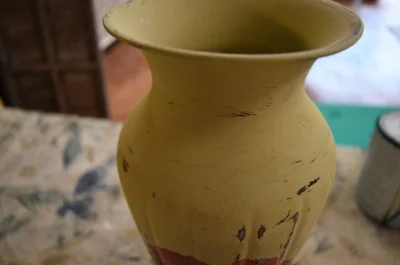
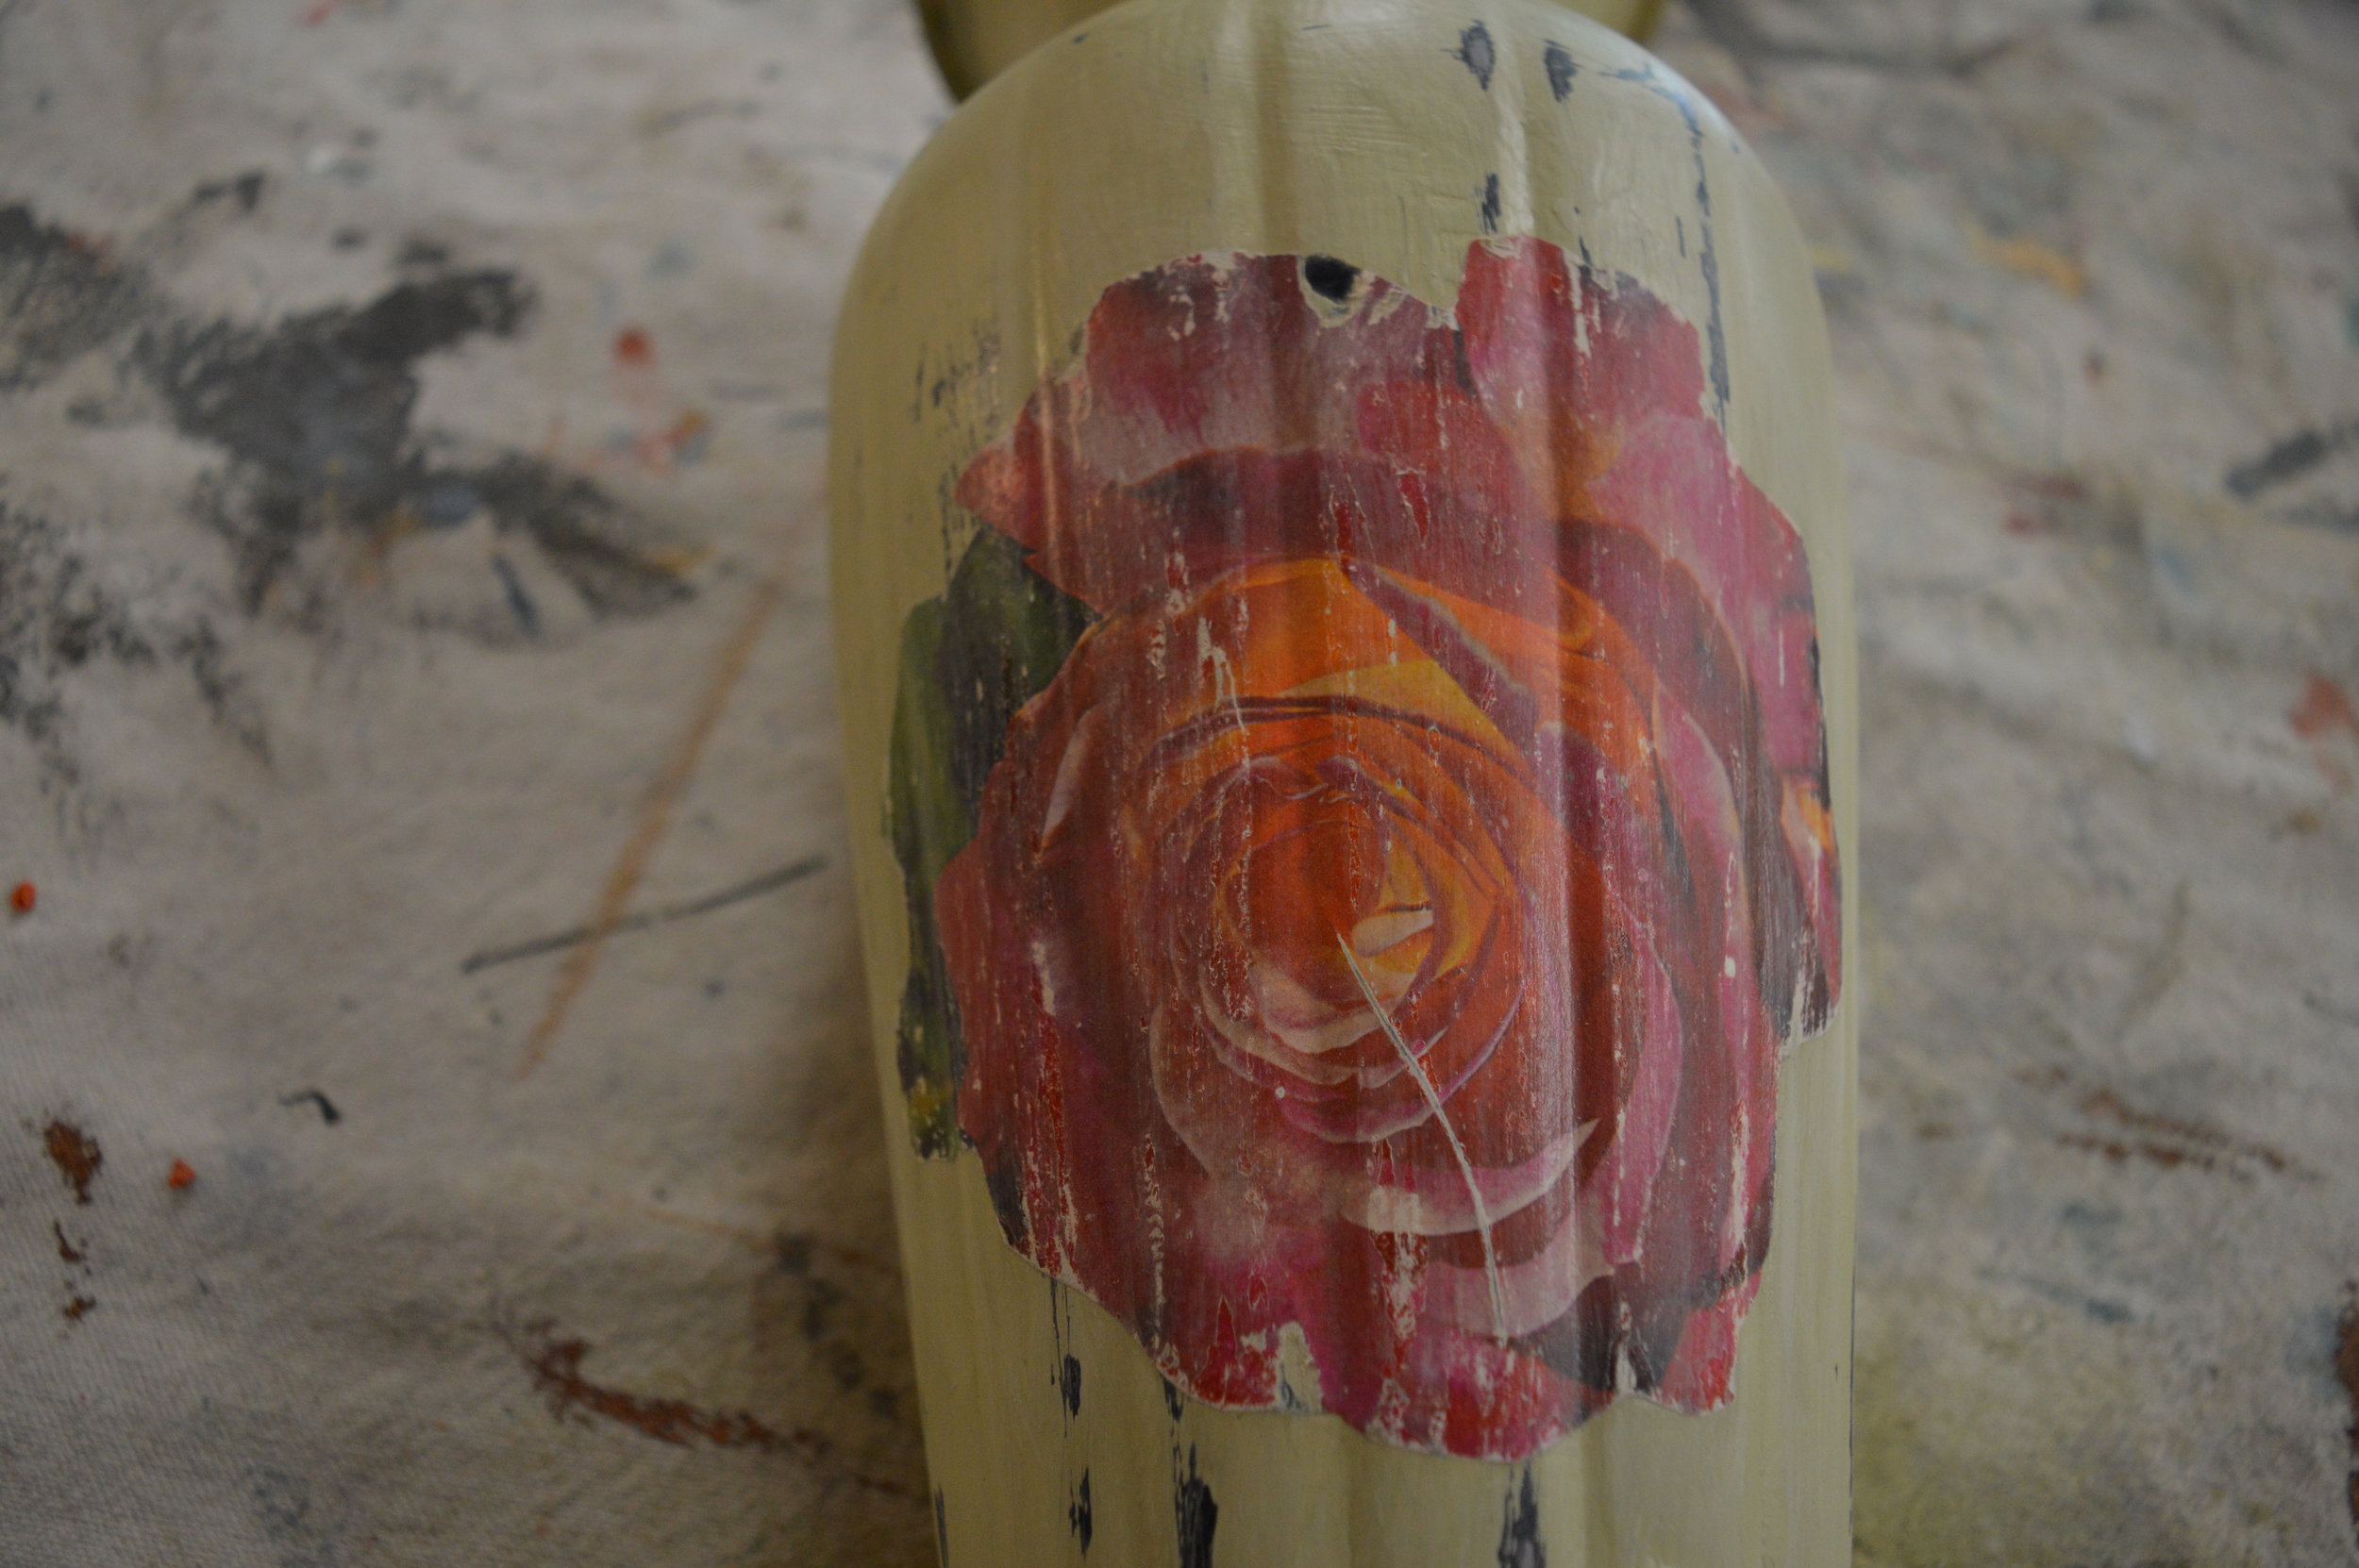
1. Apply your Chalk Paint® decorative paint color to your vase or planter surface- you may need a second coat if desired. For 'normal' surfaces, give a couple hours dry time between coats, or give 12-24 hours dry time between coats for shiny and slick metal or glass surfaces. The color we chose for our project is Versailles for its sagey-French appeal!

2. While waiting for paint to dry, cut out your image for decoupage. Try to choose something that has a generally defined outline, as opposed to something that will have tons of tiny intricate details to make it easier to cut out. We love using images from old books, magazines, newspapers, giftwrap, and even thin fabrics or tissue paper. Get crafty my friends!
3. Add a second coat of paint as needed, with the applicable dry time for your kind of surface.
4. Once dry, distress through the paint using medium grit sandpaper or a dampened scrubby sponge until you achieve a lightly aged look. Distressing looks natural over edges and raised areas.
5. Apply the Chalk Paint® Image Medium (formerly known as Decoupage Varnish) to the backside of your image, and gently press the image down onto your vase surface with one corner, and slowly press the entire image down while working out air bubbles. Apply a thin coat of your Image Medium over the cutout and let it dry. Decoupage isn't so difficult, we promise!
6. Apply 2-3 thin coats of the Image Medium total for durability. We used the Medium as a varnish over the whole vase surface as well. You may also sand the image edges down to make it feel less raised and to distress and fade the image.

7. Add your plant or flower arrangement of choice to complete the gift. We chose a lovely mini orchid from Freytag's Florist on West Anderson Ln. in Austin, so that it could be a sustainable gift that keeps growing (we added little rocks below the orchid in the vase for good drainage- always make sure to plant with proper conditions based on what you choose, and to include care instructions!). Mom can also change the planter or vase up as needed as the plant grows, and continue to repurpose the planter or vase. Remember to visit your own local florist!
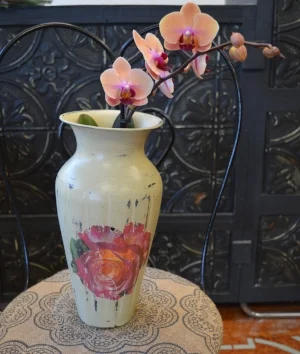
The result is something truly special. Doesn't it feel great to make a gift? This is absolutely a project that can be completed within a couple of days (even within one day depending on materials used). Share your own results with us, and if you're in or near Austin stop by our Shop & Studio at 2700 W. Anderson Ln, Ste 228 for all Chalk Paint® supplies. Otherwise find your local stockist here.
Watch our tutorial video to visualize the process!

And now for our GIVEAWAY! We are excited to announce that one lucky person can win the very same decoupage vase that we created for the tutorial. To be entered to win, please complete all steps below:

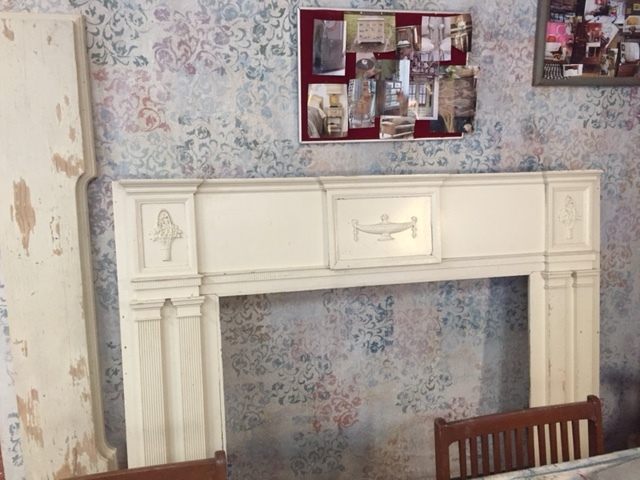
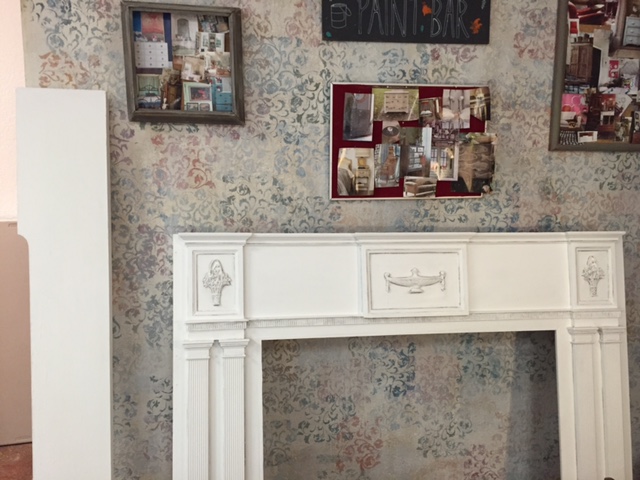
Before & After: Antique Mantle
We repainted and repaired an antique mantle, with Chalk Paint® Pure White plus waxes for a subtle yet fresh update!

When we were approached to rework this lovely antique mantle, we immediately said yes (for many reasons, mainly because we do this for a living duh!). This is something that we would only find in our vintage and antique-picking dreams we felt... and it needed some love and color updating for sure.
First we made sure to thoroughly clean it, plus sand and scrape away the peeling latex paint layers where applicable. Whenever working over a previously painted surface you must sand down chips and scrape away anything actively chipping, otherwise it can peel up your new paint layer. Next we assessed some cracking along seams of the 'shadow box' details:


This is not an uncommon encounter when working on old wooden pieces. Seams can split, and one common place to notice this is on everyday surfaces like doors, cabinetry, and window frames. We caulked these with 'painters caulk,' Big Stretch specifically. It's geared toward high flux of seams especially when painted over (make sure to check cure times and time between caulk and paint when using on your own). We trust this option too because once cured, Chalk Paint® decorative paint would adhere well.
Next we primed with our water-based, white-tinted Smart Prime because some old stains were evident to be popping through the Pure White. We think these may have been from old smoke that absorbed into the wood from long ago use. No matter how much you clean, sometimes a chemical or other substance might just need to be covered up durably! We learn to be flexible with these things...
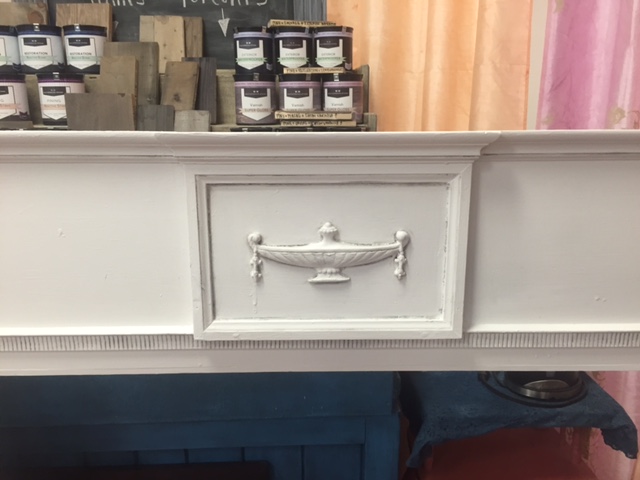
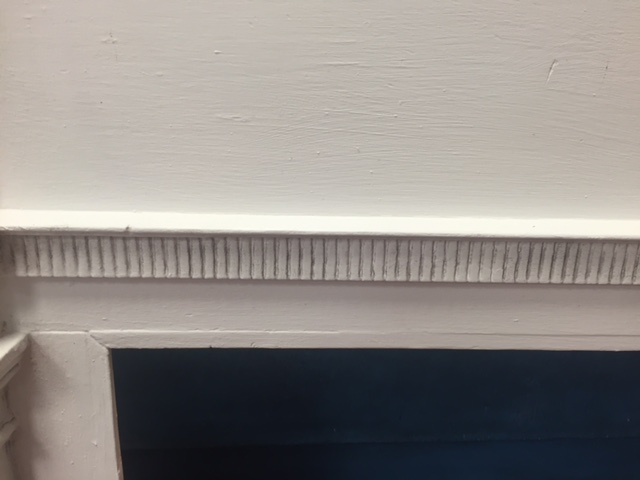
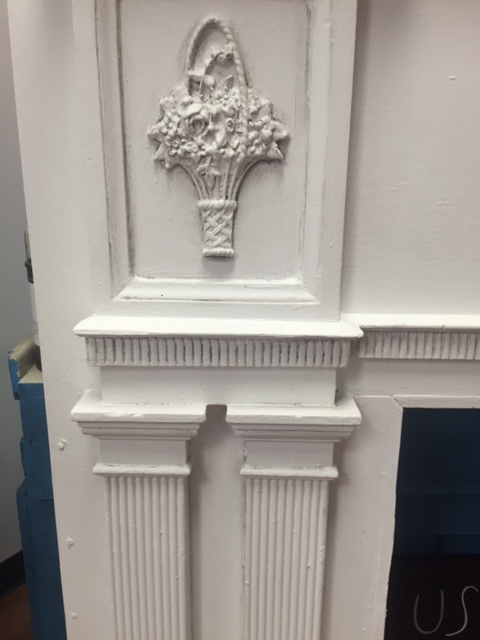
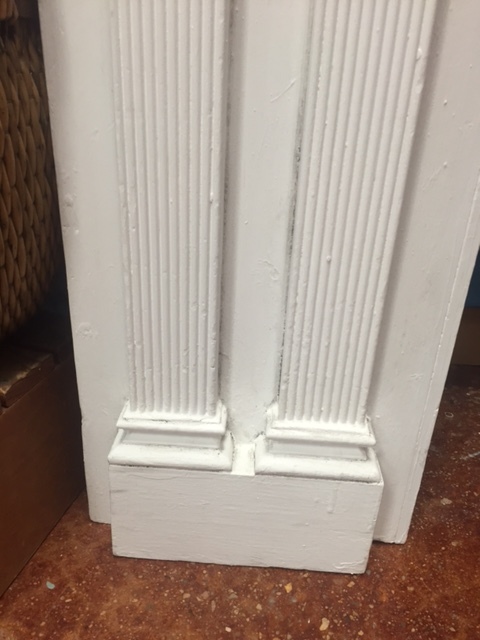
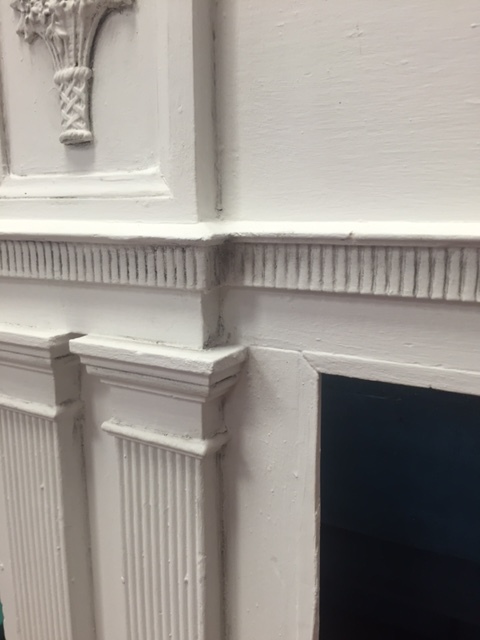

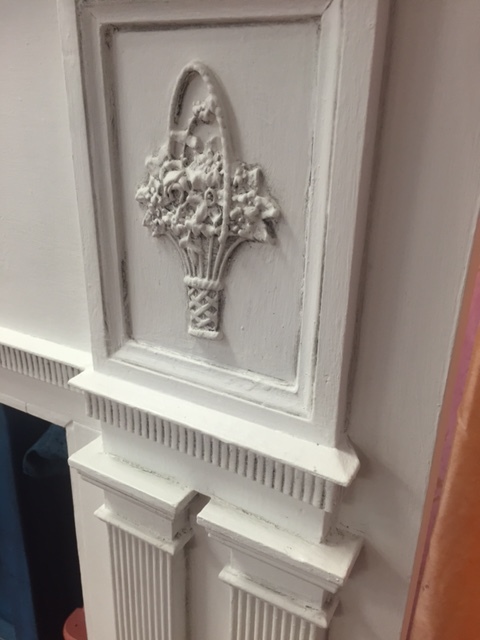
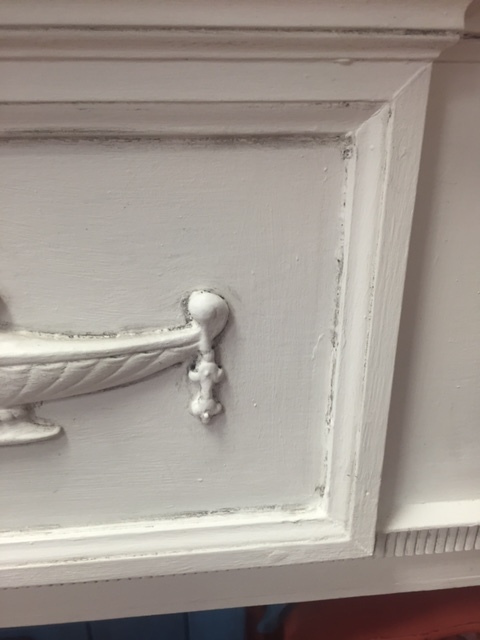
And then two coats Pure White Chalk Paint® decorative paint, plus clear wax all over, and black wax in the details with a light hand. Voila! It's not a super drastic change, however it breathed new life into this piece by freshening it up and helped the uniquely carved details stand out better. Have you painted a mantle before? How did it turn out? Feel free to share! Happy Painting xoxo